
Table of Contents:
– Background
– Look and Feel
– Reticle Options
– Comparative Optical Evaluation
– Mechanical Testing
– About that LevelPlex Digital Anti-Cant System
– Summary and Conclusion
– Your Pro and Con Breakdown:
– Testing Methodology
Background:
Sig entered the optics and opti-electronics business just a few years ago. At the time, I pretty much just thought this was another company with good name recognition looking to cash in on the name by branding some stuff OEM’d for them. Though that wouldn’t be the worst thing since lots of folks brand excellent stuff they have OEM’d and do a great job servicing their customers, it isn’t the most interesting thing for me to see the third or fourth scope from a different brand using the same optical design from the same OEM. While Sig is certainly a huge name, and most of their optics are sourced from an OEM, this wasn’t Sig’s goal. They invested a lot more in the process than a marketing team. Sig started off by hiring an optics design team away from a well known competitor and investing quite significantly both in design and manufacturing facilities. A few of their models, though not the one we will look at today, are manufactured stateside in a new state of the art facility near Portland Oregon. The size of Sig’s investment shows most dramatically in their BDX (Ballistic Data Exchange) rifle scopes and laser rangefinders. Sig has become a leader in the laser rangefinding game both through the combination of the price with the performance of their rangefinding units and, probably more importantly, though the integration of their units with both their BDX rifle scopes and sometimes also with industry leading applied ballistics software.
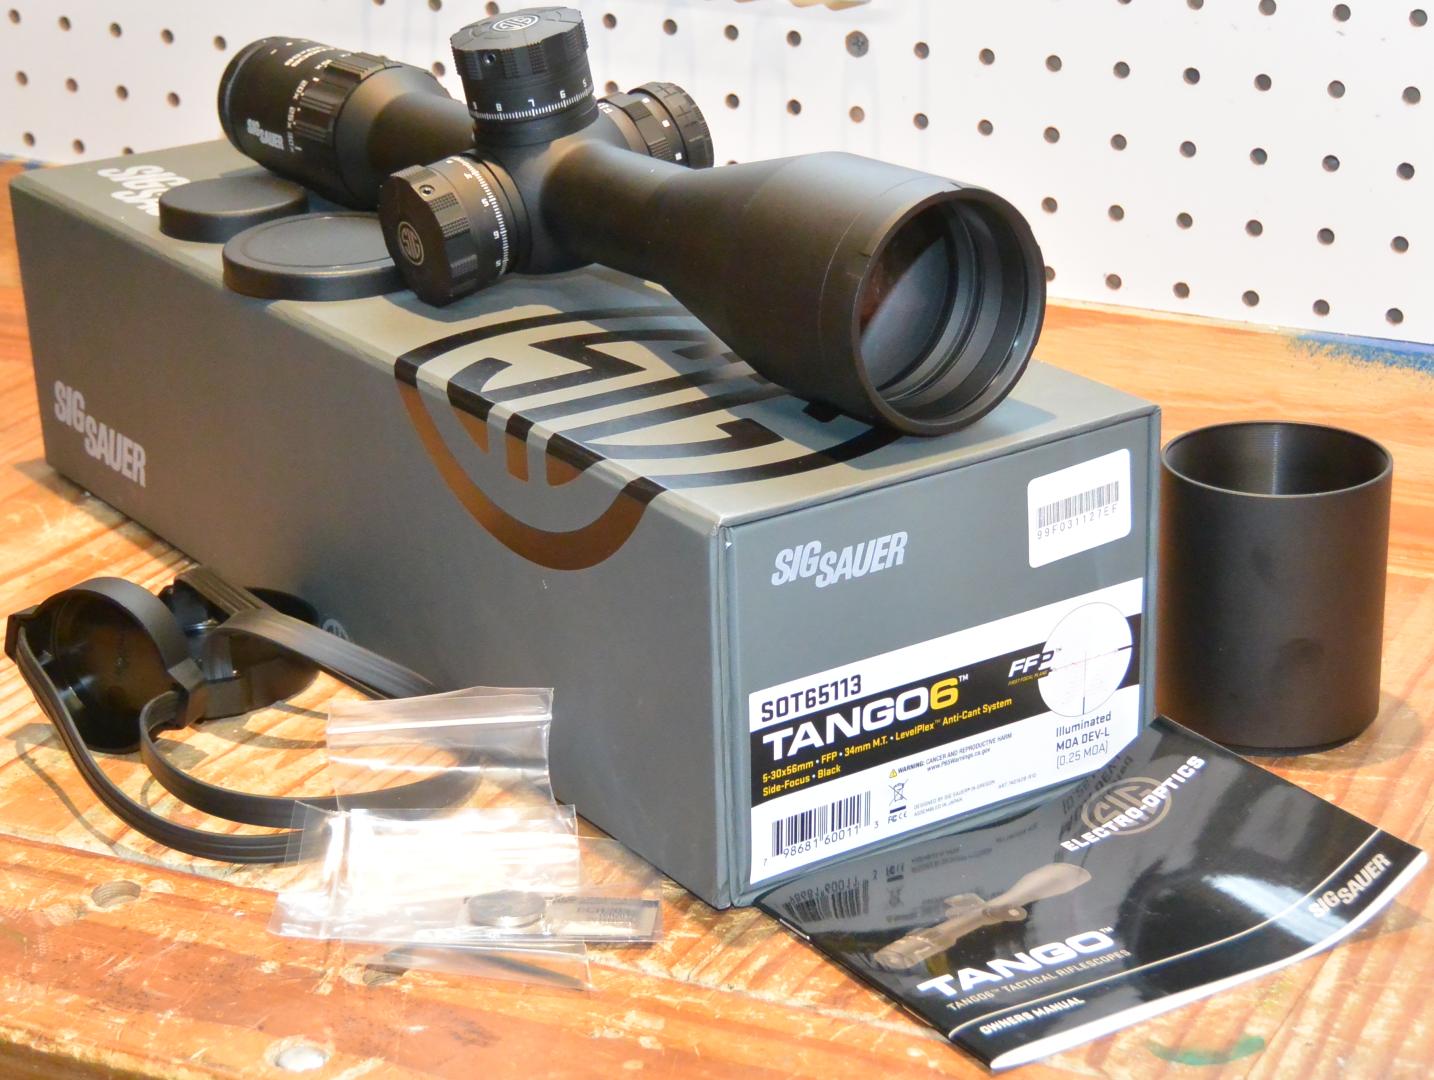
Though the Tango6 is not one of the BDX models, it still contains some unique Sig tech elements in the form of an integrated electronic level they call the LevelPlex Digital Anti-Cant System. The readout from this quite sensitive electronic level is integrated into the scope’s field of view so that it is visible to the shooter though the dominant eye without any movement or loss of focus on the target.
Look and Feel:
The look and feel of the Sig Tango6 5-30x56mm is what you would expect from the OEM I suspect Sig is using for this optic, Light Optics Japan, combined with the militaria evoking styling Sig generally prefers. The styling favors angled transitions over rounded ones and straight lines over curves. It also goes a bit extra aggressive on knurled areas and chooses particularly square fonts for the text. The Tango6 is immaculately machined and finished, quite heavy at 42oz, and short at 14.5″. The diopter on the Sig is the now ubiquitous fast focus euro style and it is quite stiff. It should not inadvertently move despite not having a locking ring. Of concern for some shooters will be that the diopter on the Tango6 does not have a lot of range. I do not wear corrective lenses as I still manage 20/20 without them, but the diopter range is limited enough I landed close to the maximum adjustment to achieve best results. The power ring and parallax move with about average force and the parallax knob integrates both the illumination control and the on/off switch for the LevelPlex Digital Anti-Cant system. To activate this system, you push the end of the parallax knob towards the scope body and discover it is actually a button. Because the nine position illumination rheostat is rather easy to turn and roughly the same size as the parallax portion of the knob, it is pretty easy to accidentally activate it when adjusting parallax. It does have an automatic deactivation feature after six minutes of rest to keep you from draining the battery in such an event, though. Illumination appears to be full scale on the standard reticles offered though on the prototype Tremor 3 that I have just the center and a dot every 2 mils down is illuminated. The test scope I have was supplied in this alternate reticle configuration because of availability of stock at the time of review. Basically, they had a few Tremor3 units left over from a batch they had made up for testing by a large volume purchaser who specced that reticle. Unusually, on this Sig the power ring markings are on the objective with the indicator for those markings being part of a mini-throw lever with fiber illumination located on the power ring. This is perhaps the most unusual element in the scope’s appearance.

The adjustments on the Sig Tango6 5-30x56mm are the lifting variety, meaning the external knob moves up and down when adjusted. The turn indicator is therefore marked on the stem of the adjustment itself and is not of the pop-up type. Despite being of this simpler type of adjustment, Sig has added both a zero stop and locking turrets to the design. They have done this in a most interesting way. Both elements are external to the scope’s gas seal and therefore are able to be disassembled by the user. In fact, setting the zero stop requires disassembly of the whole turret, during which you will see how the simple collar type zero stop and the locking torrent mechanism works. As you might imagine, setting this zero stop is a rather involved process. It requires loosening five fasteners to adjust the zero stop and keeping track of two loose parts as you set the innermost piece. It works, but it is not fast or elegant. As with most plunger or collar style zero stop systems, the user easily can choose how far below zero the turret will go or easily disable the zero stop mechanism all together. Both the elevation and windage turrets are pull-up to adjust and down to lock and both are 12 mils per revolution. There is a stop after 6 mils each way on the windage knob and my initial thought was this was probably removable like the zero stop on the elevation but it is not. In fact, it appears there are only 6 mils each way from optical center on the windage period and regardless of where the shooter’s zero ends up being. So, if you have a crooked barrel you might end up with a lot less than 6 in one direction. I’m not sure why this was done as the windage knob could easily have been set up similarly to the elevation knob, allowing you both to remove the stop if desired or reposition the stop- giving you a full ~5.5mils each way regardless of the relationship between your zero and the scope’s optical center. Perhaps the limited travel here has something to do with the space necessary internally for the LevelPlex hardware. Both the windage and elevation knobs have the same feel. Adjustment force is pretty low and the clicks are soft and mushy. Because of the relatively low force, it is easy to count the clicks and not have any get skipped over causing a miscount. This softer force also keeps the aggressive, flesh rending, knurling Sig chooses from causing an issue. For whatever reason, Sig’s 12 mil per turn elevation knob is not marked with a second turn set of numbers. While this is common on 10mil / turn knobs and not too problematic given our base 10 numbers system, it leaves you some math to do with 12 mil / turn knobs. I found myself wishing for a second line, especially when doing long range .22lr where you are often over 12 mils. The parallax on the Tango6 does go down to ~25yds so it is otherwise suited to long range .22lr use.
Reticle Options:
At the time of this writing, the Sig Tango6 5-30x56mm is available in two MOA and two Mil reticles. This is unsurprisingly divided into a Christmas tree and simple ladder version for both Mil and MOA. The simple ladder reticles are denoted ‘milling reticle’, and the Christmas tree versions ‘Dev-L’. In all cases, illumination is full scale lighting all of the reticle except for the thickest outer posts. Reticle diagrams were a little difficult to come by, so I will link a PDF of all Sig reticle diagrams here for those interested. There is a little more mixing of .5mil divisions and .2mil divisions in the Dev-L MRAD version than I would like and the lines look quite thick in the MRAD milling version, but I haven’t used either so these are just my uninformed musings. In any case, Sig is offering a pretty typical selection of the types of reticles popular on the market today in the Tango6 5-30×56, so most users will find roughly what they are looking for.
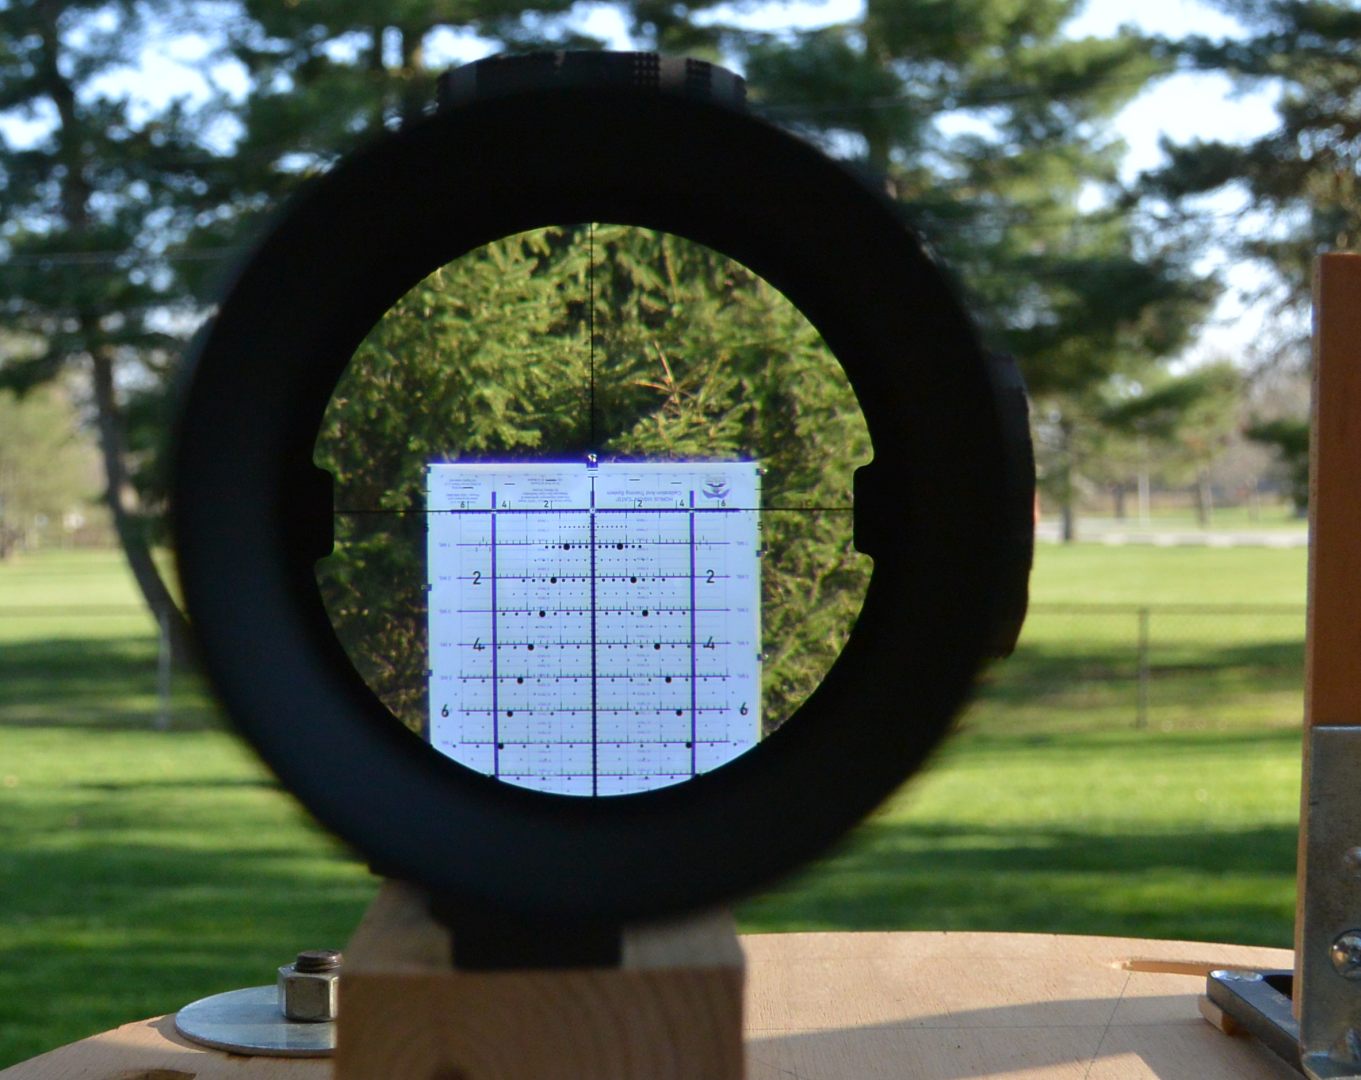
In my test scope, the reticle size was correct and there was no measurable cant.
Comparative Optical Evaluation:
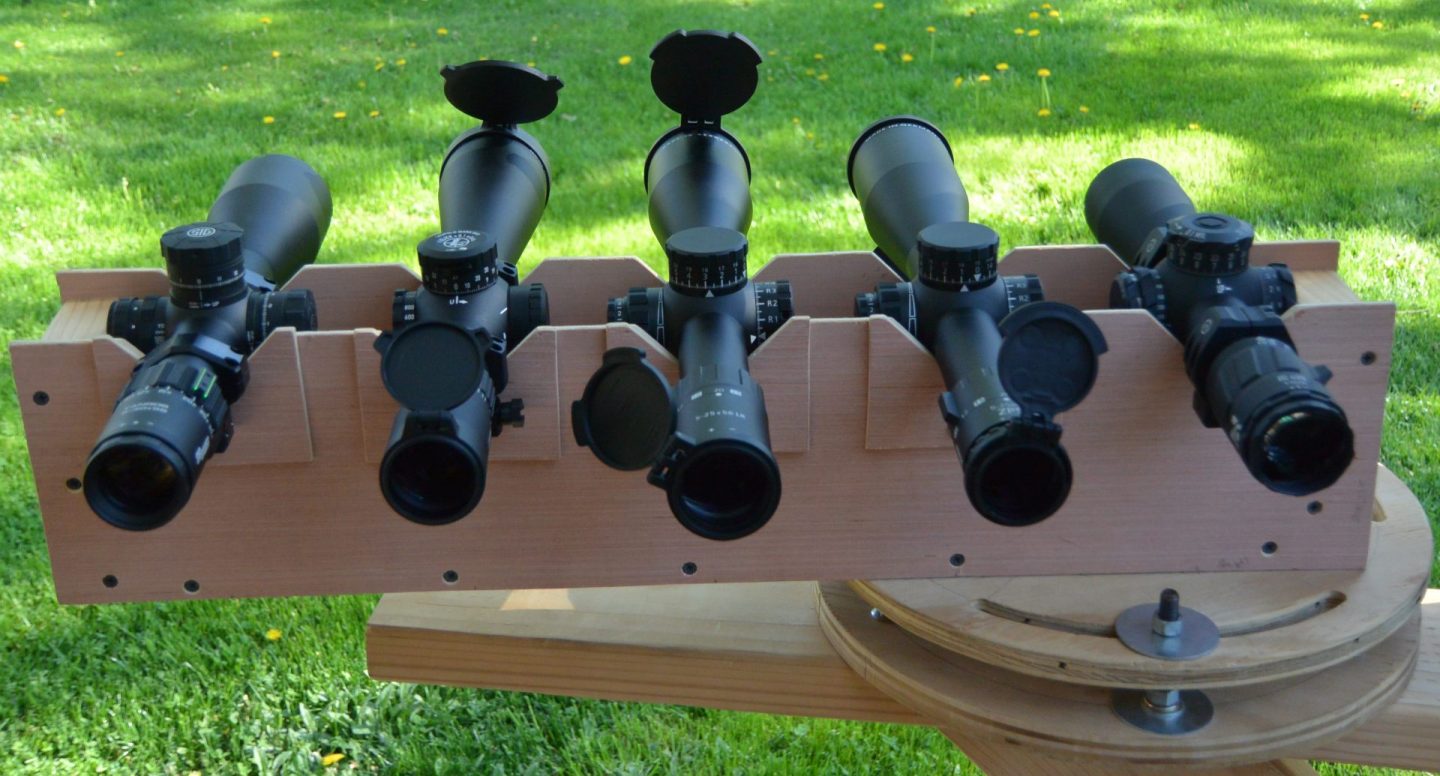
For optical comparison with the Sig Tango6 5-30×56, I first have two other scopes in this year’s series of ~$2k long range scope reviews, the Minox 5-25×56 LR and Leupold Mark 5HD 5-25×56. As per usual, I also pulled an example of both a significantly more costly and less costly optic. For these I used an Athlon Midas TAC 5-25x56mm, one of the better performing from my series of sub $1k optics, and the much more costly Zero Compromise Optics ZC420 reviewed last year. Later this year I expect to be reviewing a Bushnell Elite Tactical of similar cost (and probably also from the same OEM), so there may be an update to this section reflecting that comparison at a later date.
As should be expected, but is not always the case, the optical performance of the scopes compared during this review did break down into the respective price brackets. All of the ~$2k scopes generally outperformed the ~$1k scope and the ~$3k scope outperformed all the ~$2k scopes. Within the $2k scope bracket, however, the Sig generally underperformed its rivals.
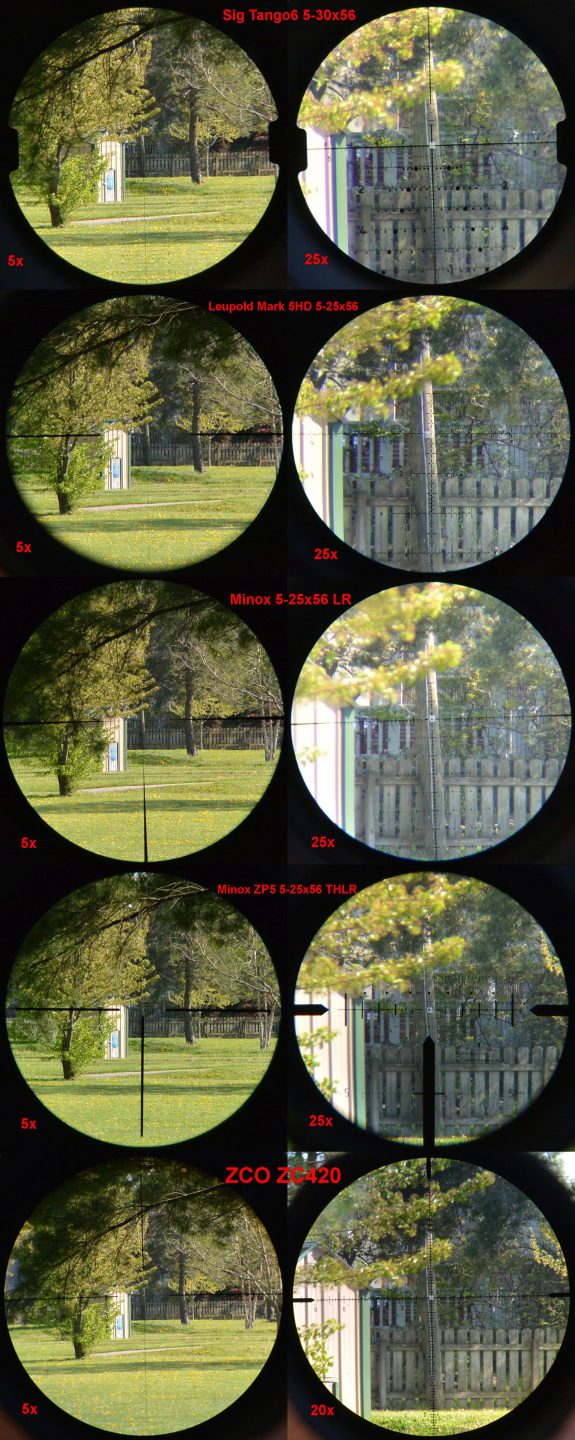
Relative to those rivals, the Sig Tango6 5-30×56 had the smallest field of view at a given magnification, the lowest resolution, most chromatic aberration, and least accurate color rendition. It fared better in low light performance, where it was middle of the pack. It was also middle of the pack in edge-to-edge clarity and contrast. In these cases it bettered the Leupold Mark 5, whereas in depth of field, and stray light handling it was better than the Minox LR, though debatably so in the case of stray light which is always hardest to measure. Of all these metrics, I felt like chromatic aberration was probably the most dramatic. In many cases, such as resolution and eyebox, the three scopes weren’t very far from each other and all performed quite well. The Sig had quite noticeable CA, however, while the other two had almost none. Being a 6x erector ratio scope, the Sig had the advantage relative to both its price point rivals of a higher maximum magnification of 30x, whereas the other two topped out at 25x and sported only 5x erector ratios.
Mechanical Testing:
Because of the pull up to unlock / push down to lock nature of both the elevation and windage knobs, the first thing I checked for was slop in the spline necessary for this feature. This has been an issue on other designs and can result in being as much as a full .1 mil difference in reticle position on the target at the same position on the adjustment knob, depending on whether the shooter adjusted up to the number or down to it. There was no measurable slop in the Sig Tango6.
Most scopes have some deviation from perfect adjustment magnitude, though they are doing far better now than just a few years ago. This adjustment magnitude error will vary from example to example within the same model of scope. This is because it is not a product of design errors but rather variances introduced within manufacturing and, particularly, the assembly. Thus, the performance of my test samples is a piece of information with only limited value due to representing only one example. Often, we measure adjustment magnitude error as a percentage such that a scope whose reticle moves 10.1 mils when adjusted 10.0 mils tracks at 101% and one who’s reticle moves 9.9 mils when 10.0 is dialed tracks at 99%. Frank has helpfully compiled a list of adjustment deviation of all scopes he has tested in class that can give you an idea of how often, and by how much, adjustment magnitude deviates from ideal.
When adjusting up from zero, the Sig Tango6 5-30×56 I tested read 10.1 mil on target when adjusted 10.0 mils on the knob and 12.1 mil on target at the maximum range of the adjustment knob of 12.0 mils. This equates to 101% on Frank’s scale and represents a 1% deviation from ideal. Adjusting down from zero (this is easy to do on the Sig as the Zero stop is removable), the Tango6 read 10.15 mils on the target at 10.0 mils on the turret and adjusted to 11.0 mils on the target and 10.9 on the turret.
As mentioned earlier, the windage adjustment on the Sig Tango6 5-30×56 is unusual: you can reset the zero marking on this knob but you cannot reset the actual stop. As such, the windage will only ever adjust about 6 mils each way from optical zero, for a total windage adjustment of roughly 12 mils and not the 23.2 advertised. The reason for this may be that a limitation is being used to prevent the erector from impacting the side of the main tube, resulting in unexpected tracking behavior when the elevation adjustment is near max, or it may be to fit some LevelPlex hardware in there. I suspect the limitation on tracking behavior grounds because with the elevation at the maximum 12 mils up from center, the erector on my example impacts the inside of the main tube at 4 mils right windage. You will not feel this, but from that point to the maximum 6 mils right windage, the elevation will move in concert with the windage as the erector is now contacting the tube side instead of the elevation screw. What this means is that the shooter who thinks he is dialing wind will also be having his elevation move down without him knowing it. Since this did not occur when going left to the 6 mil limit of travel, I expect that the windage has been intentionally limited to such a small range to try to prevent the issue and that my example was just a little off in the position of the block.
As mentioned earlier, the reticle size was correct in the Sig Tango6 and there was no observable cant in the reticle. I also did not observe point of aim shift with power or parallax adjustment.
About that LevelPlex Digital Anti-Cant System It is likely that the reason you are reading this review of the Sig Tango6 5-30×56 is to determine whether Sig’s digital level system works or if it is just a gimmick. Many shooters, myself included, find levels to be of great value when shooting long range. The ability people have to maintain level crosshairs without the aid of a level seems to vary greatly from person to person. Perhaps due to my significant seasonal allergies or perhaps because I am not an every week shooter, I don’t do so well without the aid of one. This is true even when I’m not dealing with challenging shooting positions or slanted targets on strangely sloping terrain. Of course, on shots with small amounts of drop this is not a big deal as a small amount of cant is not adding very much error because there isn’t much elevation adjustment dialed to be multiplied by that cant. However, when you start talking about 10mils or so in elevation, it doesn’t take much to start putting you tenths of a mil left or right of where you think you are due to cant. For this reason, I have levels on most of my rifles most of the time. The difficulty with this is that the shooter can lose focus when shifting attention to the level or, worse, actually break shooting position to check the level. “Level lean” is a term Frank coined for the tendency, often noticed in class, for students’ bodies to follow their eyes left to check the level. This shifts their natural point of aim and when they settle back to looking though the scope, the natural position they settle into is canted. Having the level built into the scope would not only eliminate this tendency, but would also be faster and remove the mistake prone process of mounting a level and truing it to the scope reticle.
Keeping these possibilities in mind, I was quite interested in testing the Tango6. In fact, the LevelPlex was the primary reason I chose to include the Sig as one of my scopes to be reviewed this year. I figured it would probably be either dramatically useful or a total disappointment, with little chance of landing in between. Either way, it would be interesting to write and read about.
Turns out the LevelPlex is no gimmick. It works quite well and, at least on my example, it is properly in alignment with the reticle and adjustments. In fact, in the process of testing it, I was quite surprised when it revealed that the parking lot lamp posts behind my house are well out of plumb. Fortunately, my Stabila level is not and is furthermore quite sufficiently sensitive to properly level out my test target for the purposes of assessing the LevelPlex function.
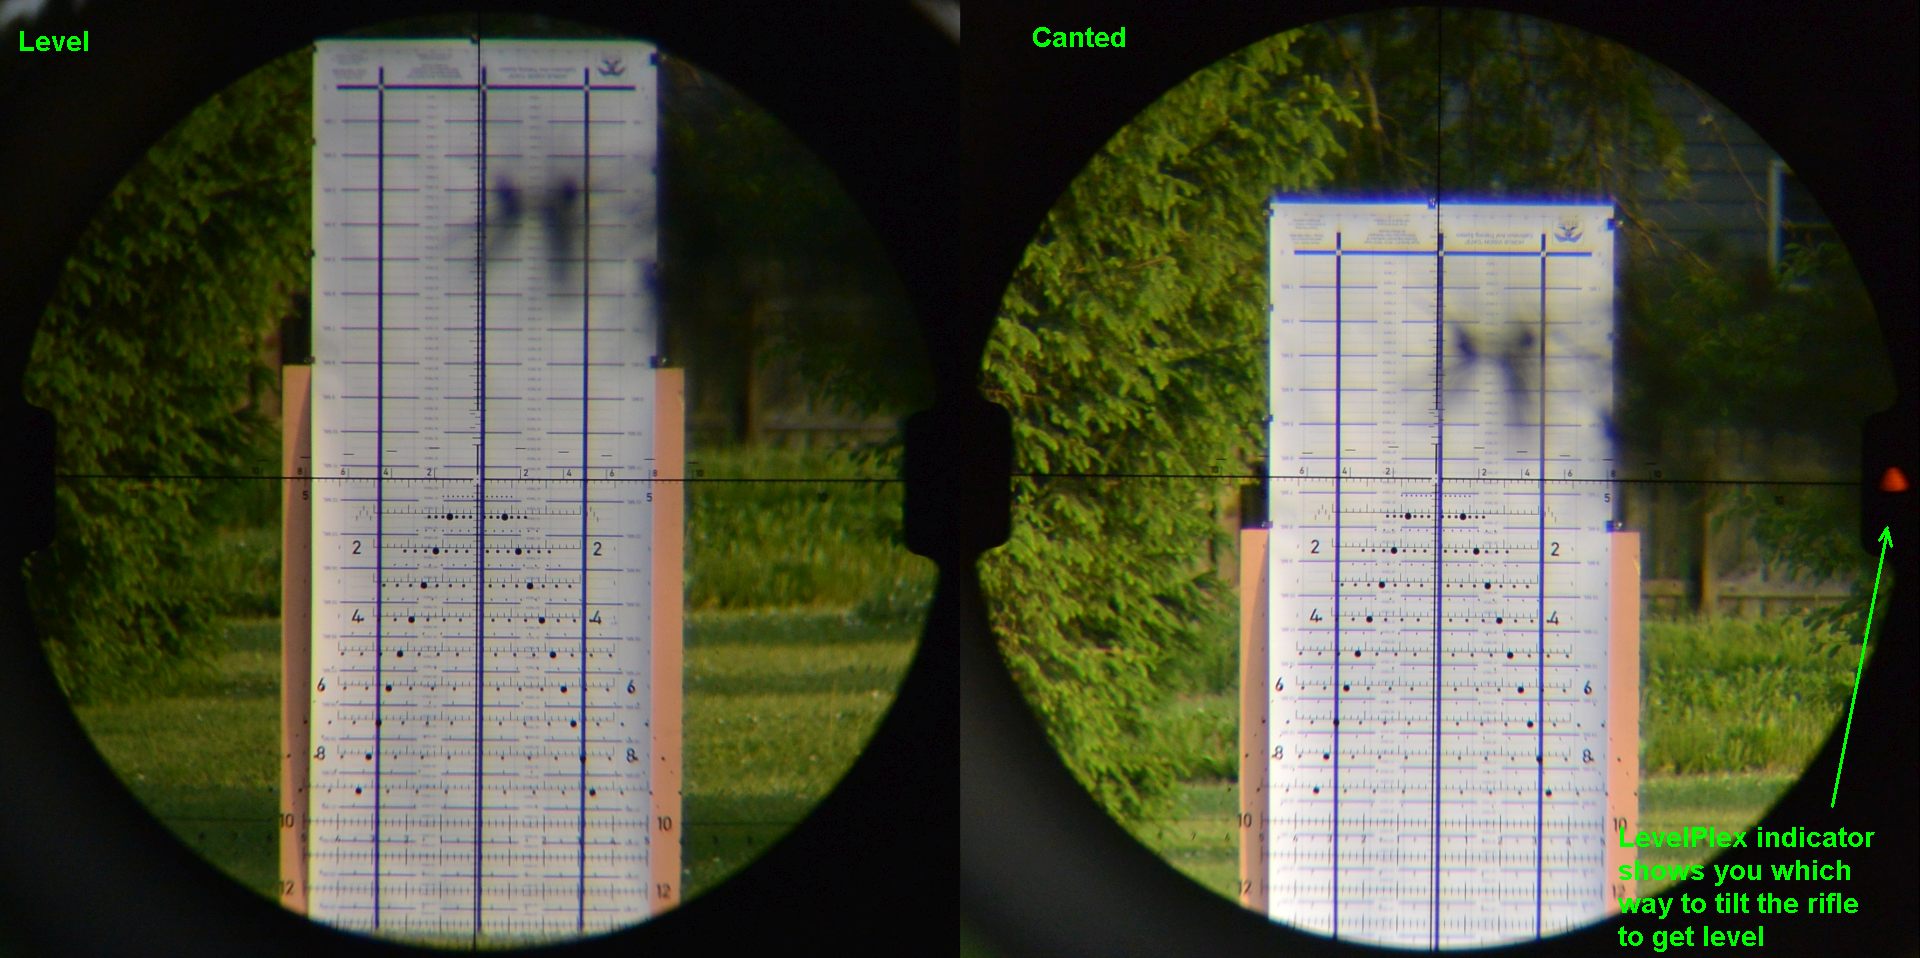
Being level is, of course, only the bare minimum for LevelPlex to be a useful feature. It also has to have the correct degree of sensitivity to be level enough to correct problematic cant, but not so sensitive that you can’t hold the rifle that straight and it ends up just driving you nuts. It also needs to be quick enough in reacting that you aren’t dealing with the lag it seems digital feedback systems sometimes have. Sig’s LevelPlex system has two settings for sensitivity to help you find a sensitivity sweet spot for your particular shooting situation. These settings are .5 degrees and 1.0 degrees. I found both settings useful, though unsurprisingly, I mostly prefer the more sensitive. I also found the reaction time of the level to changes in its position plenty quick.
In practice, the LevelPlex is a big win. I have no complaints. It absolutely kept me level, helped me keep focus on the target instead of dividing my focus, and was easy to use. LevelPlex is a definite improvement over using a separate unit.
Summary and Conclusion:
The price range of around $2k is probably the most popular both for SnipersHide users and for PRS style competitors. Consequently, there are a great number of competing scopes at or around this price point varying significantly in feature sets and optical performance. Given the high proportion of scopes at this price point with a good history of reliability and strong warranty support, feature sets and optical performance will likely be the deciding factors for most purchasers.
In optical testing, I found the Sig to be generally behind its similarly priced competitors though still in front of the highest performing scopes from lower cost brackets. It is also a bit behind most of the other ~$2k scopes on the market when it comes to basic specifications such as weight and adjustment travel, as well as on features such as a revolution indicator, turret markings for the second revolution, and ease of setting zero stop.
Mechanically, the example I tested had 1% deviation on adjustment magnitude, but all other tests (such as reticle cant, LevelPlex cant, reticle size, and shift with power or parallax) were perfect. It was possible to peg the erector to the inside of the tube body and get some unpredictable adjustment behavior from that, but only at the very edge of the elevation and windage windows. The Sig displayed no noticeable spline slop from the locking turret feature. Overall, based on my testing, the SnipersHide scope tracking database, and the history of the OEM I believe used, I have a high degree of confidence both in the QC of the Sig Tango6 5-30×56 and in its long term reliability.
The Cliff’s Notes (or as my wife likes to call them, Jim’s Notes) on the Sig Tango6 5-30×56 relative to competitors in its price range are that you give up a little on most of its features as well as its optical performance, but get the substantial benefit of excellent LevelPlex Anti-Cant system in return. Sig is making its name in the optics industry with leading integration of electronics with optics, and the Tango6 is a good example this.
Your Pro and Con Breakdown:
Pros:
– Highly functional LevelPlex Anti-Cant system.
– Locking turrets with zero stop
– Illumination
– Short length
– OEM and / or brand have a good reputation for QC, Durability, and Warranty
– Comes with sunshade though no flip caps
Cons:
– Generally behind its price peers in optical performance
– Less elevation travel and dramatically less windage travel than peers
– 42oz is heavy
– Elevation turret is slow and complex to change zero stop on and does not have markings for numbers on the second turn despite a 12mil / turn turret requiring math on the second turn

