

LDI DBAL-D2: Initial Review, 01-21-12
SPECS:
Dimensions: 3.85”(L) x 3.37”(W) x 1.59”(H)
Weight: 12.5 oz.
Housing: 6061 Aircraft-Grade Aluminum, T6 Mil-Spec Hard Anodized
Power: One (1) CR123A 3-Volt Battery
Battery Life: 1 Hour on HIGH Power
Waterproof: Submerged 20 Meters
Warranty: 1 year
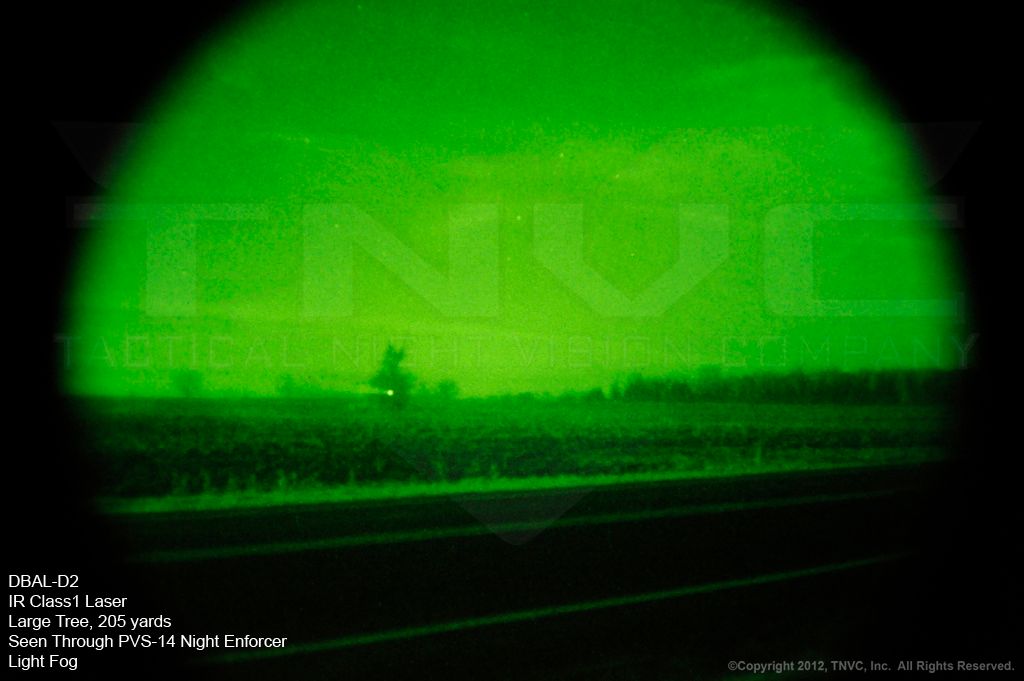
IR LASER:
Class: Class1 Eye-Safe
Output: 0.7mW
Divergence: 0.3 mrad
Wavelength: 850nm
Range: Up to 250 yards
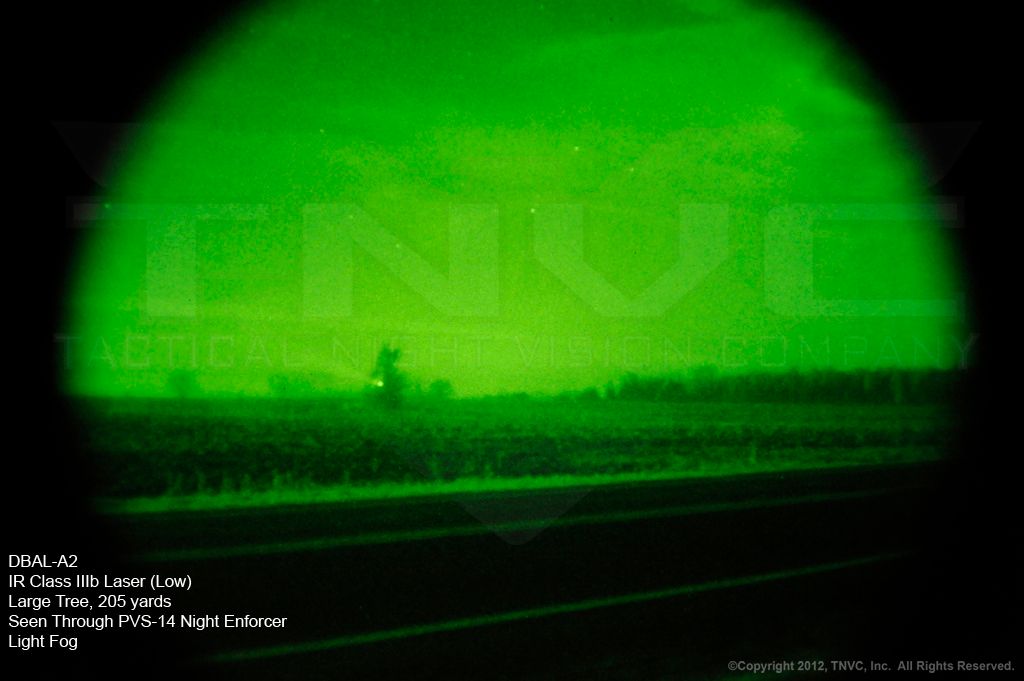
VISIBLE LASER:
Class: IIIa
Output (High/Low): <5mW/ <1mW (Red or Green)
Divergence: 0.3 mrad (Red), 0.5 mrad (Green)
Wavelength: 635nm (Red), 532nm (Green)
Range (Day/Night): 10m/ 500m (Red), 30m/ 1,500m (Green)
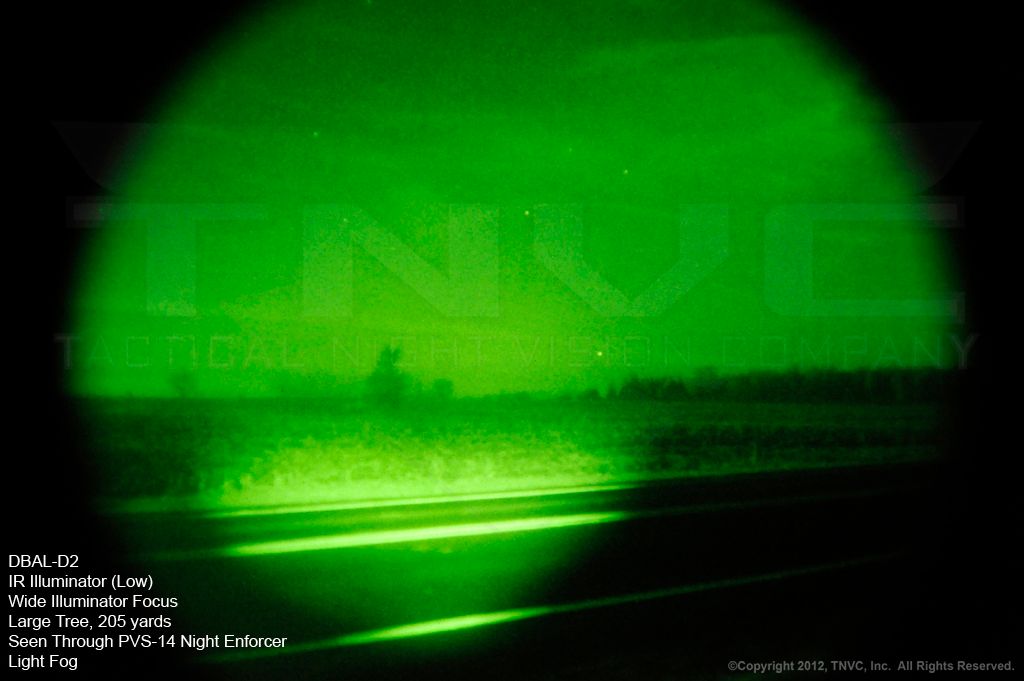
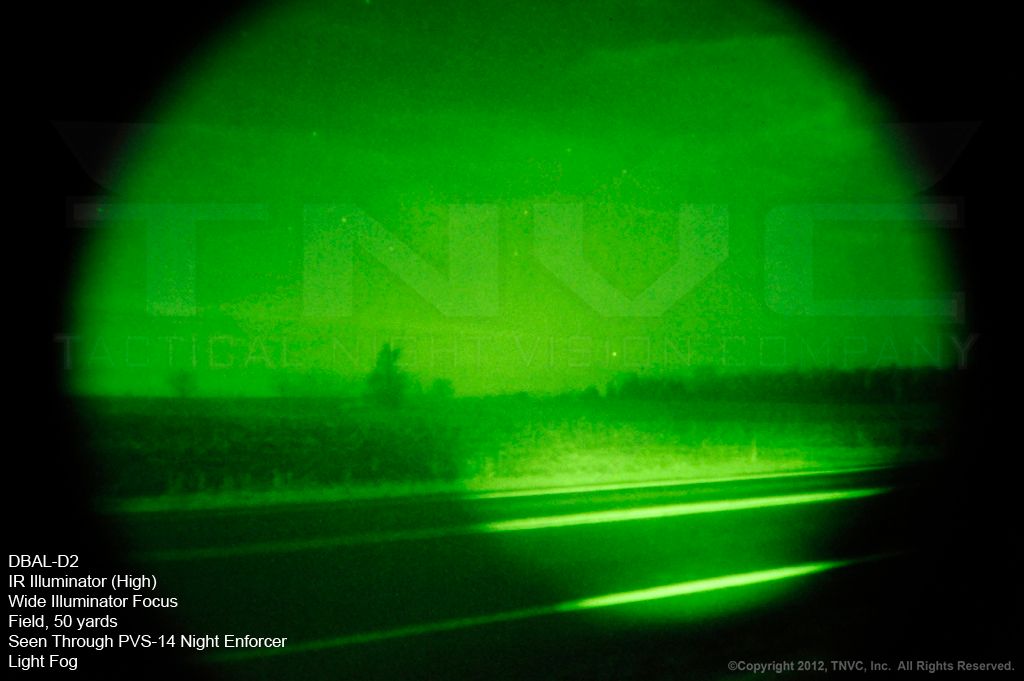
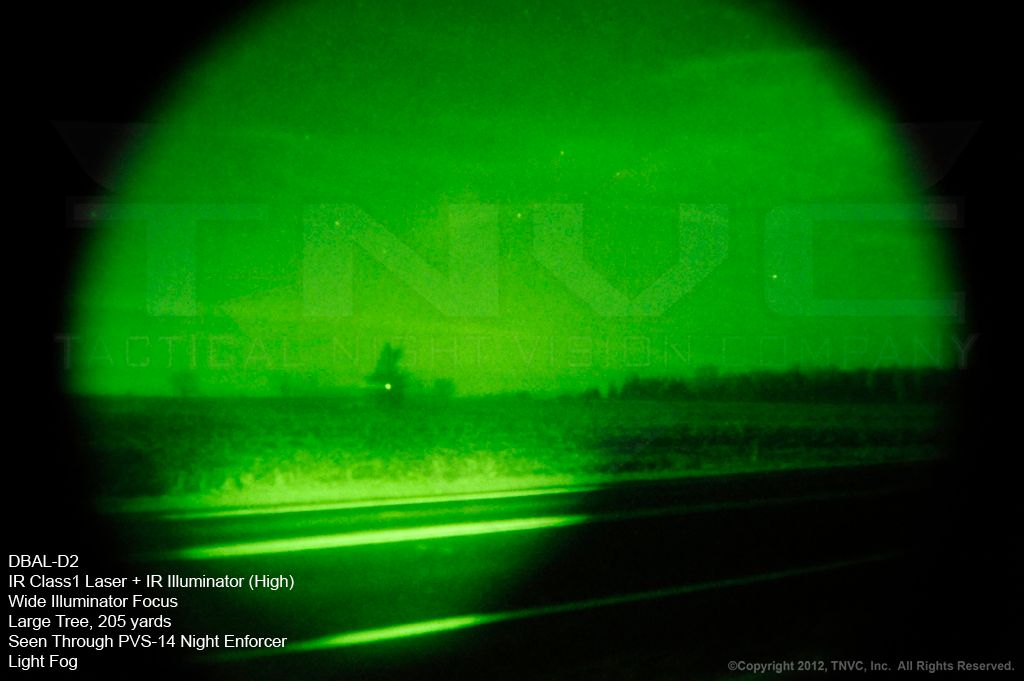
IR ILLUMINATOR:
Class: Class1 Eye-Safe
Output (High/Low): <600mW/ <300mW
Divergence: 2° to 30°
Wavelength: 850nm
Range: Up to 800 yards
INCLUDES:
DBAL-D2 Multi-Function Laser
LDI Quick-Detach H2 Throw Lever Mount
One (1) CR123A Battery
7” Remote Cable Pressure Pad Switch
Operator’s Manual
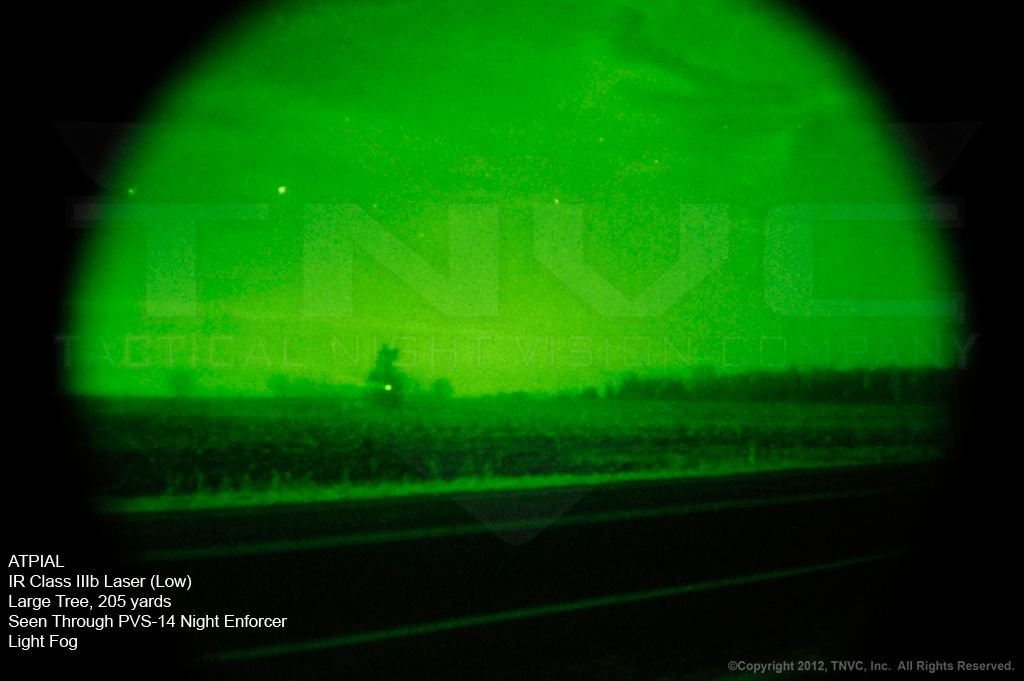
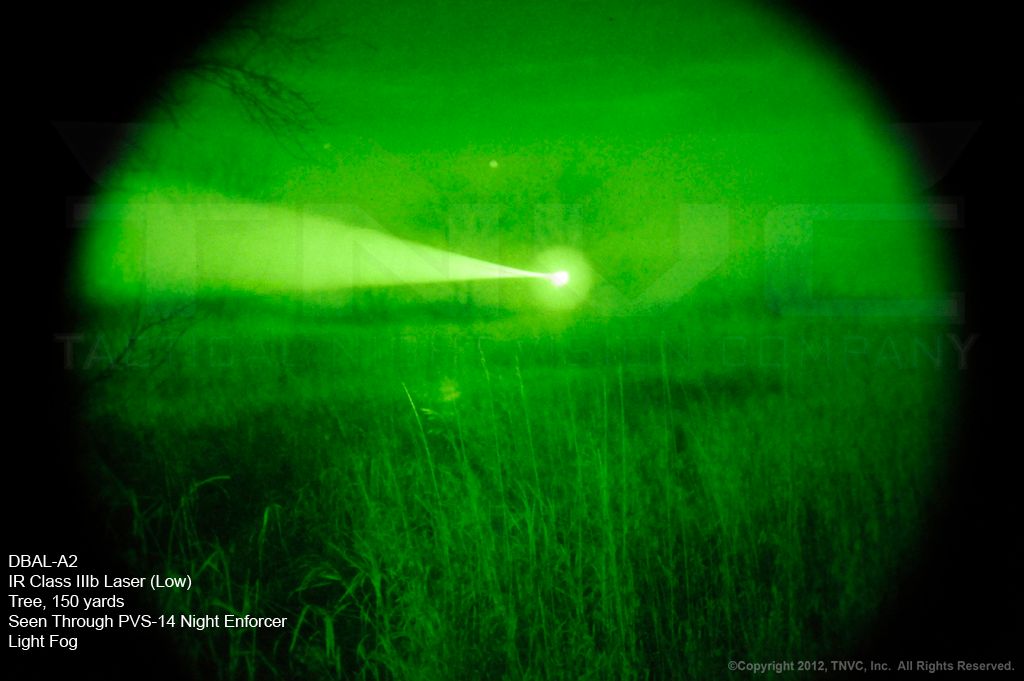
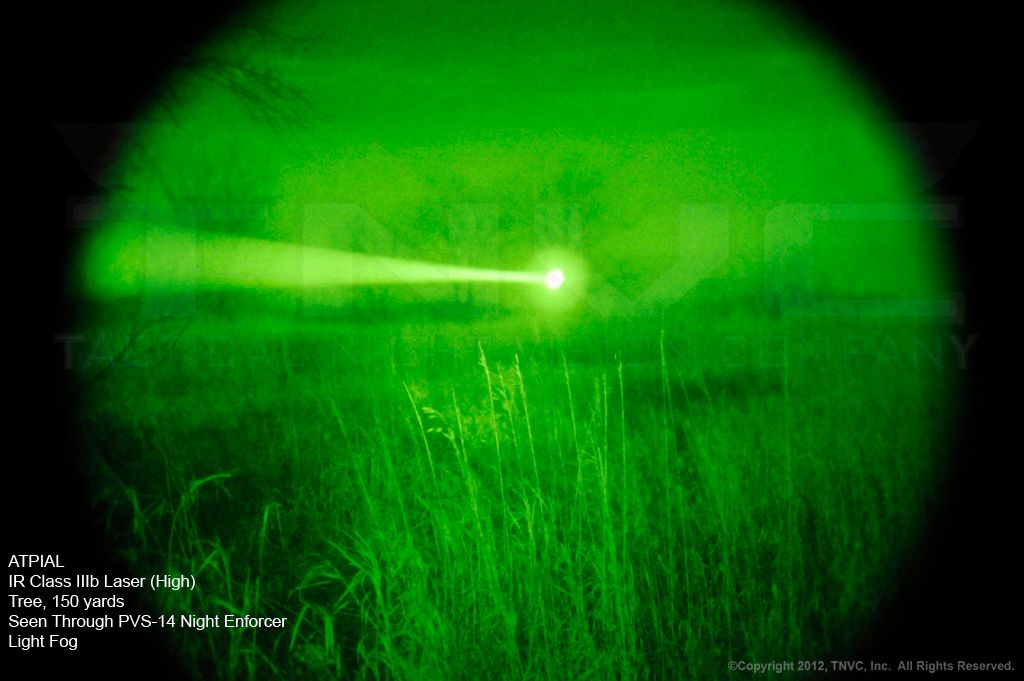
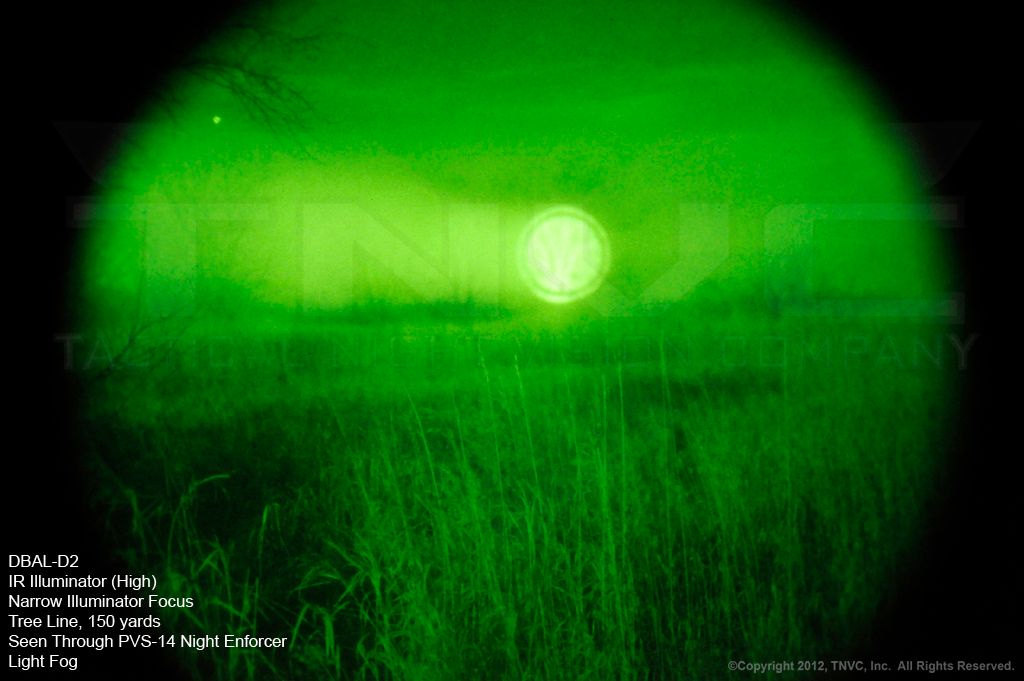
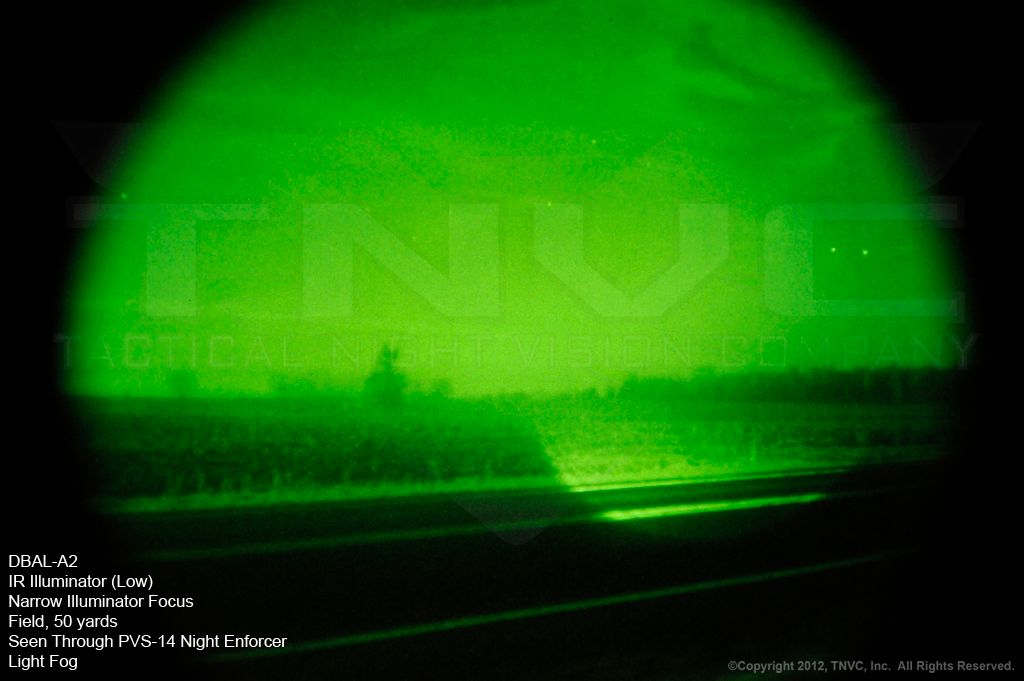
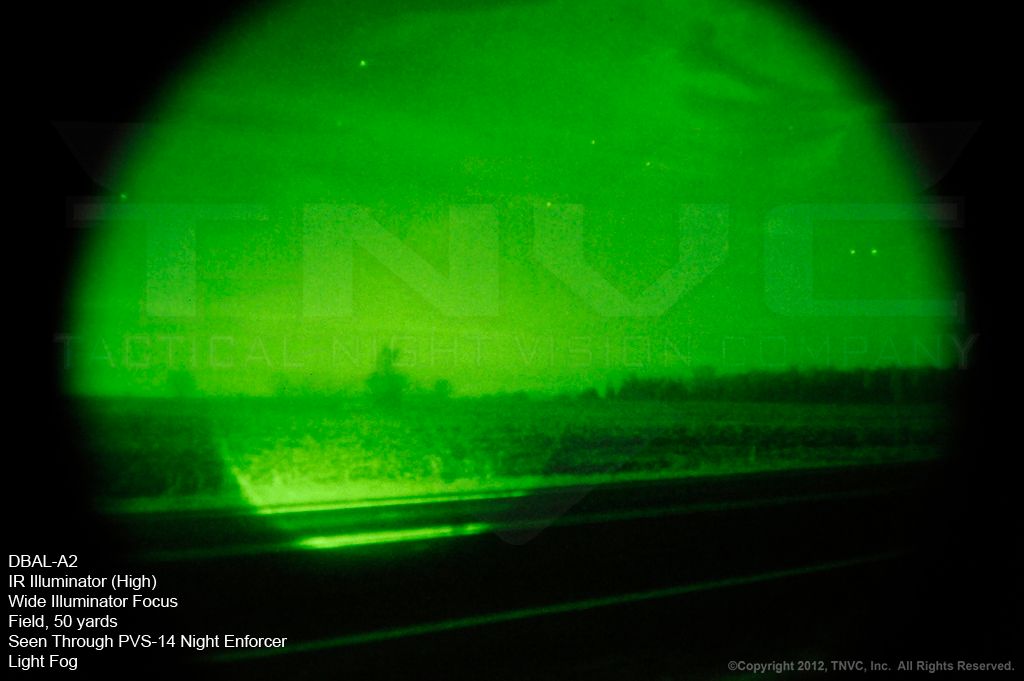
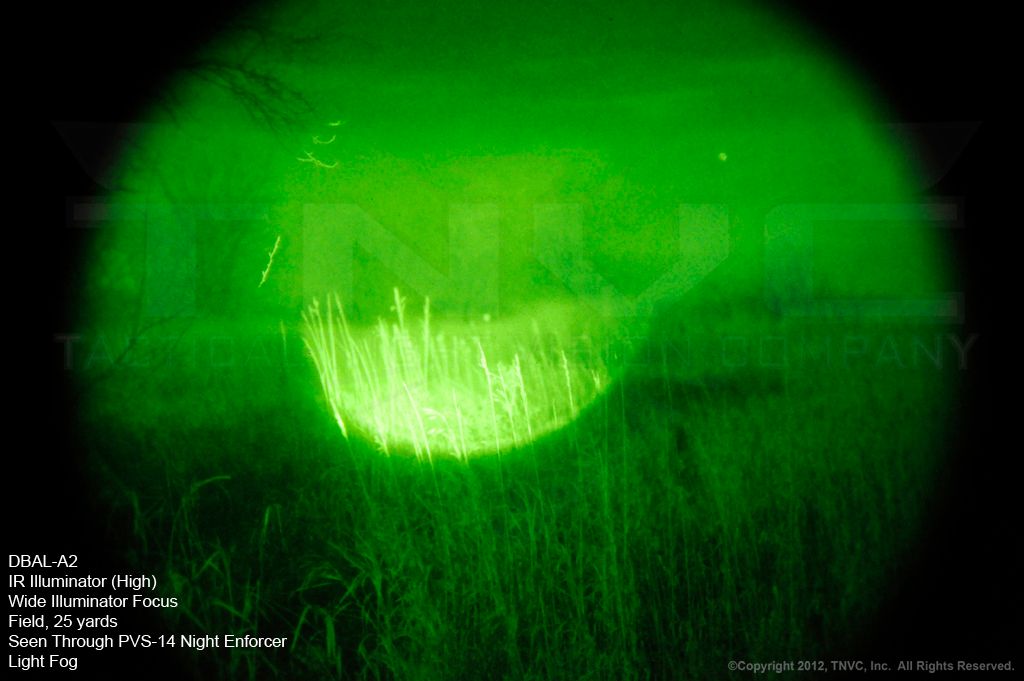
Now that the 2012 SHOT Show has come and gone, Laser Devices, Inc. has granted its distributors permission to begin talking about their new DBAL-D2 Class1 Infrared Laser. Up until the end of SHOT, LDI Distributors were under strict NDA to not discuss the specs or performance of the unit due to the finalization of patent filing. TNVC was contacted to evaluate the DBAL-D2 several months ago. When the project manager first disclosed the development of the DBAL-D2, we were extremely intrigued. We were honored to be asked to test the prototype. As you read this review, it is important to remember that the feedback is based on a prototype unit and that the final production model will feature several changes. These changes will be minor, but based on our feedback provided to the manufacturer at SHOT Show, they will improve the usability of the unit. The extreme success of the original Class1 Infrared Lasers, launched last January by LDI, has certainly been one for the books. And while they brought night vision shooting in the civilian market to a whole new level, there was still a request/need for the inclusion of an integrated IR Illuminator (such as that seen on the AN/PEQ-15 ATPIAL and AN/PEQ-15A DBAL-A2). However, these units’ Illuminators are lasers and the power required to make them powerful enough to be useful would far surpass the spec for Class1, which mandates power below 1mW. So, in developing the DBAL-D2, Laser Devices, Inc. decided to include an LED IR Illuminator, which is inherently eye-safe.
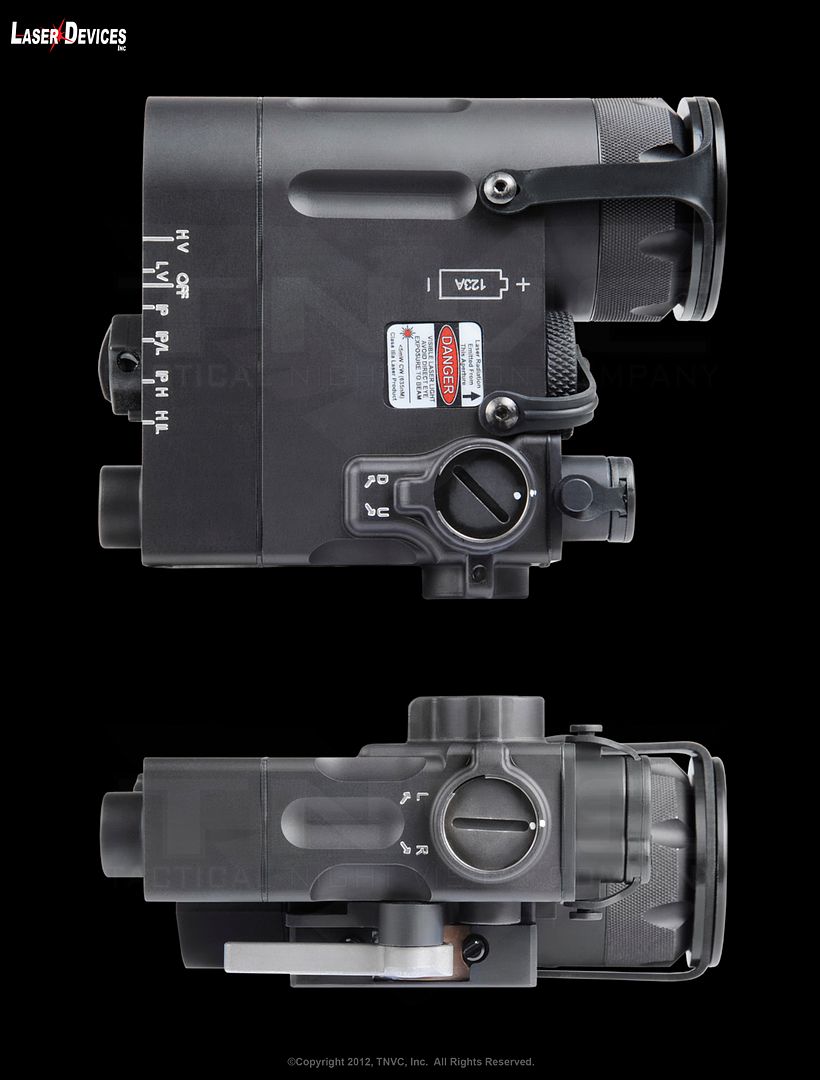
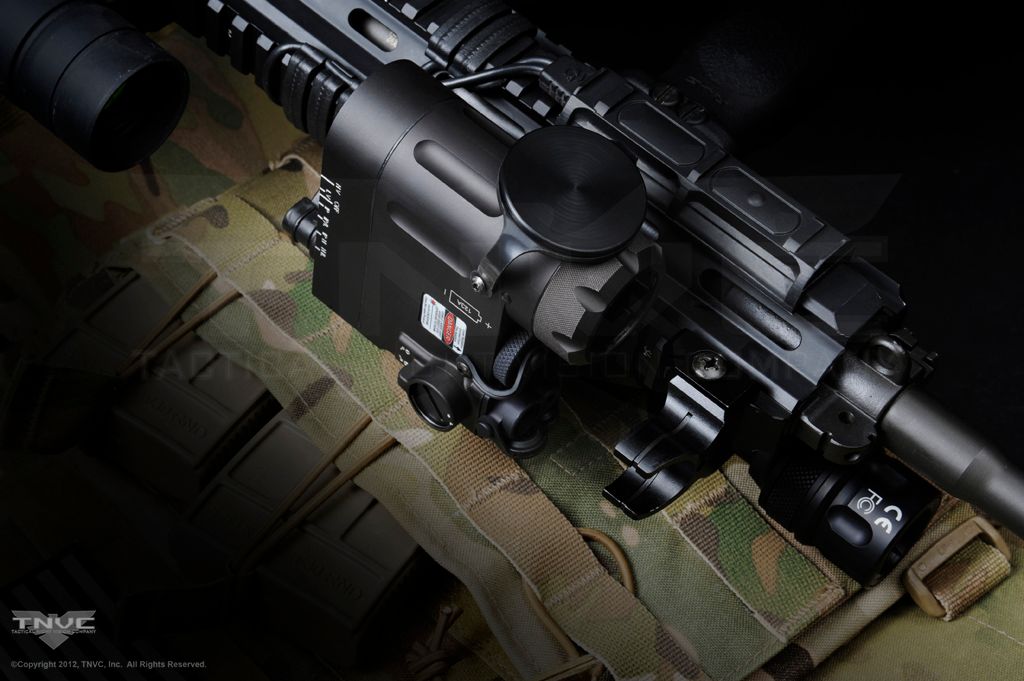
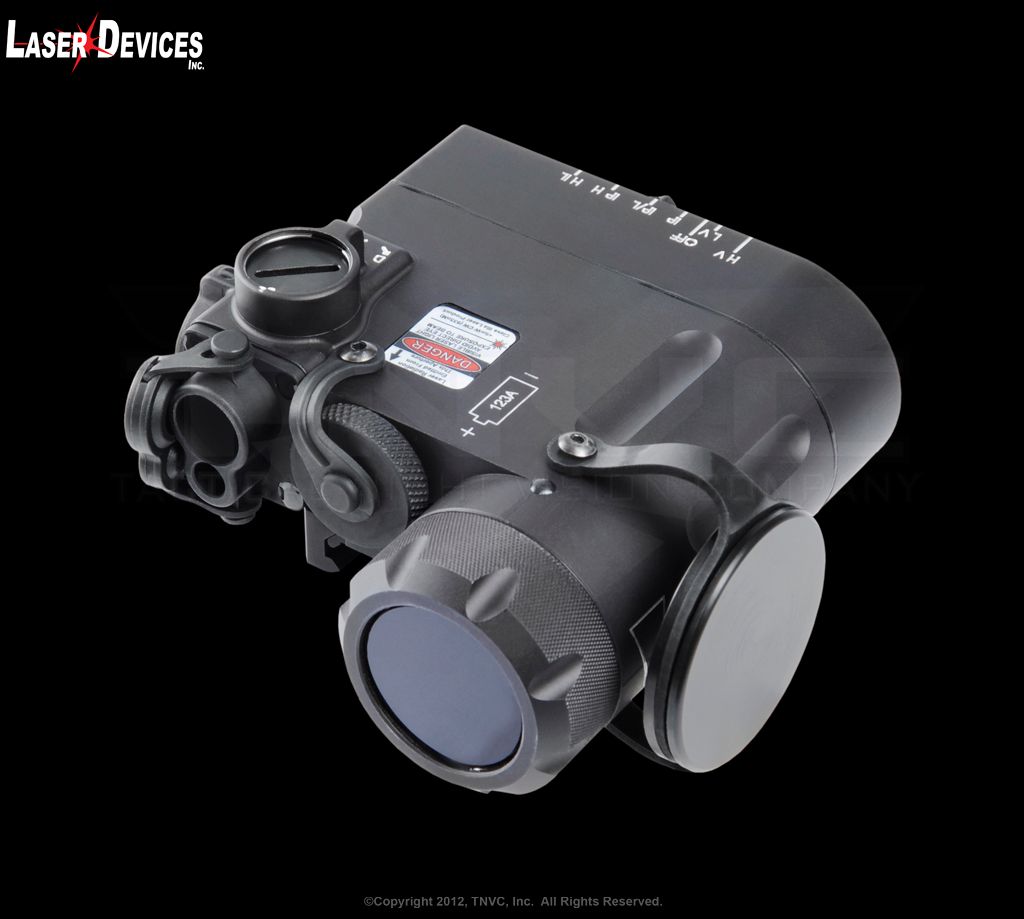
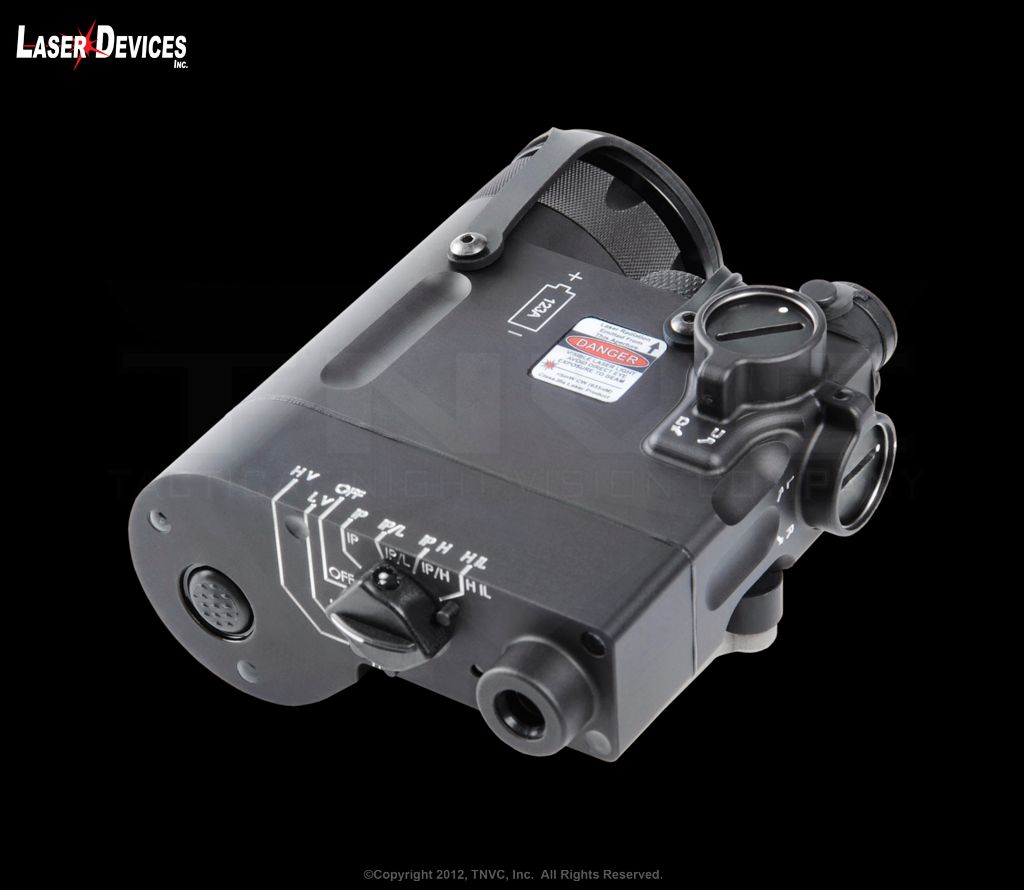
LDI’s Class1 IR Lasers are 0.7mW and have a reach of about 250 yards. But, in order to stay within the FDA regulation, LDI needed to integrate an LED IR Illuminator. This brings us to the first thing you will notice about the unit: it’s big. The very prominent IR Illuminator certainly takes up a large portion of the physical appearance when compared to the legacy DBAL-I2 and government-only A2 models. This is because it needs to house an IR LED array large enough to produce a useful output. LDI’s goal was to create an Illuminator that was powerful enough to reach out to long distances. I will get to our findings on its performance shortly, but let’s take a look at the physical characteristics first. The DBAL-D2 housing is based on the government-only DBAL-A2 body. About 60% of the housing of the D2 is identical to the A2. The right side of the unit features a piggy-backed and slaved visible and Class1 IR Laser. Familiar windage and elevation adjustments are found on the top and side of the unit with the battery compartment facing forward in the center front of the housing. A central indicator knob is located in the center rear of the D2, facing the shooter for easy access. The left side of the unit houses the large LED IR Illuminator. This is where the changes begin. The body housing bulges to accommodate the 1” diameter illuminator bezel. The illuminator housing stretches 3” in length and is tipped with a rotary focus ring that is knurled for easy actuation in the field. I found the illuminator head to be easily turned because it is thick enough to allow a lot of purchase by the fingers. The bulbous illuminator housing is needed to accommodate a large-enough LED that would produce the desired throw/spill.
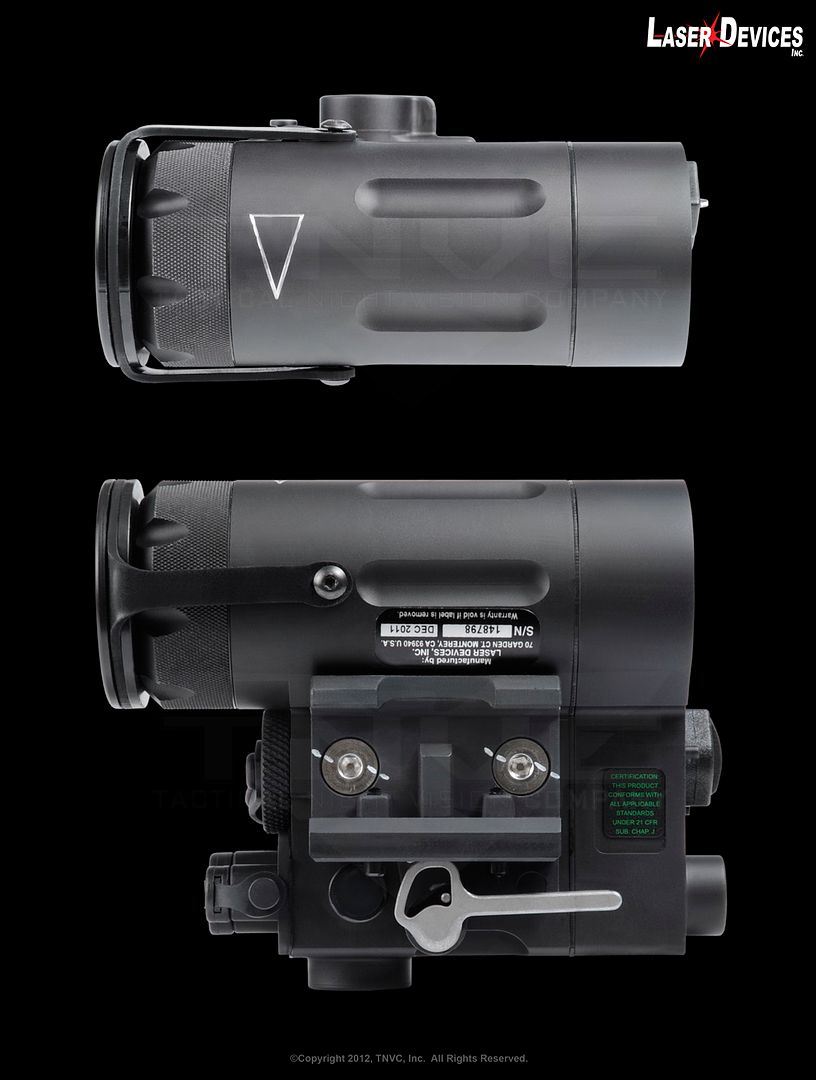
The top of the housing is flat and spills over the left side into the illuminator housing, making it sit partially below the 1913 rail of the host weapon platform. This design challenge caused the engineers to choose between the lesser of two evils. Had they decided to let the main body housing intersect the illuminator in the center, the resulting bump on the top surface would have severely interfered with the shooter’s sight picture. As it is, the DBAL-D2 (like all DBAL units) is tall and invades the lower portion of the sight picture through an Aimpoint or Eotech sight, when mounted on the top rail, more than an ATPIAL. The D2 is actually taller than the legacy I2 and A2 devices. It sits approximately 1.25” (1.1875” to be exact) off the surface of the rail. This is mainly caused by the inclusion of the excellent LDI H2 throw lever mount, but the housing itself is actually thicker as well. Legacy DBAL-I2 and A2 systems sit about 1.0625” off the top of the rail, making the DBAL-D2 1/8” taller. In my trials, I found that the sight picture with a standard co-witness was too obscured by the DBAL-D2 at the 12 o’clock. But, mounting your sight with a tall mount that places it at the lower 1/3rd co-witness height gets rid of this issue. There are plenty of tall mounts available for all the popular sights. So, while the combination of a taller housing and H2 mount increases the height, the overall durability and functionality of the DBAL family attachment system is greater. So, I think it’s a fair trade-off. The solution is to simply mount the optic in a taller mount that places it at a lower 1/3rd co-witness with the iron sights. This increases the optic height for a better cheek weld while un-cluttering the sight picture at the same time. While we’re on the topic, let’s quickly discuss laser placement.
Laser Aiming Systems are just that: aiming systems. They are used in situations where it is not ideal to engage a target or threat with an optical or iron sight such as when using night vision goggles or while wearing a gas mask. It is my professional opinion that mounting a laser system at the 12 o’clock position will produce the best results for the shooter. The reason is simple. After proper zeroing of the device, the laser point of impact will coincide with the bullet point of impact at the desired range. However, the laser will continue on to infinity (or until it runs out of power) while the bullet will be affected by gravity and drop towards the earth. Like a shooter knowing his/her holds for the red dot at various distances before and after the POA/POI, the laser is used in the same way. So, the shooter only has to compensate for elevation with a properly zeroed laser and weapon optic. However, when a laser is mounted at the 3 or the 9 o’clock position, a whole new variable comes into play: windage. Now, the shooter’s round is going to cross the laser at the desired range (point of impact). And, the shooter’s “hold” at ranges up to the POI are relatively straight forward. But, after he POI, the laser will continue left or right of the bore, relative to the laser position. So, the shooter now has to compensate for windage and elevation holds at distances past his/her zero. This makes target acquisition slower and more complicated, increasing the chances you will miss your target. So, unless an optic, clip-on sight, grenade launcher sight, or other piece of mission-essential kit precludes you from mounting the laser at the 12 o’clock, you should place it on the top rail. But, I digress…
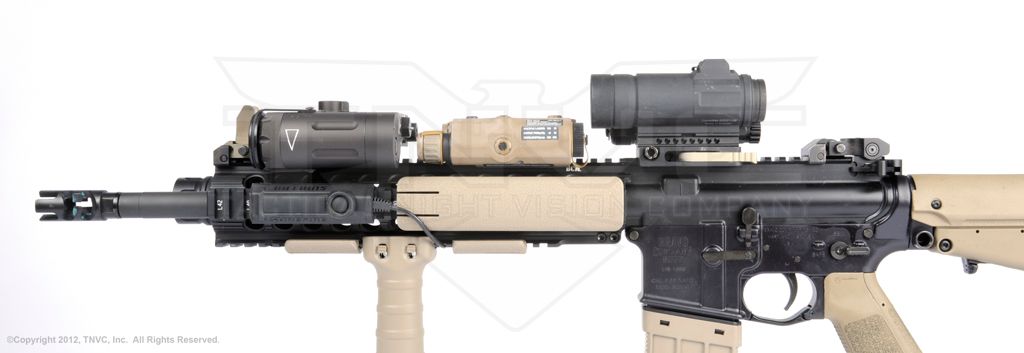
Height comparison: DBAL-D2 and ATPIAL in front of Aimpoint CompM4s (M68 CCO) in standard height mount
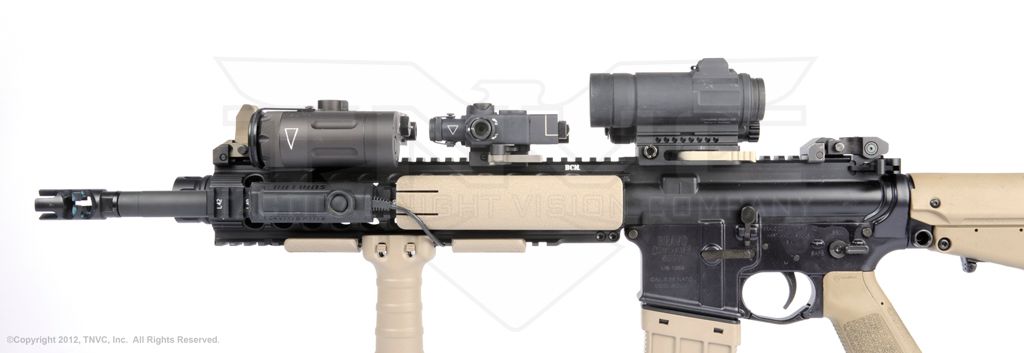
Height comparison: DBAL-D2 and DBAL-I2 in front of Aimpoint CompM4s (M68 CCO) in standard height mount
Anyway, the DBAL-D2’s large infrared illuminator cascades over the side of the rail and hugs the recessed space between rails. The bottom of it is approximately 0.50” from the adjacent rail, possibly causing a real estate issue with certain weapon light mounts. While this is a minor issue, it is something the user should be aware of when setting up his/her weapon. But, like I said; it is certainly the lesser of the two evils when compared to obscuring your sight picture. And with the plethora of weapon light mounts on the market, you will surely be able to find your way around this interference.
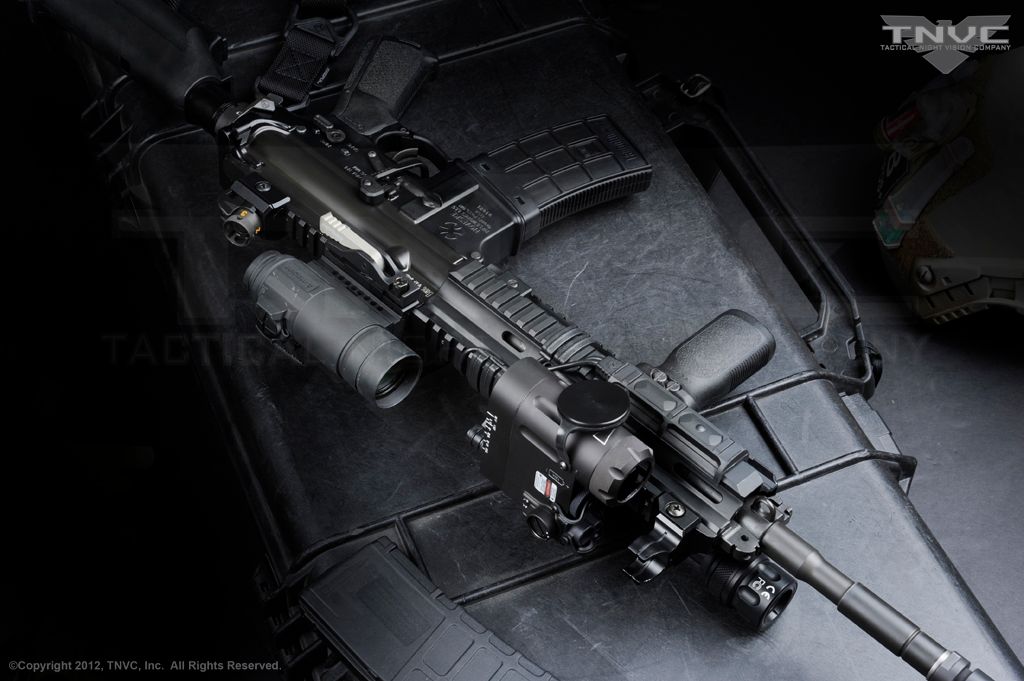
The DBAL-D2 is big, but it’s a solid unit. The thing is built like a proverbial tank, weighing in at 12.5 ounces with a battery installed. Unlike a lot of the lasers and illuminators out there, you could beat someone to death with the DBAL-D2 and it will still work. The D2 is about the size and weight of an AN/PEQ-16B, so it’s not incredibly unwieldy. But, you will definitely notice it on a rifle.
The next thing you will notice is the placement of the fire button. Traditionally, the fire button is located on the top of the laser device so the user can reach over with his/her thumb to activate it. But, because of the space taken up by the illuminator, access to a top-mounted fire button would be limited only to those with giant bear paws for hands. So, the DBAL-D2 features a rear-mounted fire button. Located at the rear of the illuminator portion of the housing, it can be easily activated by the user’s thumb while shooting with a thumb break method. It requires a deliberate motion which is good because it lessens the chance of an accidental discharge of the laser. Something to keep in mind if you are using the fire button for actuation of the unit: it needs to be placed relative to your grip if you don’t want to break your grip to activate the laser. But, if you plan on using the included remote pressure pad, then this is a non-issue. The prototype’s fire button sits flush to the surface, making it hard to find while wearing gloves. Per my discussion with LDI’s staff at SHOT Show, a raised frame around the fire button will be added for increased tactile feedback, making it easier to find the button. Also, it should be noted that the placement of the fire button on the left rear of the housing will make it virtually impossible for a left-handed shooter to reach. This means that south-paws will have to use the remote pressure switch. By the way, actuation works the same as other DBAL’s. Pressing and holding the fire button or remote switch provides momentary activation while double tapping provides constant-on for 5 minutes.
Fire Button is actuated with left thumb
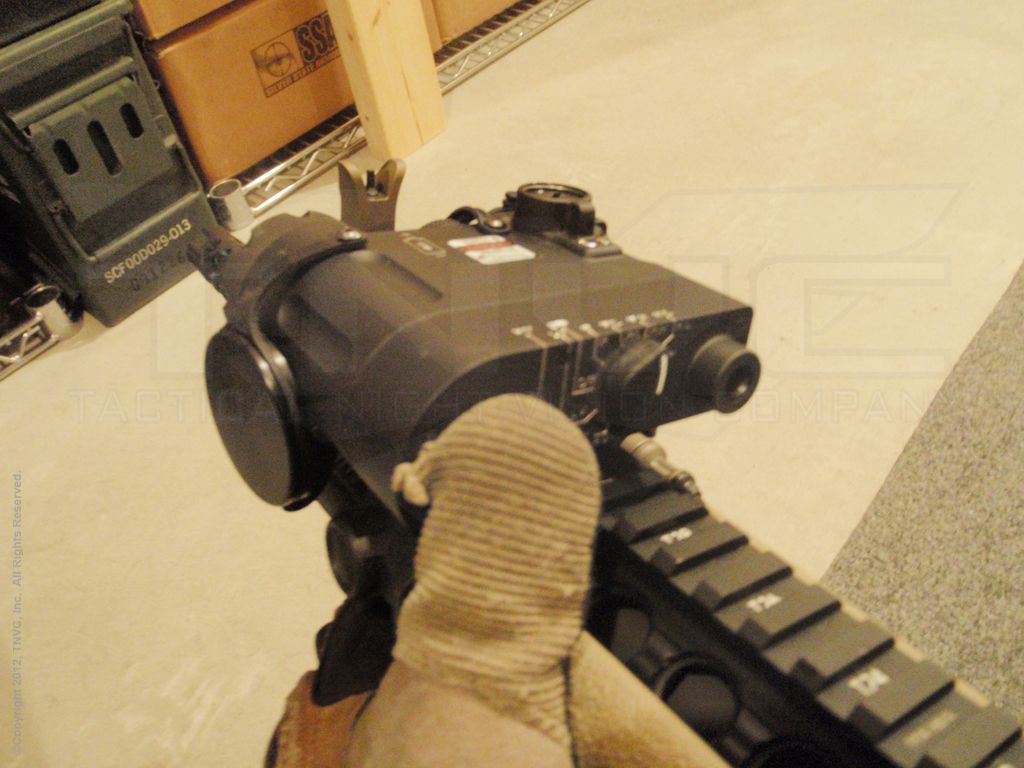
Size of Illuminator would cause issues for smaller hands if Fire Button was placed in traditional location


") You'll save a few more pennies as well vs. the full up D2. We did an comprehensive review of this one as well.
You'll save a few more pennies as well vs. the full up D2. We did an comprehensive review of this one as well. 