
I thought I would share what it took me to build a PSG-1. This is my first build , I chose this rifle because:
#1 its rather rare with only 333 imported into the USA before they were banned from importation.
#2 The parts to do this project were pretty easy to come by and all us made.
#3 I already own a hk91 for reference.
#4 I think she’s one of the best looking rifles made, I always wanted one but I am too cheap to pay $10,000 for a rifle.
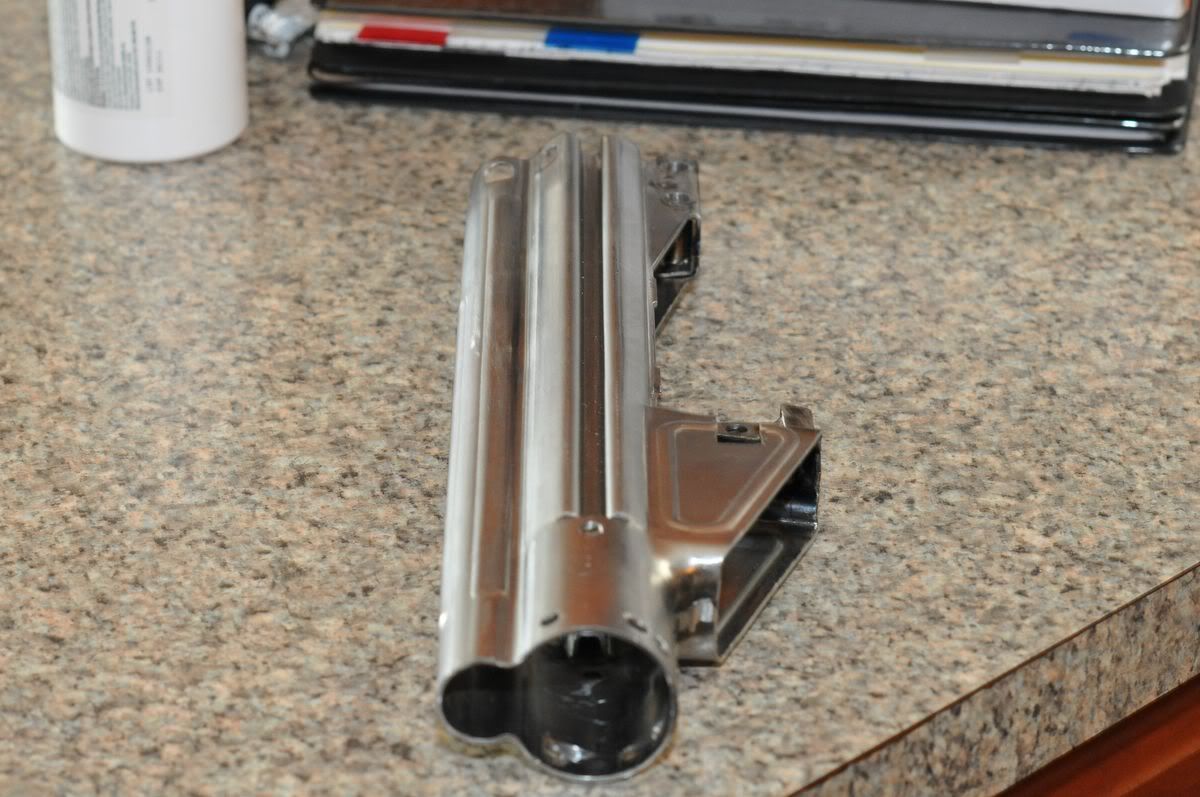
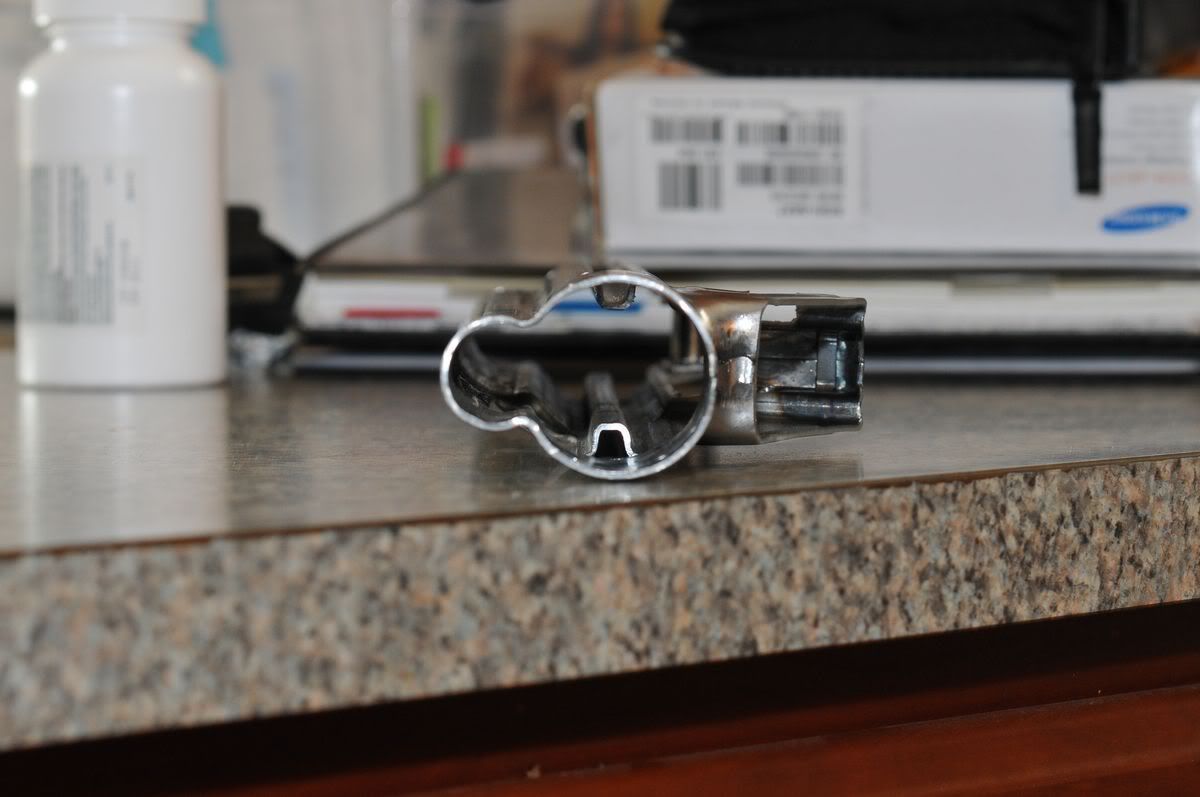
I started by reading every post I could find concerning the build process of a 91 based platform. Next I began purchasing all the parts needed to complete the build. I bought a barrel from rim county mtg, a trunion from bravo5, a trunion extension from igf,the cocking tube was built by jfk on the hkpro forums. The small parts like the mag latch componets and cocking tube parts were from rtg. The forend was purchased from hkparts.
I decided to roll a flat because I did not want to deal with removing the rear site base from a ptr receiver, plus the honor of saying I made that receiver. Next I read everything I could find concerning rolling the flat. I chose to use a jig designed by MR.BCH on weaponeer forums but made some modifications to the design so the flat would not move while in the bending process.
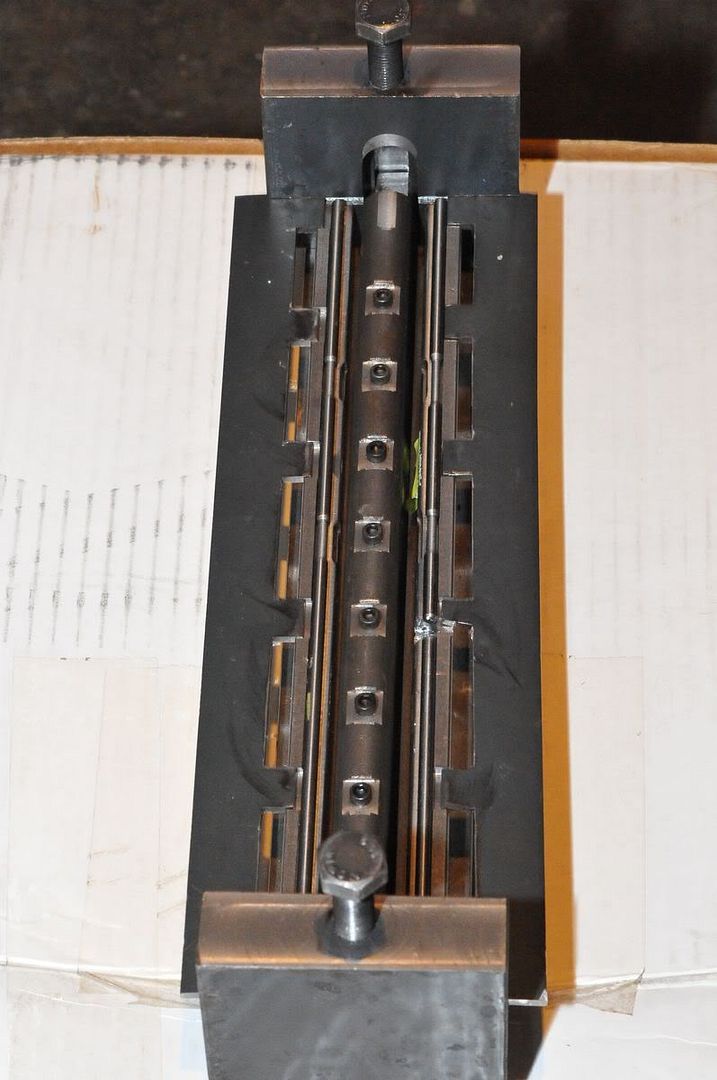
Before I rolled the flat I milled some dies to match the inside dimension of the bosses of the claw mounts so I could press the mounts flat to match the profile of the PSG-1 receiver. It’s not exact but close enough for my build. When I squared the rails the flat was bowed .I needed to make the heatsink, jfk shows in his build but with a beveled channel to match the profile of the rails so I could straighten the flat after the rails are flattened. Next I milled a 1/2 x 1 1/4 piece of cold rolled steel to fit perfectly in my existing 91 rail channel. I set the flat with the channel pointing down in the press placing the milled jig component in the rail . I used a fairly wide 2" x1/2'' piece of steel to flatten the rail in a 20 ton press , pressing the rail several times along its length till the rail looked evening flattened. I then set the flat on the heatsink using the rail jig to straighten the flat , not pressing it flush into the heatsink , just enough so the bottom edge of the flat looked straight. I then rolled the flat in the jig ,tack welding the receiver after it was rolled .
I used the heatsink to center the rails so the carrier moved without hanging in the receiver.
Next it was time to weld the extension to the trunion before I pressed the barrel in place. I then turned down the extension to match the diameter of the trunion. Pressing the barrel was quite different . the diameter of the PSG-1 barrel does not allow the barrel to be pressed in through the chamber side of the trunion . I made a clamp to keep the trunion flat on the press while pressing the barrel through the extension . I used a piece of aluminum plate so the crown of the barrel was not damaged by the press. I set the bolt gap to .020. Then drilled and reamed the hole with a 5mm reamer for the barrel pin installation.
Next I fitted the barrel, trunion assembly into the receivers to figure out how much of the rails need to be removed so the tab at the bottom of the trunion fully engages the magazine when inserted. After that process was completed It was time to weld the barrel, trunion assembly to the receiver I used a harbor freight laser for circular saws to center the barrel to the receiver before tacking into place. Next I check to make sure the carrier move smoothly in the receiver after welding.
I was originally going to weld a rail to the top of the receiver but decided to attempt milling the scope mounts . I was going to bolt weaver bases to the mounts but after one was milled I decided to integrate the mount to the base. I left the mounts attached to the scope ,aligned to what I sighted to in the bore and tack welded them to the receiver.
Next it was time to make the side rails for the receiver . They were the most time consuming part to build so far. Next time I will buy them. Welding the rails on was no picnic , I had some terrible welds to clean up. I ended up using my mill to clean the welds up. I then installed the spacers and bracket I made for attaching the rear stock in the receiver tacking them into place.
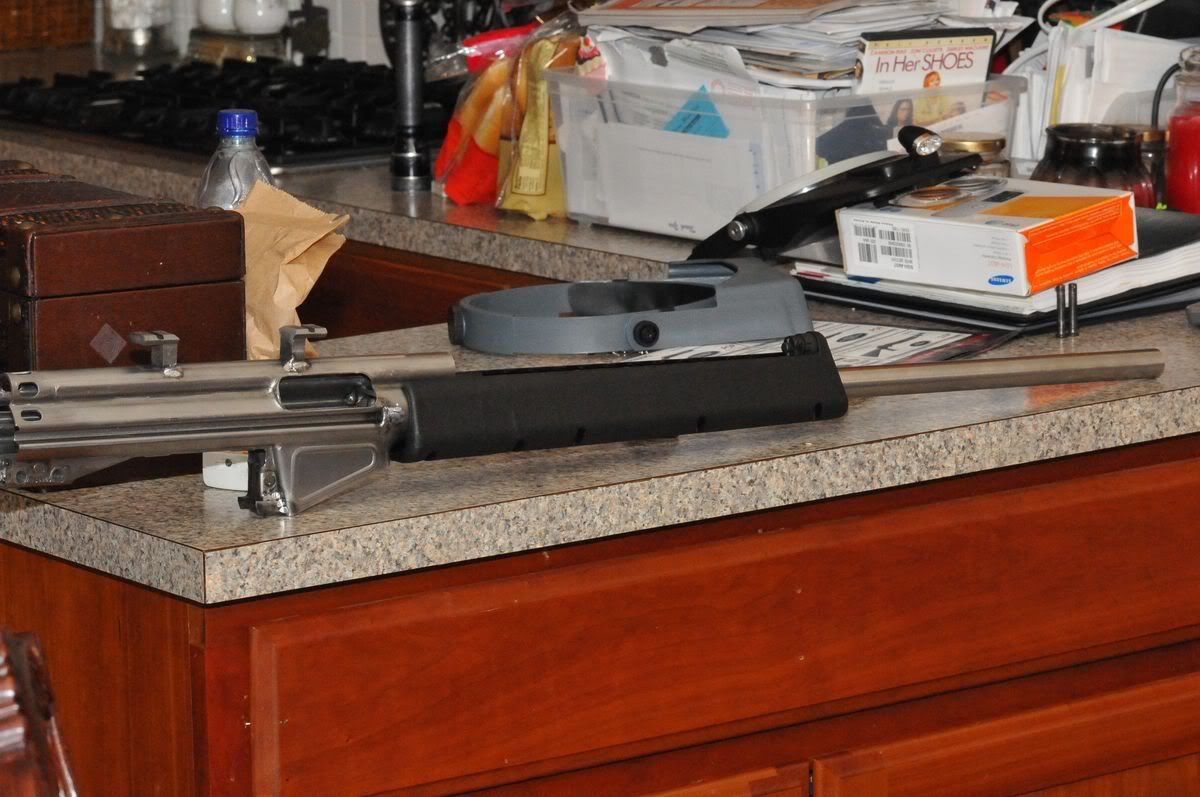
It was now time to set the rifle in the mill to remove some of the 4 tabs used to set the height of the trigger group ejector foot in relation to the bolt head . Next it was time to install the cocking tube . I installed the cocking handle and piston then used my bolt carrier to center the tube I set the gap of the bolt carrier to the piston at .020 then tack welded it into place. I then assembled the rifle to make sure everything fit before painting.
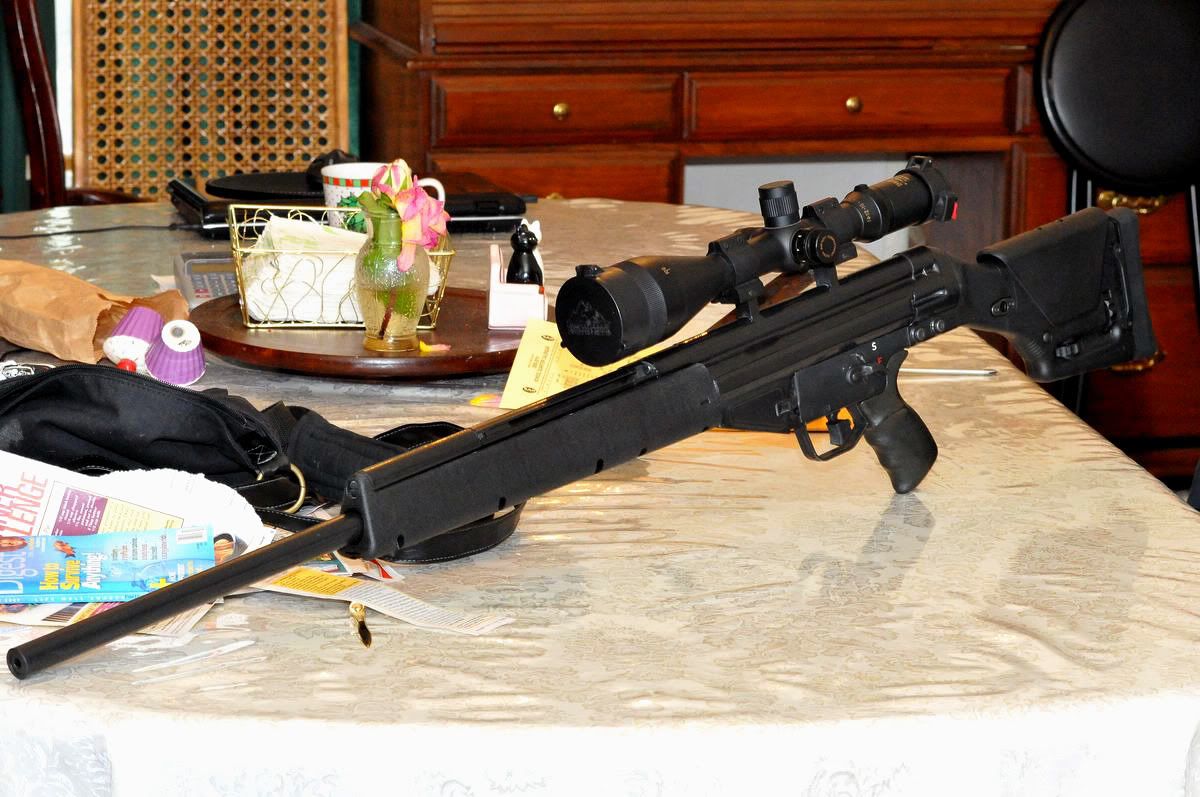
After firing 75 rds the bolt gap has changed from .020 to .016.I purchased a new set of dies to manufacture ammo dialed to this rifle. Next time out I'll see how tight she will group
#1 its rather rare with only 333 imported into the USA before they were banned from importation.
#2 The parts to do this project were pretty easy to come by and all us made.
#3 I already own a hk91 for reference.
#4 I think she’s one of the best looking rifles made, I always wanted one but I am too cheap to pay $10,000 for a rifle.
I started by reading every post I could find concerning the build process of a 91 based platform. Next I began purchasing all the parts needed to complete the build. I bought a barrel from rim county mtg, a trunion from bravo5, a trunion extension from igf,the cocking tube was built by jfk on the hkpro forums. The small parts like the mag latch componets and cocking tube parts were from rtg. The forend was purchased from hkparts.
I decided to roll a flat because I did not want to deal with removing the rear site base from a ptr receiver, plus the honor of saying I made that receiver. Next I read everything I could find concerning rolling the flat. I chose to use a jig designed by MR.BCH on weaponeer forums but made some modifications to the design so the flat would not move while in the bending process.
Before I rolled the flat I milled some dies to match the inside dimension of the bosses of the claw mounts so I could press the mounts flat to match the profile of the PSG-1 receiver. It’s not exact but close enough for my build. When I squared the rails the flat was bowed .I needed to make the heatsink, jfk shows in his build but with a beveled channel to match the profile of the rails so I could straighten the flat after the rails are flattened. Next I milled a 1/2 x 1 1/4 piece of cold rolled steel to fit perfectly in my existing 91 rail channel. I set the flat with the channel pointing down in the press placing the milled jig component in the rail . I used a fairly wide 2" x1/2'' piece of steel to flatten the rail in a 20 ton press , pressing the rail several times along its length till the rail looked evening flattened. I then set the flat on the heatsink using the rail jig to straighten the flat , not pressing it flush into the heatsink , just enough so the bottom edge of the flat looked straight. I then rolled the flat in the jig ,tack welding the receiver after it was rolled .
I used the heatsink to center the rails so the carrier moved without hanging in the receiver.
Next it was time to weld the extension to the trunion before I pressed the barrel in place. I then turned down the extension to match the diameter of the trunion. Pressing the barrel was quite different . the diameter of the PSG-1 barrel does not allow the barrel to be pressed in through the chamber side of the trunion . I made a clamp to keep the trunion flat on the press while pressing the barrel through the extension . I used a piece of aluminum plate so the crown of the barrel was not damaged by the press. I set the bolt gap to .020. Then drilled and reamed the hole with a 5mm reamer for the barrel pin installation.
Next I fitted the barrel, trunion assembly into the receivers to figure out how much of the rails need to be removed so the tab at the bottom of the trunion fully engages the magazine when inserted. After that process was completed It was time to weld the barrel, trunion assembly to the receiver I used a harbor freight laser for circular saws to center the barrel to the receiver before tacking into place. Next I check to make sure the carrier move smoothly in the receiver after welding.
I was originally going to weld a rail to the top of the receiver but decided to attempt milling the scope mounts . I was going to bolt weaver bases to the mounts but after one was milled I decided to integrate the mount to the base. I left the mounts attached to the scope ,aligned to what I sighted to in the bore and tack welded them to the receiver.
Next it was time to make the side rails for the receiver . They were the most time consuming part to build so far. Next time I will buy them. Welding the rails on was no picnic , I had some terrible welds to clean up. I ended up using my mill to clean the welds up. I then installed the spacers and bracket I made for attaching the rear stock in the receiver tacking them into place.
It was now time to set the rifle in the mill to remove some of the 4 tabs used to set the height of the trigger group ejector foot in relation to the bolt head . Next it was time to install the cocking tube . I installed the cocking handle and piston then used my bolt carrier to center the tube I set the gap of the bolt carrier to the piston at .020 then tack welded it into place. I then assembled the rifle to make sure everything fit before painting.
After firing 75 rds the bolt gap has changed from .020 to .016.I purchased a new set of dies to manufacture ammo dialed to this rifle. Next time out I'll see how tight she will group


