Disclaimer: I am not a gunsmith!
I am, however, easily entertained and possess a garage full of tools that normally
are employed in keeping my outboards and wheeled vehicles operational.
After swapping out my 455 Varmint stock trigger for the CZ SST and experiencing
the difference for myself, decided my 455 American needed an improved trigger also.
I've played with a "Yo-Dave", but decided I wanted an adjustable sear.
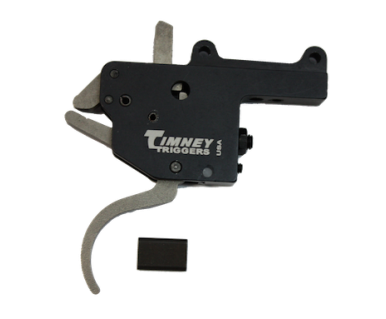
The Timney has an adjustable sear, but the tail on the Timney trigger for the 455
would require some serious wood removal in order to fit the older "A" model 455 American stock.
Timney for the 455 with the trigger tail shown
Rear inletting of the old 455 American stock

Ordered the Rifle Basix 452/455 trigger late Sunday afternoon,
delivered to my mailbox on Thursday. I like the quick service.
Trigger kit, instructions, decal and products brochure in a padded shipping envelope.
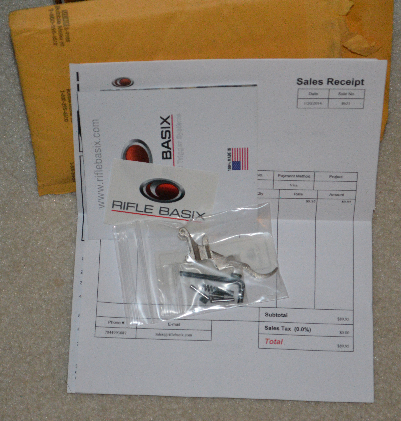
Arranged the kit to verify what goes where.
Doesn't appear to be anything missing, even the necessary allen wrenches.

I've got no complaints about the CZ factory trigger.
It's solid, no wiggle, no play, no creep. Ideal for use as a sporter.
But I find the 455 American Lilja 22lr is spending more time as a bench rifle
than for woods carry and my 455 Varmint 22wmr/17hmr has become my open field choice.
So, time to learn if the Basix will work well for me as a bench trigger.
Instructions say something about dremeling off the pin compression flare,
I'm old school and grabbed a 1/8 inch drill bit and a hand drill, skimmed the flange off
in about 15 seconds by letting the bit ride the dimple in the pin.

After that a plastic mallet and a 3/32 drift eased the pin out.
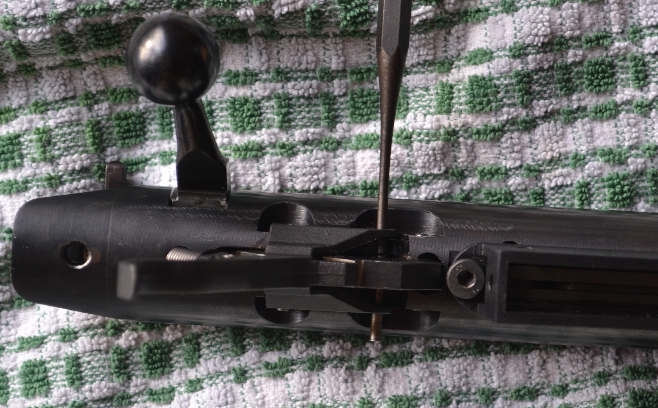
The rear pin is even easier, no flare, tapped out with no fuss.
The trigger spring popped loose and landed on the towel.
Factory trigger removed, time elapsed: about 4 minutes, including taking pictures.
The sear ball pin stays put, so no chasing the detent ball and spring around.

Wiped old lubricant off all the previously inaccessible surfaces,
made sure no metal shavings from the drilling had ended up where they shouldn't.
Re-read the instructions one more time and dove in.
Could have used an extra hand during assembly.
That's the difference between an experienced pro and an amateur.
Short end of the spring stud drops in the receiver hole where the CZ trigger spring used to be,
small end of the spring fits in spring well in the new trigger,
large end goes over the spring stud hanging out of the receiver.
Lined up the rear trigger holes with the rear holes in the receiver,
while keeping the spring in place on the stud and in the well,
and pushing the new rear pin through the trigger/receiver holes.
Exercise in futility, wife stood there watching me and giggling.
She asked if I wanted some help...naw, I can get it.
I did, after providing the wife with a few more minutes of cheap entertainment.
The new pin that was provided in the Basix kit refused to slide in.
Not a surprise, the older CZ 455 receivers had some production issues with fit/tolerances.
Had to reuse the old rear pin as the new pin shipped with the kit was too tight.
Once the old rear pin was in place, the new front pin slid in easy.
The yellow thread lock on the supplied cup screws was a little heavy,
used a wire brush to remove it and applied blue thread lock instead.
With the cup screws in place, cycled the bolt, rough adjusted the sear screw,
adjusted the spring screw, popped the trigger. Nice feel. No travel, no creep,
no wobble, no play. Cycled the bolt again, adjusted the sear screw to the
amount of bite wanted and that trigger pops with exactly the same feel as my CZ single set trigger.
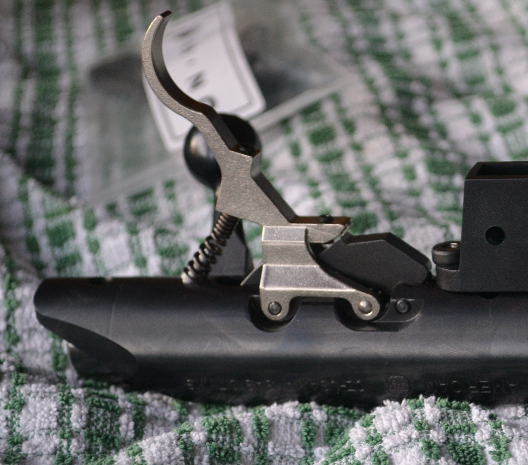
Wiped the ends of the pins clean with an alcohol pad to degrease,
dots of 5 minute epoxy on the ends of the pins, let it set over night.
To remove those epoxy dots at a later time, a hot soldering iron tip
will melt the epoxy, allowing the pins to be pushed out with minimal effort.

There is a cheaper alternative for an adjustable sear while using the factory 455 trigger.
It involves epoxying a portion of a motherboard standoff screw to the sear plate.
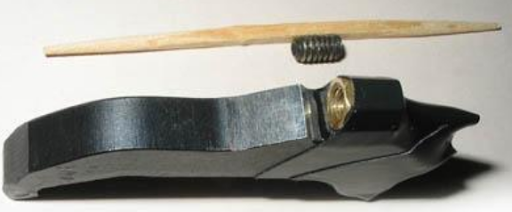
According to my trigger pull gauge, range of trigger pull adjustment
is as low as 4 ounces or as high as 36 ounces with my setup.
I readjusted to just over 12 ounces to match the set trigger on my 455 Varmint.
I like the feel and function of the Rifle Basix trigger. Worth the money for my purposes.
I am, however, easily entertained and possess a garage full of tools that normally
are employed in keeping my outboards and wheeled vehicles operational.
After swapping out my 455 Varmint stock trigger for the CZ SST and experiencing
the difference for myself, decided my 455 American needed an improved trigger also.
I've played with a "Yo-Dave", but decided I wanted an adjustable sear.
The Timney has an adjustable sear, but the tail on the Timney trigger for the 455
would require some serious wood removal in order to fit the older "A" model 455 American stock.
Timney for the 455 with the trigger tail shown

Rear inletting of the old 455 American stock
Ordered the Rifle Basix 452/455 trigger late Sunday afternoon,
delivered to my mailbox on Thursday. I like the quick service.
Trigger kit, instructions, decal and products brochure in a padded shipping envelope.

Arranged the kit to verify what goes where.
Doesn't appear to be anything missing, even the necessary allen wrenches.

I've got no complaints about the CZ factory trigger.
It's solid, no wiggle, no play, no creep. Ideal for use as a sporter.
But I find the 455 American Lilja 22lr is spending more time as a bench rifle
than for woods carry and my 455 Varmint 22wmr/17hmr has become my open field choice.
So, time to learn if the Basix will work well for me as a bench trigger.
Instructions say something about dremeling off the pin compression flare,
I'm old school and grabbed a 1/8 inch drill bit and a hand drill, skimmed the flange off
in about 15 seconds by letting the bit ride the dimple in the pin.

After that a plastic mallet and a 3/32 drift eased the pin out.

The rear pin is even easier, no flare, tapped out with no fuss.
The trigger spring popped loose and landed on the towel.
Factory trigger removed, time elapsed: about 4 minutes, including taking pictures.
The sear ball pin stays put, so no chasing the detent ball and spring around.

Wiped old lubricant off all the previously inaccessible surfaces,
made sure no metal shavings from the drilling had ended up where they shouldn't.
Re-read the instructions one more time and dove in.
Could have used an extra hand during assembly.
That's the difference between an experienced pro and an amateur.
Short end of the spring stud drops in the receiver hole where the CZ trigger spring used to be,
small end of the spring fits in spring well in the new trigger,
large end goes over the spring stud hanging out of the receiver.
Lined up the rear trigger holes with the rear holes in the receiver,
while keeping the spring in place on the stud and in the well,
and pushing the new rear pin through the trigger/receiver holes.
Exercise in futility, wife stood there watching me and giggling.
She asked if I wanted some help...naw, I can get it.
I did, after providing the wife with a few more minutes of cheap entertainment.
The new pin that was provided in the Basix kit refused to slide in.
Not a surprise, the older CZ 455 receivers had some production issues with fit/tolerances.
Had to reuse the old rear pin as the new pin shipped with the kit was too tight.
Once the old rear pin was in place, the new front pin slid in easy.
The yellow thread lock on the supplied cup screws was a little heavy,
used a wire brush to remove it and applied blue thread lock instead.
With the cup screws in place, cycled the bolt, rough adjusted the sear screw,
adjusted the spring screw, popped the trigger. Nice feel. No travel, no creep,
no wobble, no play. Cycled the bolt again, adjusted the sear screw to the
amount of bite wanted and that trigger pops with exactly the same feel as my CZ single set trigger.

Wiped the ends of the pins clean with an alcohol pad to degrease,
dots of 5 minute epoxy on the ends of the pins, let it set over night.
To remove those epoxy dots at a later time, a hot soldering iron tip
will melt the epoxy, allowing the pins to be pushed out with minimal effort.

There is a cheaper alternative for an adjustable sear while using the factory 455 trigger.
It involves epoxying a portion of a motherboard standoff screw to the sear plate.

According to my trigger pull gauge, range of trigger pull adjustment
is as low as 4 ounces or as high as 36 ounces with my setup.
I readjusted to just over 12 ounces to match the set trigger on my 455 Varmint.
I like the feel and function of the Rifle Basix trigger. Worth the money for my purposes.
Last edited:


