Hi guys, im pretty new here and this will be my first post. Figured id kick it off by showing you my first steps into working on a rifle.
I had only ever lapped and mounted scopes up to this point, But with the arrival of a new baby I've had some time off work so any spare minutes i get i have been working on an old Howa 1500 .223. This used to be my coyote rifle but have since upgraded to a 204 Ruger. So i figured id give the Howa some loving and hopefully not destroy it.
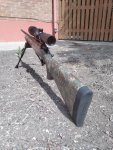
First up i always hated the Hogue Overmold stock, so decided to paint it. This was originally all i was going to do with the rifle. If i knew i was going to do more work on it i probrably would have painted it last.
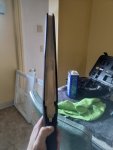
Cleaned it thoroughly with acetone and then masked it all up. I used Krylon camo paint and started with 6 coats of their Khaki color. I let that dry for 3 days and then used the sponge method and hit it with the brown and olive krylon paint. I then finished it with 4 coats of Rustoleum matte clear coat. i think it turned out pretty nice.
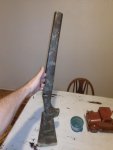
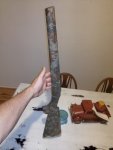
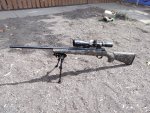
Fast forward a few days later i was sitting on my couch with nothing to do, so i decided it would be a good idea to strip the gun back down and do something about the flimsy forend on the stock. I dug out some old carbon fiber arrows i had from my old bow and got to work.
i did a small recess into the plasting infront of the recoil lug as to stiffen that up some also. and then used a dremel and old thin chisel and removed notches into the webbing of the stock. i got it just right so the arrows would click into place when i put them in.
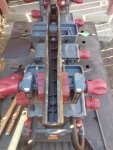
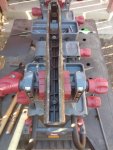
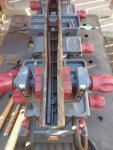
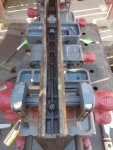
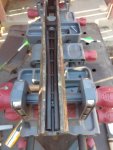
Once i was happy with the fit i mixed up some epoxy and poured it in making sure to give it time to seep down under the arrow shafts before i added more.
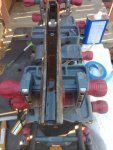
I let it cure and then came back with some sand paper and a small chisel and made sure the barrel was still free floating. worked out great and the stock is now super rigid and doesnt bend up and touch the barrel when using a bipod.
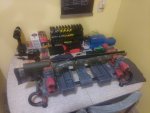
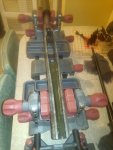
Next task was the bed the action. I have never done this before so i was kind of terrified, i cleaned everything up real good and removed the trigger from the action. I used holeshot case lube for my release agent and just the regular JB weld for the actual bedding. I used a paper towl and stuffed it into the barrel and plugged any other holes with my 2 year olds Playdoh. I made sure to apply a ton of the JB weld into the stock to get decent squeeze out. sat the barreled action into the stock and put the bottom metal on with the magazine spring removed and tightened it down. I tightened it until i got a good amount of squeeze out and then back the screws off about 1/2 a turn.
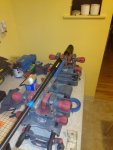
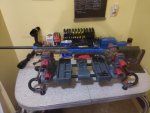
And that is as far as i have gotten with it so far. no idea how the bedding turned out because i literally sat the action in stock about 20 mins ago. Fingers crossed its not stuck in there! ill be sure to update this tomorrow when i pull it out. hopefully i can go and put some shots down range out of it and see if i succeeded in turning my 1/2 moa rifle into a 4 moa rifle haha.
Thanks for stopping by!
I had only ever lapped and mounted scopes up to this point, But with the arrival of a new baby I've had some time off work so any spare minutes i get i have been working on an old Howa 1500 .223. This used to be my coyote rifle but have since upgraded to a 204 Ruger. So i figured id give the Howa some loving and hopefully not destroy it.
First up i always hated the Hogue Overmold stock, so decided to paint it. This was originally all i was going to do with the rifle. If i knew i was going to do more work on it i probrably would have painted it last.

Cleaned it thoroughly with acetone and then masked it all up. I used Krylon camo paint and started with 6 coats of their Khaki color. I let that dry for 3 days and then used the sponge method and hit it with the brown and olive krylon paint. I then finished it with 4 coats of Rustoleum matte clear coat. i think it turned out pretty nice.


Fast forward a few days later i was sitting on my couch with nothing to do, so i decided it would be a good idea to strip the gun back down and do something about the flimsy forend on the stock. I dug out some old carbon fiber arrows i had from my old bow and got to work.
i did a small recess into the plasting infront of the recoil lug as to stiffen that up some also. and then used a dremel and old thin chisel and removed notches into the webbing of the stock. i got it just right so the arrows would click into place when i put them in.


Once i was happy with the fit i mixed up some epoxy and poured it in making sure to give it time to seep down under the arrow shafts before i added more.

I let it cure and then came back with some sand paper and a small chisel and made sure the barrel was still free floating. worked out great and the stock is now super rigid and doesnt bend up and touch the barrel when using a bipod.


Next task was the bed the action. I have never done this before so i was kind of terrified, i cleaned everything up real good and removed the trigger from the action. I used holeshot case lube for my release agent and just the regular JB weld for the actual bedding. I used a paper towl and stuffed it into the barrel and plugged any other holes with my 2 year olds Playdoh. I made sure to apply a ton of the JB weld into the stock to get decent squeeze out. sat the barreled action into the stock and put the bottom metal on with the magazine spring removed and tightened it down. I tightened it until i got a good amount of squeeze out and then back the screws off about 1/2 a turn.


And that is as far as i have gotten with it so far. no idea how the bedding turned out because i literally sat the action in stock about 20 mins ago. Fingers crossed its not stuck in there! ill be sure to update this tomorrow when i pull it out. hopefully i can go and put some shots down range out of it and see if i succeeded in turning my 1/2 moa rifle into a 4 moa rifle haha.
Thanks for stopping by!
Attachments
-
 IMG_20200918_105859.jpg324.9 KB · Views: 167
 -
 IMG_20200920_203543.jpg282.3 KB · Views: 192
 -
 IMG_20200920_203559.jpg293.3 KB · Views: 189
 -
 IMG_20200922_130610.jpg1.1 MB · Views: 177
 -
 IMG_20200922_130625.jpg905.1 KB · Views: 177
 -
 IMG_20200929_172235.jpg420.3 KB · Views: 150
 -
 IMG_20200929_172236.jpg403.8 KB · Views: 170
 -
 IMG_20200929_172256.jpg375.7 KB · Views: 157
 -
 IMG_20200929_173412.jpg402.3 KB · Views: 156
 -
 IMG_20200929_173528.jpg370.6 KB · Views: 158
 -
 IMG_20200929_180555.jpg363.6 KB · Views: 152
 -
 IMG_20200929_193912.jpg440.8 KB · Views: 175
 -
 IMG_20200929_193920.jpg359.6 KB · Views: 162
 -
 IMG_20200929_210312.jpg329.2 KB · Views: 183
 -
 IMG_20200929_210439.jpg442.3 KB · Views: 153


