G
Guest
Guest
Hey guys,
Though I should post this project, get the feeling it might be useful to a few. I was lucky and had someone to hold my hand on this project so in the spirit of putting it forward here is the epoxy bedding job I did on my MDT ESS chassis (Modular Driven Technologies Enhanced Sniper System).
I never indented to bed this chassis, after I swapped out the original stock (Hunter Magpul) to the ESS there was a terrible lose in accuracy. I mean TERRIBLE! In the break in process of the barrel I managed a few 5 round dime sized groups at 100m, post swap I was looking at 2.5-3 MOA. To say I was disappointed was an understatement. I approached MDT and their advice was to tap the butt of the rifle against the ground when mounting the action into the chassis before you tighten the action screws to the chassis. I was also told bedding wasn't required, well I flat out disagree with that statement because after I completed the bedding project my accuracy returned, all things being equal, load,brake etc. For the record I love MDT!!
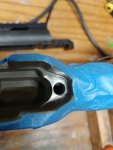
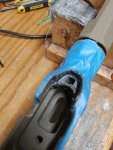
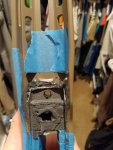
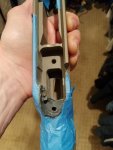
I started by masking the chassis with painters tape. I found two tapped holes in the ESS chassis and I couldn't figure out what they were for. Rather than just fill with epoxy I masked the holes with Kiwi natural shoe polish if I need access to them later.


I used a Dremel tool, 1/8 ball bit, to rough up the surface I will be applying the epoxy to.


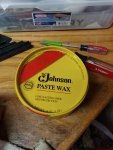
I applied Kiwi shoe polish to the barrel with my finger to the areas of the barrel that contact the chassis, this is a fantastic release agent.
JB Weld is the epoxy I picked up from Canadian Tire, a small amount was applied to the chassis and the barrel. I used a good olde fashion white candle stick and rubbed a healthy portion into the threads of the action screws to prevent the epoxy from sticking. I also used the traditional release agent in the magazine well and in the barrel action screw holes of the chassis so I didn't have any problems with epoxy in places I don't want it.


The messy part is getting the chassis, action and screws all together, but 8 hours later I tapped the action out of the chassis with a wooden block, placed in the mag well and gently tapped out with a rubber mallet.


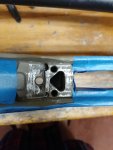
I bedded the lug in two parts so I could properly mask the screw that attaches to the handguard. I wasn't sure at first what to use but with a toddler in the house it didn't take me long to snag a white crayon. It fits perfect leaving easy access if required later. With the crayon in place I applied a small amount of epoxy to the other side of the lug and chassis.


I was happy with the results, everything is all snug and my accuracy has returned, just in time to get out to 600M

Though I should post this project, get the feeling it might be useful to a few. I was lucky and had someone to hold my hand on this project so in the spirit of putting it forward here is the epoxy bedding job I did on my MDT ESS chassis (Modular Driven Technologies Enhanced Sniper System).
I never indented to bed this chassis, after I swapped out the original stock (Hunter Magpul) to the ESS there was a terrible lose in accuracy. I mean TERRIBLE! In the break in process of the barrel I managed a few 5 round dime sized groups at 100m, post swap I was looking at 2.5-3 MOA. To say I was disappointed was an understatement. I approached MDT and their advice was to tap the butt of the rifle against the ground when mounting the action into the chassis before you tighten the action screws to the chassis. I was also told bedding wasn't required, well I flat out disagree with that statement because after I completed the bedding project my accuracy returned, all things being equal, load,brake etc. For the record I love MDT!!
I started by masking the chassis with painters tape. I found two tapped holes in the ESS chassis and I couldn't figure out what they were for. Rather than just fill with epoxy I masked the holes with Kiwi natural shoe polish if I need access to them later.


I used a Dremel tool, 1/8 ball bit, to rough up the surface I will be applying the epoxy to.


I applied Kiwi shoe polish to the barrel with my finger to the areas of the barrel that contact the chassis, this is a fantastic release agent.
JB Weld is the epoxy I picked up from Canadian Tire, a small amount was applied to the chassis and the barrel. I used a good olde fashion white candle stick and rubbed a healthy portion into the threads of the action screws to prevent the epoxy from sticking. I also used the traditional release agent in the magazine well and in the barrel action screw holes of the chassis so I didn't have any problems with epoxy in places I don't want it.


The messy part is getting the chassis, action and screws all together, but 8 hours later I tapped the action out of the chassis with a wooden block, placed in the mag well and gently tapped out with a rubber mallet.


I bedded the lug in two parts so I could properly mask the screw that attaches to the handguard. I wasn't sure at first what to use but with a toddler in the house it didn't take me long to snag a white crayon. It fits perfect leaving easy access if required later. With the crayon in place I applied a small amount of epoxy to the other side of the lug and chassis.


I was happy with the results, everything is all snug and my accuracy has returned, just in time to get out to 600M


