Gunsmithing Winchester Pre 64 Heavy Tac Build

LRI

Lance Criminal
Full Member
Minuteman
  • Mar 14, 2010
    6,336
    7,623
    53
    Sturgis, S. Dakota
    www.longriflesinc.com
    Here's the latest. This one is a 300 Winchester Magnum getting the full makeover.

    Full monty blueprint
    New barrel, Lilja 1-12 twist.
    Manners stock
    and looottttsss of work.


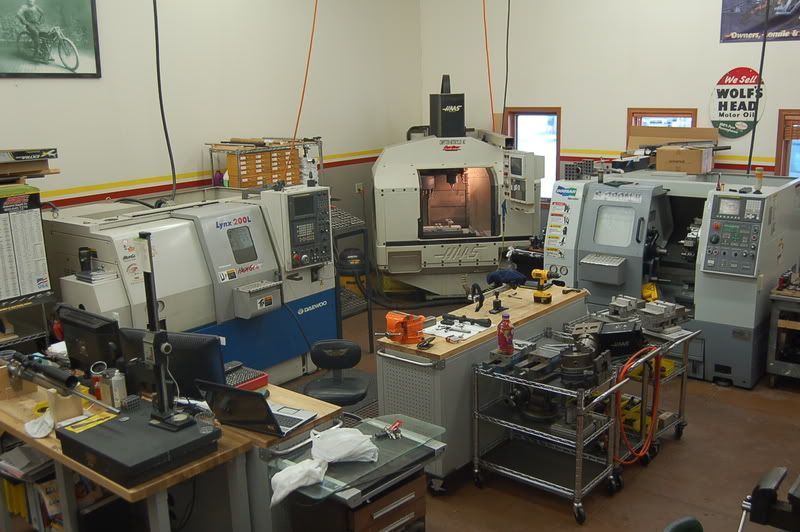
    Starting out with the receiver getting tuned up in the milling center. Tune up the threads, face, counterbore, and lug abutments.

    DSC_0004.jpg


    DSC_0007.jpg


    DSC_00022.jpg


    Then onto the barrel. Setup of the setup tooling (meh?
    smile.gif
    )

    EDIT: Dern it, wrong photo. This is a 300WSM reamer. Wellz, you get the idea. . .
    smile.gif


    DSC_0004-Copy.jpg


    DSC_0005-Copy.jpg


    DSC_00013.jpg


    And getting the stock back to a usable form for how I do stuff here in the shop. Fill that bugger up, only to remove 95% of it again. (yay!)

    Before:
    DSC_0001.jpg


    After:
    DSC_00012.jpg


    Thanks fer lookin!

    C


    Re: Winchester Pre 64 Heavy Tac Build

    Chad, Nice work. It looks like you cut new threads in the receiver to get rid of the threads with the broach cuts in them from the factory, makes sense. Just out of curiosity are you facing the end of the receiver off then indexing off of the newly milled flat, or where the bolt lugs ride when you re-thread the receiver?
     
    Re: Winchester Pre 64 Heavy Tac Build


    Beginning the primary inlet portion of the build now. Action has been trued, barreled, and is ready for bedding.

    This is a Tom Manners stock. I believe it is the MCS-T5 minus the adjustable hardware for the cheek piece.

    Laying the tape so I can measure out the center. This is pretty important as it determines the center position for the barreled action. Gotta get it right otherwise stuff points in different directions. (blech!) A good compass makes this an easy task, but I still like to double check with a quality scale. Measure twice, cut once. . .

    DSC_0001-1.jpg


    DSC_0002-1.jpg


    DSC_0004-1.jpg


    DSC_0005-1.jpg


    Well a couple hours later and I have the action ready for bedding. There were a great many tooling marks all over this bugger. (common to these actions) Some file work, lathe work, and a little bit in the mill tuned it up nice.

    This should make for a really nice looking bedding job. My hands are numb from filing and sanding. I like doing it though. It's too easy at times to get seduced by fancy equipment. It's fun to get the hands dirty now and then too.

    DSC_0006-1.jpg


    DSC_0007-1.jpg


    DSC_0008-1.jpg


    Here's the front of the recoil lug being drafted slightly. This makes it much easier to peel out of the stock during disassembly. Really helps to avoid chipping the delicate corners and whatnot.

    DSC_0009.jpg


    DSC_0011.jpg
     
    Re: Winchester Pre 64 Heavy Tac Build

    Now onto finishing the action up. the front pillar/guard screw area behind the lug was pretty rough. Someday I'll get around to setting up my BAD AZZ Brown and Sharp monster hydraulic surface grinder that'll make super quick work of all this.

    for now its old school files and emery.

    DSC_0013.jpg


    Giving the rails a kiss

    DSC_0014.jpg


    Last little bit of machine work, putting a slight draft on the front of the mag box register. Again, just to make it easier to peel this bugger out.

    DSC_0015.jpg


    After bead blasting. Looks pretty good now. Tool marks are gone and the edges are still clearly/cleanly defined. It's way easy to make one of these look like it sat under a heat lamp if a guy gets too carried away with the files and emery.

    DSC_0016.jpg


    DSC_0017.jpg


    Now it's time to get back to inletting the stock. Computer work commences!
     
    Re: Winchester Pre 64 Heavy Tac Build

    Now the fun starts.

    As with all my builds, I begin with documentation. If I don't write it down I'm screwed! Here I've dinged out the guard screw locations to be used later for the puter model.

    DSC_0002-2.jpg


    DSC_0003-2.jpg

    Here's what were after. 3 hours of dickerin on the puter gets me the model I want and the tool paths. From here I'll save it and it'll get used as the base for the next long action I do. The first ones are always the bugger. Once I have the "master" though it goes pretty simple. It becomes a matter of just pushing stuff around. The tool package/path is where the work is. Surfacing isn't cut and dry like a pocket or profile. There's a bit of "puter voodoo" in order to get it to work the way you want. It's just an experience thing. The books only get you so far. Stuff I watch for is how the tool will treat the stock on an edge or inside/outside corner. Will it rip/split the material? With fiberglass its not as big a deal. Nice wood can be catastrophic. for this reason I write all the paths on the assumption they'll be used in a wood stock someday. Usually takes a little more time in the machine but it saves the hair pulling later.


    Onto making chips!

    DSC_0004-2.jpg
     
    Re: Winchester Pre 64 Heavy Tac Build

    <div class="ubbcode-block"><div class="ubbcode-header">Originally Posted By: hgr2</div><div class="ubbcode-body">It is very refreshing to find an actual gunsmith instead of a remington barrel fitter!! I like your work. </div></div>

    -You guys are going to get me lynched.

    Thanks, appreciate the kind words.

    Back to work!
     
    Re: Winchester Pre 64 Heavy Tac Build


    Inlet is all done. With my mandrel in the receiver I indicated off of it to check parallelism. I'm within .003" That's pretty good. I have a feeling the bottom of the receiver isn't exactly on track with the bore center. If I'd only had my surface grinder set up. . .

    My skills with a file only go so far.

    That being said she looks pretty good. The tool paths did a nice job. The action is sitting right on the show line (radius of the receiver ring) and it's parallel to the stock. The tang is kind of showing its ass, but I expected that. Trigger placement is everything so I'll have a little "Earl Sheib'n" to do on the back end. Not to worry, this particular stock lends itself well to the modification. My only worry is the rear tang of the floor metal. It's going to be buried up inside the grip a little.

    Not concerned really, all the Anschutz tgt stuff I used to work on are done similar to this. Nice that the grip has a draft to it on this stock, that'll make it easier to get the tools down in there without banging into the grip cap area. (which sucks as its more body work later!)

    Anyways, now I have to knock out the barrel channel.

    Here's the photos on the stock inletting and the final outcome.

    DSC_0001-3.jpg


    DSC_0002-3.jpg


    DSC_0008-2.jpg


    DSC_0005-2.jpg


    DSC_0006-2.jpg


    DSC_0007-2.jpg
     
    Re: Winchester Pre 64 Heavy Tac Build

    <div class="ubbcode-block"><div class="ubbcode-header">Originally Posted By: Northern50</div><div class="ubbcode-body">Chad, Nice work. It looks like you cut new threads in the receiver to get rid of the threads with the broach cuts in them from the factory, makes sense. Just out of curiosity are you facing the end of the receiver off then indexing off of the newly milled flat, or where the bolt lugs ride when you re-thread the receiver? </div></div>

    Everything is started from where the new face ends up after it's been resurfaced. This way all my programming is with one tool and in a negative Z direction (down). The only exception is the thread milling. That begins at the bottom of the hole and works up. Only reason why is so I can climb mill on a R/H thread. I've considered the idea of buying a thread mill with backwards flutes but that'd probably just screw me up.
    smile.gif
    I've been doing it this way so long it's not a big deal anymore. It used to scare the buggers out of me for fear of having a bad offset and smacking the tool on the lug abutments. Thankfully that has never happened. (bang on wood)
     
    Re: Winchester Pre 64 Heavy Tac Build

    Ok, last update for the night.

    Momma's made CHILI and it's to fricken die for!


    As for the stock, I cut the barrel channel and it looked pretty good. I'm not happy though with all the pin holes that suddenly showed up. Sooo, I got out my fast set bondo and plugged them up. I'll let this stuff sit overnight and machine the channel again in the morning. I could have left it, but it'd really look like chit once paint hit it. Barrel channel with chicken pox.

    Anyways, I'm done for the day. Bright n early tomorrow we start again!

    Nite.

    c
    DSC_0001-4.jpg


    DSC_0003-4.jpg
     
    Re: Winchester Pre 64 Heavy Tac Build

    I got queezy when I saw all of that bedding compound all over the stock like that. If I made that big of a mess I would never be able to clean it up! It's funny, you're looks like that now but it will look 100 times better than my bedding jobs when you get done. You do amazing work...keep it coming!
     
    Re: Winchester Pre 64 Heavy Tac Build

    <div class="ubbcode-block"><div class="ubbcode-header">Originally Posted By: C. Dixon</div><div class="ubbcode-body">Masking tape is a beautiful thing
    smile.gif
    </div></div>

    I think it's more like <span style="font-weight: bold">Having the balls to sand the shit out of a $600+ stock is a beautiful thing
    eek.gif
    </span>.
     
    Re: Winchester Pre 64 Heavy Tac Build

    Sitting pretty well now. Got her back in the mill to cut the ejection port inlet. Now it's trigger time!

    I's pooped from working late last night so we'll start this again in the morning. Hope to have it finished up. Client is coming in for a fitting to check scope height and whatnot.


    Fun stuff.

    Later,

    C


    Right on the showline. Perfect!

    DSC_0007-4.jpg


    Bolt handle inlet is now a clean transition to the receiver. .03" clearance all the way around.

    DSC_0006-4.jpg


    Tang is now blended. That took awhile. Lots of fiddlin. Still have some block sanding to do to clean up the edges a bit, but the hard part is over.

    DSC_0005-4.jpg


    Front and rear sides of the ejection ports. 1:1 fit. I'll open them up slightly later to fit for the paint's film thickness.

    DSC_0004-6.jpg


    DSC_0003-7.jpg


    Here's one more of the bedding after spot facing the pillar holes. Coming along well. Clean surfaces everywhere.
    DSC_0002-6.jpg
     
    Re: Winchester Pre 64 Heavy Tac Build

    <div class="ubbcode-block"><div class="ubbcode-header">Originally Posted By: C. Dixon</div><div class="ubbcode-body"> Client is coming in for a fitting to check scope height and whatnot.


    Fun stuff.

    Later,

    C</div></div>

    Chad,
    Tell your "client" I said hello.

    John
     
    Re: Winchester Pre 64 Heavy Tac Build

    I am curious - how do you adjust the receiver in the 3-jaw so that the bolt bore axis is true before you chase the barrel threads and face the receiver and bolt lug buttresses?
     
    Re: Winchester Pre 64 Heavy Tac Build

    This morning consisted of getting the code sorted out for the trigger and magazine inlets.

    I think all that work on the receiver paid off. The finish on the bedding looks pretty nice.

    DSC_0010-3.jpg


    Everything else though looks good. Only took 6 HOURS to get it all figured. I'm kinda particular with how this stuff ends up. I encourage folks to take stuff apart and one thing I've learned is sharp corners see a lot of wear and tear. For that reason I try to put a radius on every feature I machine. I think they look better this way too.

    Here's where were at. The top side is all done now. I have one more to run and then we'll pull the fixture and go onto the bottom side. This'll take awhile too due to the use of floor metals I don't have code for yet.

    More puter doodles. . .


    Enjoy,

    C

    DSC_0009-3.jpg


    DSC_0008-4.jpg


    DSC_0006-5.jpg


    DSC_0005-5.jpg
     
    Re: Winchester Pre 64 Heavy Tac Build

    Chad , not asking for numbers but it sure seems like alot of time ahnd effort on your part has gone into this stock with a total refill and inlet.
    It would seem to me that all your time would cost alot more than what a new stock would run?

    Is it realy worth the cost and effort to "rebuild" a stock as opposed to just trying to sell one and order a new one?
     
    Re: Winchester Pre 64 Heavy Tac Build

    Honestly, it's not an issue with me. The customer wanted this stock so I'm making it work. Custom guns (to me anyway) doesn't mean a box of parts slapped together. I'm so used to doing stuff this way it's second nature now. I've built a great many "franken guns" where actions/stocks were never meant to go together. Where there's a will there's a way. The most psychotic to date was this bugger:

    Nesika Model R in 6mmBR fitted to an Anschutz 2013 alloy position rifle stock. Bedded and everything. Getting resin to stick to aluminum in a permanent fashion is tough to do. I was successful with this one though. Just don't ask what the epoxy cost or what it probably did to my liver.

    MartyWaters300MNesikaCropped.jpg


    Now that I have the baseline programming sorted out I'll be able to run an infinite number of Winchester actions much, much faster.

    The first one is always the biche.

    C


    PS:

    You live in Slidell? My best friend David Karcher is from there. He's a hell of a shooter. 2002 National Champion (SR) and has been on the Palma team. Federal agent guy now chasing delinquent Navy guys who beat on their wives/kids.

    If you ever run into him at a range he's a hell of a good chit.

    C

     
    Re: Winchester Pre 64 Heavy Tac Build

    <div class="ubbcode-block"><div class="ubbcode-header">Originally Posted By: css</div><div class="ubbcode-body">I've got to ask, what is the good looking wood stock sitting on the bench a few post up? Just some left over from another project? </div></div>


    That's my palma rifle stock. Nesika K action in 308, English walnut with the Nesika part inlayed in Pewter. (don't evah want to do that again!)

    This thing is a bling rifle.

    Nesika K action
    Chanlynn barrel in 308 Bisley
    Grunig/Elmiger FT300 trigger
    Sunny Hill SS trigger guard
    My rail setup
    Warner buttplate
    Warner Palma rear sight
    My ladder front sight
    My adjustable cheek hardware.

    I've owned the dumb thing 7+ years and it has less than 100 rounds through it. Just sits around getting beat up now. I need to put it back together and start shooting again.

    Someday. You all keep me cooped up in the shop!
    smile.gif
    (not complaining at all)

    Here she is all decked out:

    DSC_0049.jpg


    laddersight.jpg


    MyPALMA.jpg


    Here's another one I'll be starting on before too long.

    Kyle Leibertrau's Palma Gun. Getting all sorted out for Worlds this fall in Australia. New paint, some minor changes, and a new barrel. I sponsor Kyle by building his rifles for him and catoring to his whining. (kidding) He's a good kid and makes me look good.

    DSC_0009-4.jpg
     
    Re: Winchester Pre 64 Heavy Tac Build

    Sir, I want to come and work for you. I've seen a lot of wannabees that wish they had your skills, and commitment to quality & craftsmanship, but you are an artist.
     
    Re: Winchester Pre 64 Heavy Tac Build

    I'll come sweep your floors for free...as long as you don't mind me leaning on my broom watching most of the day.

    Love the way you can see the "CE" code stamp from the reciever captured in the bedding.

    ZY
     
    Re: Winchester Pre 64 Heavy Tac Build

    <div class="ubbcode-block"><div class="ubbcode-header">Originally Posted By: ZY100</div><div class="ubbcode-body">I'll come sweep your floors for free...as long as you don't mind me leaning on my broom watching most of the day.

    Love the way you can see the "CE" code stamp from the reciever captured in the bedding.

    ZY </div></div>


    Well in that case where the hell were you yesterday around 4pm? (snicker)


    Gave the shop an "ethnic cleansing". Soon as the weather thaws out I'm gutting this place to wax the floors again.


    Here's my little bat cave:

    DSC_0001-3.jpg
     
    Re: Winchester Pre 64 Heavy Tac Build

    The building is finished. I believe its just a bit of paint work left.

    Part of my business is manufacturing vintage motorcycle parts for a mail order/bike building company. (Competition Distributing Sturgis SD)

    The building actually belongs to "the ol man". Were not exactly sure what were going to do long term with that. Lots of ideas being kicked around. So we'll have to see.

    Someday I'd like to be in my own little bat cave, but it's too early yet. I'll need to get a few more guns in/out of here before I can take that plunge.
     
    Re: Winchester Pre 64 Heavy Tac Build

    <div class="ubbcode-block"><div class="ubbcode-header">Originally Posted By: C. Dixon</div><div class="ubbcode-body">Honestly, it's not an issue with me. The customer wanted this stock so I'm making it work. Custom guns (to me anyway) doesn't mean a box of parts slapped together. I'm so used to doing stuff this way it's second nature now. I've built a great many "franken guns" where actions/stocks were never meant to go together. Where there's a will there's a way. The most psychotic to date was this bugger:

    Nesika Model R in 6mmBR fitted to an Anschutz 2013 alloy position rifle stock. Bedded and everything. Getting resin to stick to aluminum in a permanent fashion is tough to do. I was successful with this one though. Just don't ask what the epoxy cost or <span style="font-weight: bold">what it probably did to my liver.</span>


    </div></div>

    You aren't supposed to drink it bro...
     
    Re: Winchester Pre 64 Heavy Tac Build

    This thread really makes you appreciate the craftsmanship that goes into building a gun, now I wont complain when I drop the $ I will drop. These things take a while to build!