Alright so let me preface this by saying that this is my first rifle and my first bedding job ... basically a bunch of firsts. Some things I have going for me is that I am not afraid of stuff like this, and I am decently mechanically inclined. I hope to share some of the things that were hurdles and a basic overview of what happened.
I have a Remington 700 SPS-V which is the 26" heavy barreled version. I have one of the new ones with the new X-Mark Pro trigger with the external set screw. I was able to set it to 3 pounds however it won't go any lower.
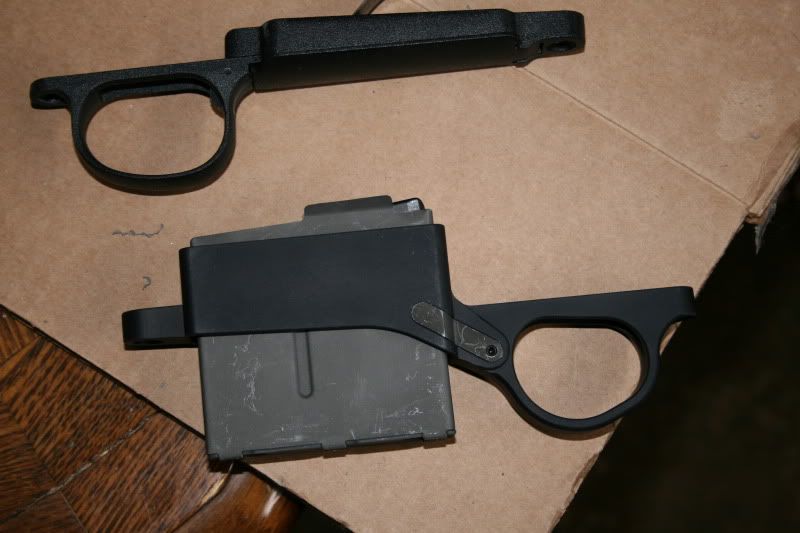
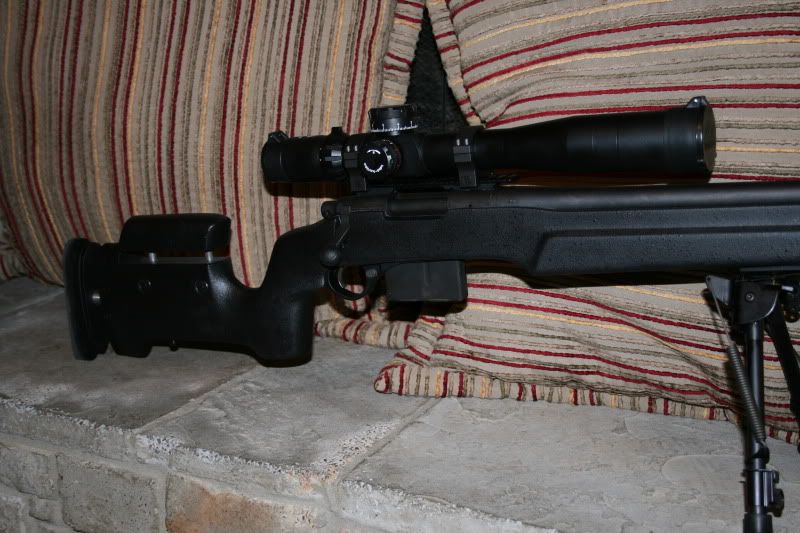
So first things first we check out the sweet detachable mag system from Glen over at Seekins Precision. I have to say that while i'm no expert this thing is freeking stout and very high quality. The only odity I see is that the bottom metal comes a very high quality and pretty scratch resistant anodized black, yet the magazines are more of a greenish drab color.
Below you can see the differences in colors and sizes when compared to the stock bottom metal. Note that nothing is scratched there on the mags or anything that is actually probably fingernail scuff marks where the coating was harder then the nail.
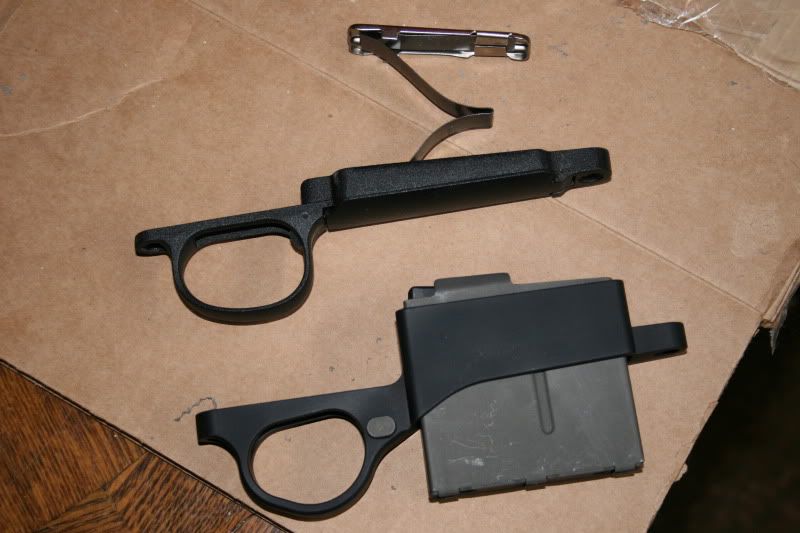
Here we can see the crazy tight tolerances between the mag and the mag well. I can say from experience that those suckers are tight, it gets even tighter when you spray them black
 . With the rubberized spray paint 1.5 coats the mag won't drop free when it isn't full of rounds. Then again I havn't worked them a bunch yet so that is to be expected.
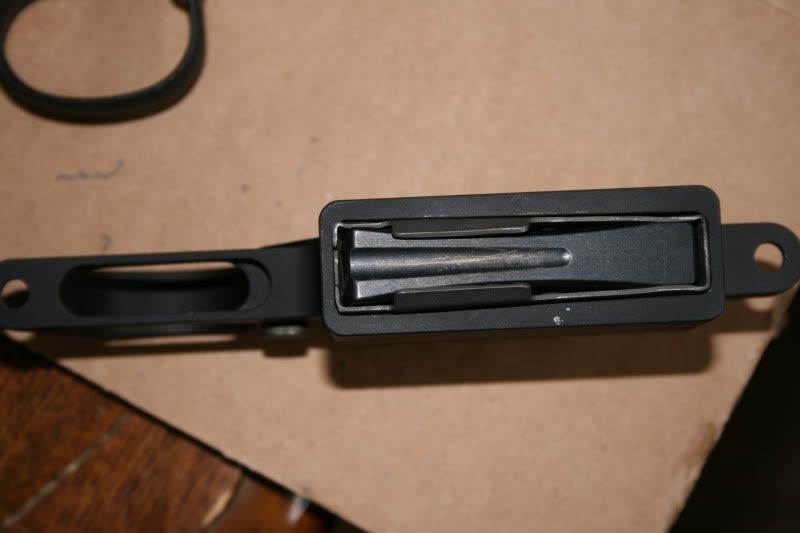
Now here is where the fun stuff starts happening. In order to get the mag system to fit in the stock some milling is needed. It can be done with a dremmel and drill press (as I have just done it) but I would like to state for the record that this is a pain in the ass and is by no means the best and most efficient way to do this
 The longest part of this process was creating the clearance for the mag system.
I can say from certainty that this sucker has a solid Aluminum block. I just need some iron oxide and I could probably make some thermite with all the leftover chips
 The little holes and stuff you see around was me making room for a bond for the glassbed to adhere to.
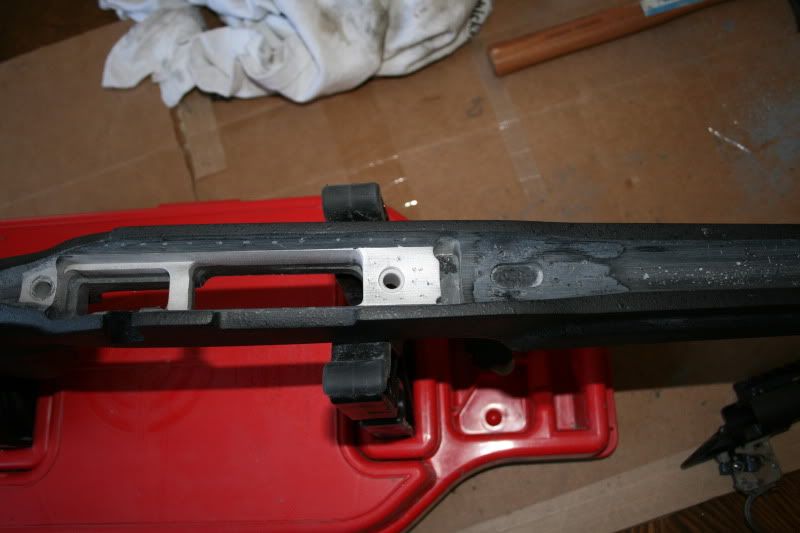
I got a couple carbide bits to use for the dremmel in the beginning to remove the metal.
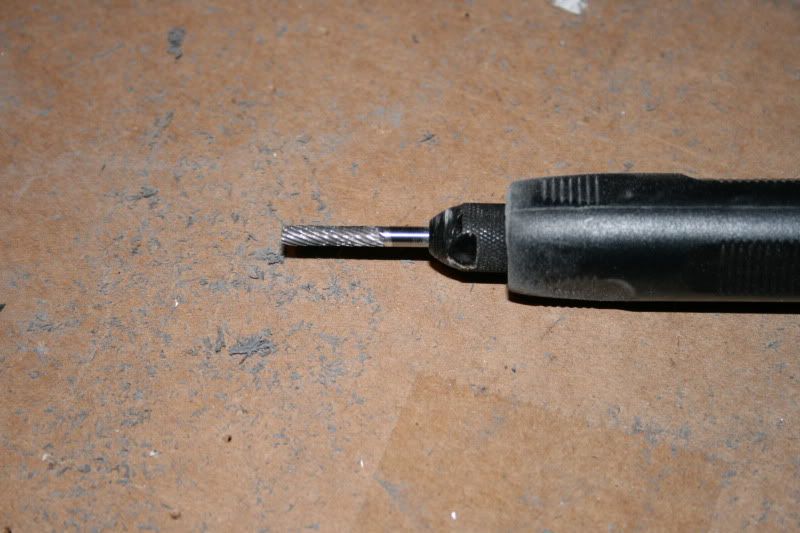
I then decided that wasn't working well enough and went out an got one of these
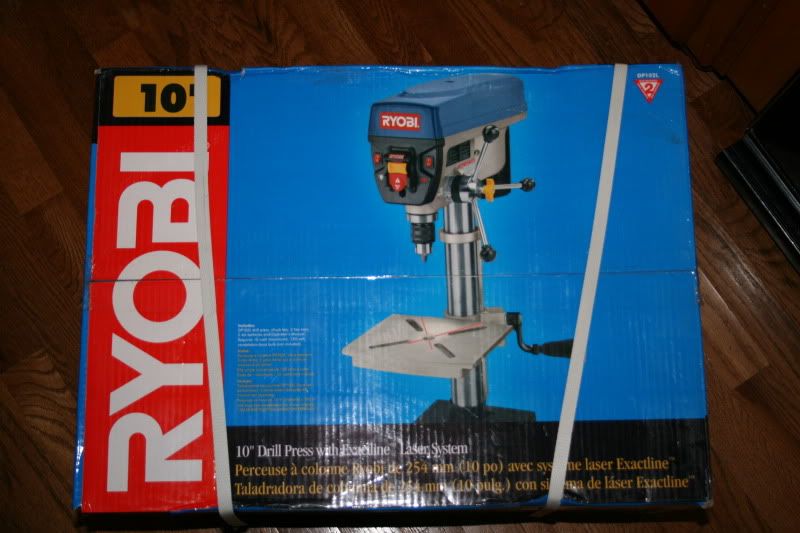
It wasn't all that much better for removing the metal however it was much more consistent and allowed for a smoother ground surface. I basically used a titanium tipped drill bit and side ground the walls down. I didn't "press" cut / drill the sides down as I didn't trust the consistency. In the end I used both bits for the dremmel and the press to remove the metal. If you are going to do it this way you want to get a carbide cutter with big teeth grind down the surface the fastest. I looked for milling bits for the press however I was unable to really find any locally that didn't cost over 100 bucks for one bit.
At this point I started to get in over my head a bit because the rear pillar on the B & C stock was about 1.25" and I needed to get to 1.07 or so as per Glen's instructions. Without this the clips feed up through but fall about half an inch short of the action and wouldn't be effective. So I used the press to grind down the pillar and the area surrounding it so that the proper depth was achieved.
Here we are set with a test fit.
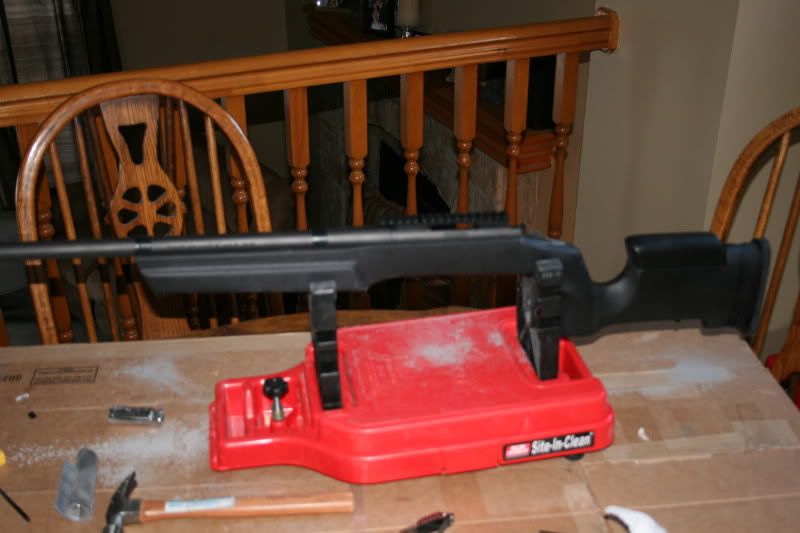
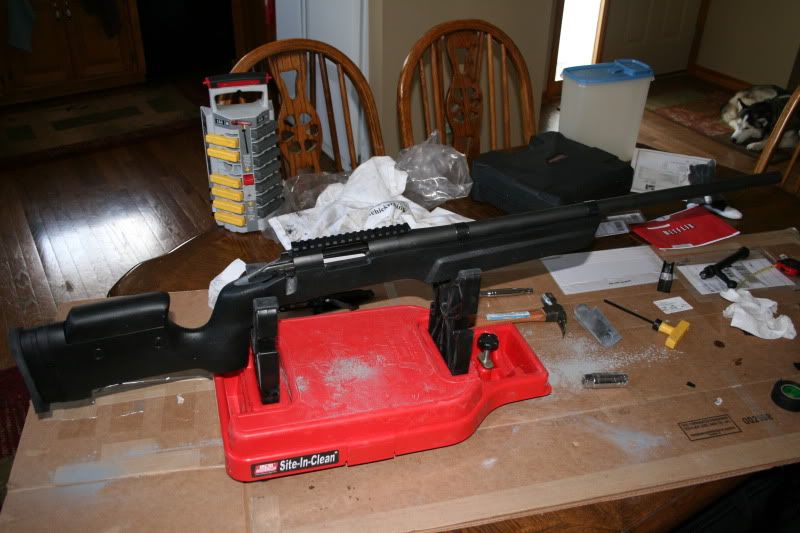
The netflix envelope was used to help measure the free float spacing. We are getting ready to move down to Dallas so my kitchen table was my work table. One of my helpers was over on the rug
 I believe both of them may have made an appearance in the pictures.
At this point it is pretty much a straight forward tape and glassbed procedure so I didn't take any pictures. I reserved the right not to take any pictures of the inside post glassbed because it looked like a hooker at the end of free Tuesday. The bed was consistent without any pockets or pits but I got way too much down in the mag and trigger cavities and so I had to do a bit of cleaning and by the time I was done I wasn't wanting to bust out the camera.
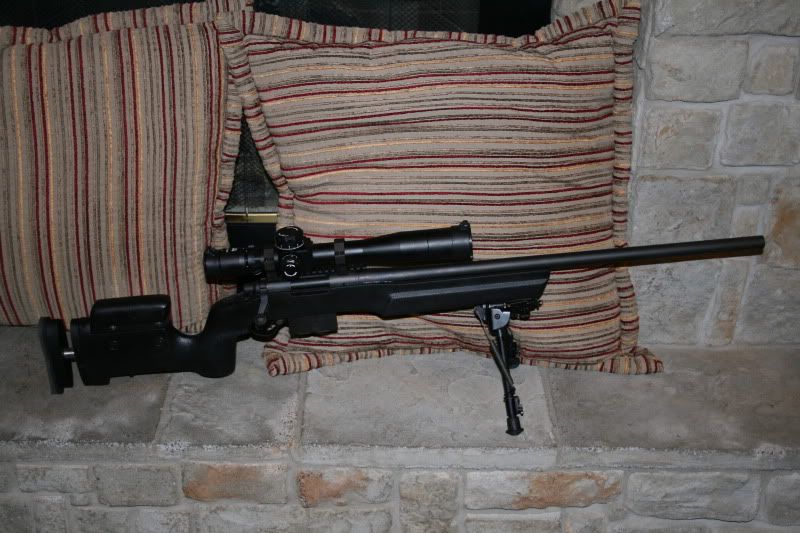
Here we have the finished product. For those who will no doubt ask here is the run down...
Rem 700 SPS-V
Seekin's 20 MOA base
Valdada IOR 3-18x42 Gen4 SH edition FFP scope MP-8 (I believe) Mil / Mil
Harris bipod
Both base an scope came from liberty optics and they kick ass
 very helpful and fast.
I also have a sling one of those Butler Creek quick sling things, I really have no idea how to use it effectively so I may end up getting a proper one.
Here is the final product
So hopefully some people found this somewhat helpful and informative. I searched for quite a while to see if anybody had successfully mated a badger system or seekins system to the B & C stocks and couldn't find anything helpful. So it can be done just requires a bit of work. I would say that you should have a competent smith do it unless you are a tinkerer like me as it can be involved without the proper tools. You have to remove quite a bit of aluminum to get that sucker in so you will need something adept at hogging out aluminum. It took me probably around 6 or 7 hours all told just removing aluminum. Once I got to the part where I had to decrease the length of that rear pillar I tried finding a gunsmith around here who could do it and the answers I got were "we don't really do rifle work anymore" or sure we can do it but it will probably take about a month. I couldn't afford to wait that long as I move down to Dallas on the 14th and have my pig hunt on the 19th.
I hope you guys found it somewhat helpful or at least a decent waste of your time
 . Thanks for all the information I referenced in the creation of this project / build.
I have always been interested in long range precision shooting and tried my best to stay out of yet another expensive hobby however after my brother gave me two month's notice for the pig hunt I basically spent a day researching the platform and went out to buy the gun. I origionally had a leupold VX-3L mated to the rifle however I wasn't a big fan of the scope or features so after about 200 or so rounds traded in for the IOR and I have to say its sweet, I am looking forward to putting everything through their paces.
I have a Remington 700 SPS-V which is the 26" heavy barreled version. I have one of the new ones with the new X-Mark Pro trigger with the external set screw. I was able to set it to 3 pounds however it won't go any lower.
So first things first we check out the sweet detachable mag system from Glen over at Seekins Precision. I have to say that while i'm no expert this thing is freeking stout and very high quality. The only odity I see is that the bottom metal comes a very high quality and pretty scratch resistant anodized black, yet the magazines are more of a greenish drab color.
Below you can see the differences in colors and sizes when compared to the stock bottom metal. Note that nothing is scratched there on the mags or anything that is actually probably fingernail scuff marks where the coating was harder then the nail.


Here we can see the crazy tight tolerances between the mag and the mag well. I can say from experience that those suckers are tight, it gets even tighter when you spray them black


Now here is where the fun stuff starts happening. In order to get the mag system to fit in the stock some milling is needed. It can be done with a dremmel and drill press (as I have just done it) but I would like to state for the record that this is a pain in the ass and is by no means the best and most efficient way to do this

I can say from certainty that this sucker has a solid Aluminum block. I just need some iron oxide and I could probably make some thermite with all the leftover chips


I got a couple carbide bits to use for the dremmel in the beginning to remove the metal.

I then decided that wasn't working well enough and went out an got one of these

It wasn't all that much better for removing the metal however it was much more consistent and allowed for a smoother ground surface. I basically used a titanium tipped drill bit and side ground the walls down. I didn't "press" cut / drill the sides down as I didn't trust the consistency. In the end I used both bits for the dremmel and the press to remove the metal. If you are going to do it this way you want to get a carbide cutter with big teeth grind down the surface the fastest. I looked for milling bits for the press however I was unable to really find any locally that didn't cost over 100 bucks for one bit.
At this point I started to get in over my head a bit because the rear pillar on the B & C stock was about 1.25" and I needed to get to 1.07 or so as per Glen's instructions. Without this the clips feed up through but fall about half an inch short of the action and wouldn't be effective. So I used the press to grind down the pillar and the area surrounding it so that the proper depth was achieved.
Here we are set with a test fit.


The netflix envelope was used to help measure the free float spacing. We are getting ready to move down to Dallas so my kitchen table was my work table. One of my helpers was over on the rug

At this point it is pretty much a straight forward tape and glassbed procedure so I didn't take any pictures. I reserved the right not to take any pictures of the inside post glassbed because it looked like a hooker at the end of free Tuesday. The bed was consistent without any pockets or pits but I got way too much down in the mag and trigger cavities and so I had to do a bit of cleaning and by the time I was done I wasn't wanting to bust out the camera.
Here we have the finished product. For those who will no doubt ask here is the run down...
Rem 700 SPS-V
Seekin's 20 MOA base
Valdada IOR 3-18x42 Gen4 SH edition FFP scope MP-8 (I believe) Mil / Mil
Harris bipod
Both base an scope came from liberty optics and they kick ass

I also have a sling one of those Butler Creek quick sling things, I really have no idea how to use it effectively so I may end up getting a proper one.
Here is the final product


So hopefully some people found this somewhat helpful and informative. I searched for quite a while to see if anybody had successfully mated a badger system or seekins system to the B & C stocks and couldn't find anything helpful. So it can be done just requires a bit of work. I would say that you should have a competent smith do it unless you are a tinkerer like me as it can be involved without the proper tools. You have to remove quite a bit of aluminum to get that sucker in so you will need something adept at hogging out aluminum. It took me probably around 6 or 7 hours all told just removing aluminum. Once I got to the part where I had to decrease the length of that rear pillar I tried finding a gunsmith around here who could do it and the answers I got were "we don't really do rifle work anymore" or sure we can do it but it will probably take about a month. I couldn't afford to wait that long as I move down to Dallas on the 14th and have my pig hunt on the 19th.
I hope you guys found it somewhat helpful or at least a decent waste of your time

I have always been interested in long range precision shooting and tried my best to stay out of yet another expensive hobby however after my brother gave me two month's notice for the pig hunt I basically spent a day researching the platform and went out to buy the gun. I origionally had a leupold VX-3L mated to the rifle however I wasn't a big fan of the scope or features so after about 200 or so rounds traded in for the IOR and I have to say its sweet, I am looking forward to putting everything through their paces.


