Ok, so after searching high and low for info on bedding AR15's and AR10/LR308's I decided to do my own post/review. I know there is alot of talk about it not helping the accuracy. This was not really for accuracy. I like my rifle to be tight and solid feeling. It is a personal thing. I have a touch of OCD when it comes to this. I understand that it probably will not help accuracy.
So after searching here I read somewhere that it is better to bed the upper action so that the lower can be used with multiple upper actions with out issues. That seemed very smart to me. For this post/review I will be bedding a Bushmaster (made by DPMS) LR308 ORC.
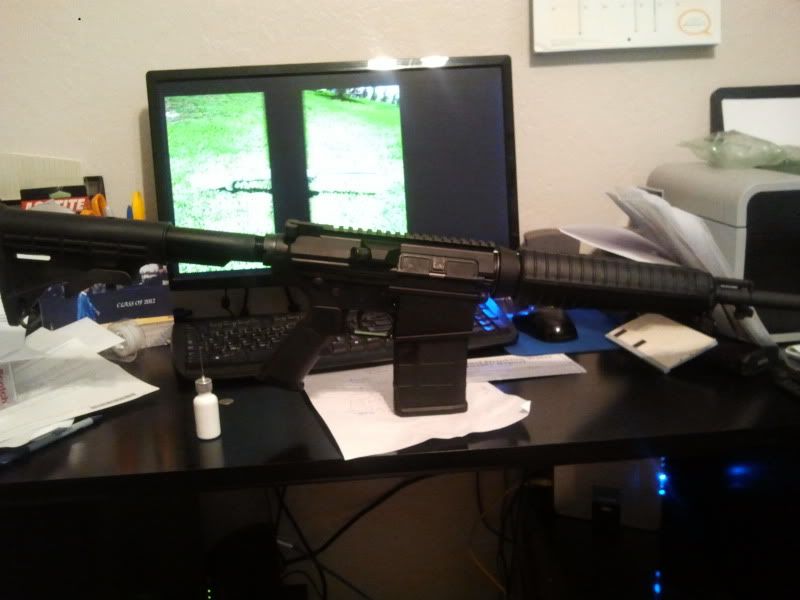
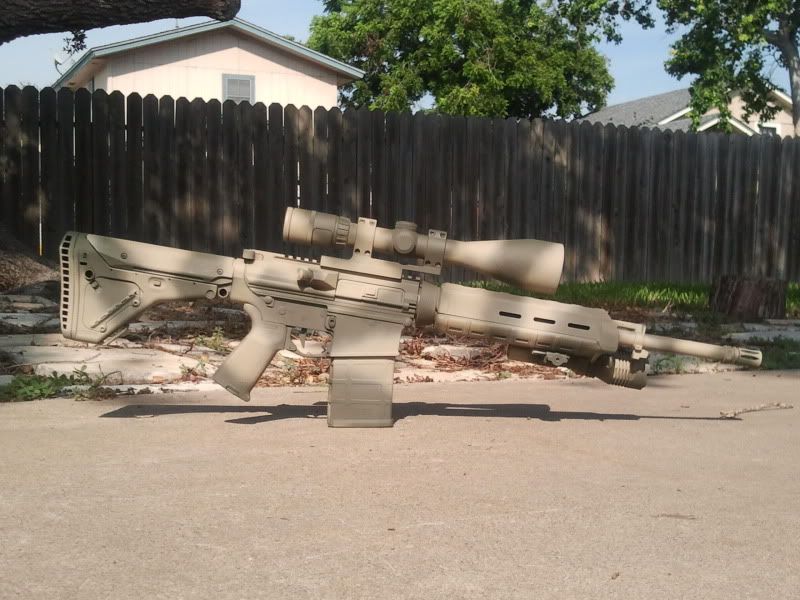
Before doing this mod I had already changed some things on the rifle. Mods are as follows
Trijicon 2.5-10X56
LaRue Mount
Magpul UBR stock
Magpul Moe forearm
Magpul Moe grip and winter trigger guard
Geissele SDE 3.5lbs trigger
Tubbs BCG carrier weight sys
Tubbs SSS flat wire spring

1. I took the upper and lower and cleaned them both. I removed the BCG and the charging handle.
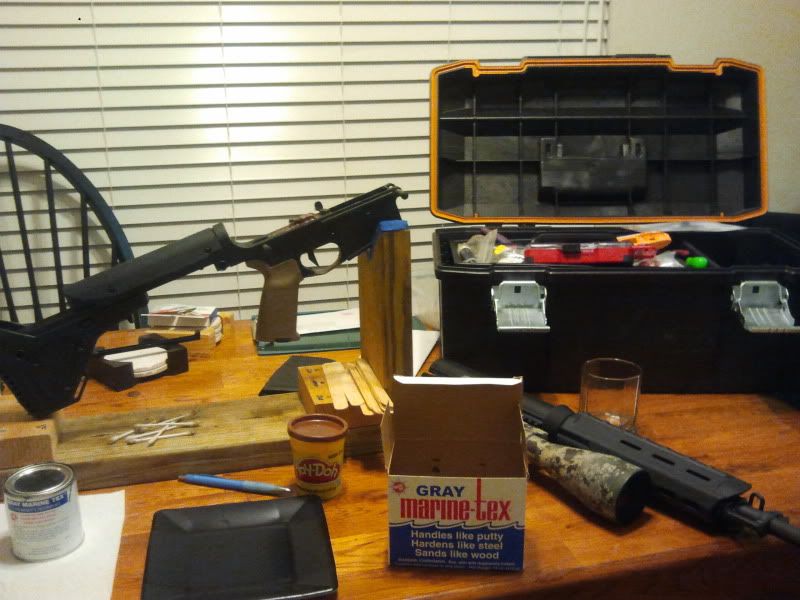
2. I got some play-doh and covered the firing control group and the safety, leaving only the small but over sized area where the rear lug would go.
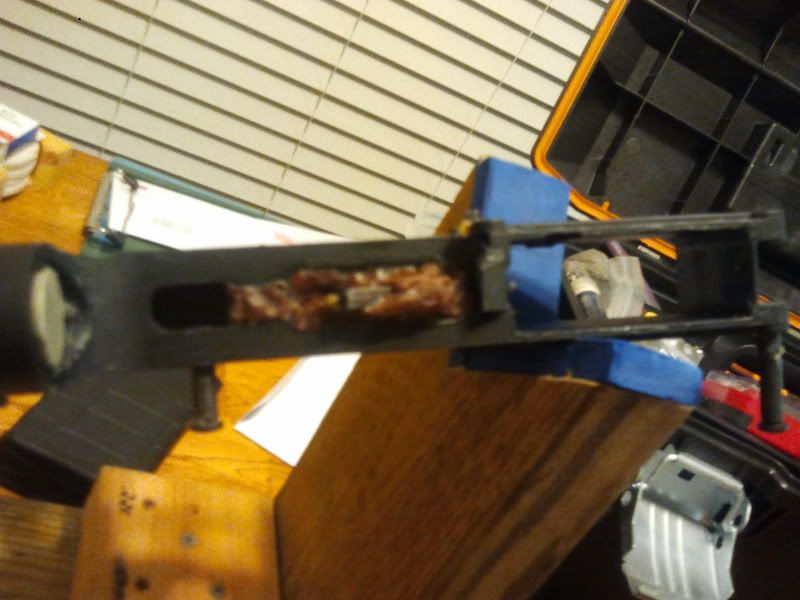
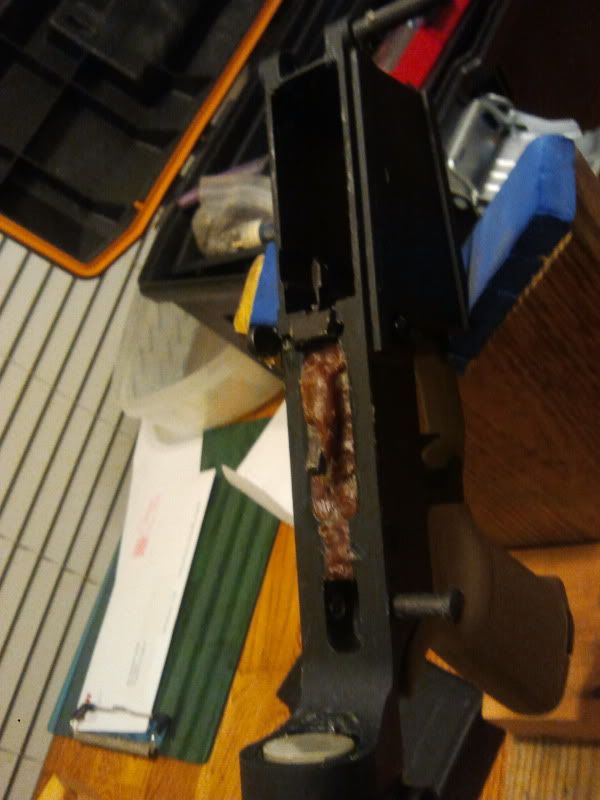
3. I took the lower action and applied a copious amount of Johnson's paste wax to every area I thought that might get contacted by the marine-tex, even over the play-doh areas. Refer to the above pictures.
This rifle is a new Bushmaster (made by DPMS) LR308 ORC. The 308's are designed in a way that gives a lot of area to put bedding on without needing it to go down around the rear lug. I was getting some sideways shift so I decided to do the rear lug area as well as the flats on the lower/upper.
I put some wax in the rear and front lug pin holes, the outside edges of the both the lower and upper to prevent the marine-tex from sticking to the metal. Basically anywhere you think that you do not want the bedding put wax there.
4. I mixed the marine-tex bedding 5 to 1 ratio and then put it on the upper on the flats (bottom side where it meets the lower receiver) and around the rear lug area and a small amount on the front lug area for shits and gig's. I did not take pictures of this because I did not think about it. I put enough on the flats but was a little short on the rear lug area. Not to short on the rear lug but it could have used more on the sides and the bottom to get a complete fill. I was afraid of it getting up into the buffer tube threads when squeezed together. The bedding went all the way up to the threads of the buffer tube but not into it. I think that had more to do with putting it on the sides/flats then in the lug area.
5. I wanted to make sure that the gap I had felt in the lower/upper fit was filled with bedding so I basically let the lower hand off the upper action when assembled and curing. Make sure not to slam the upper/lower closed when putting them together or it will squeeze out all of the bedding.
Notice the high speed set up I have. Yes state of the art mechanics. Very high speed low drag shit here, only for the advanced.
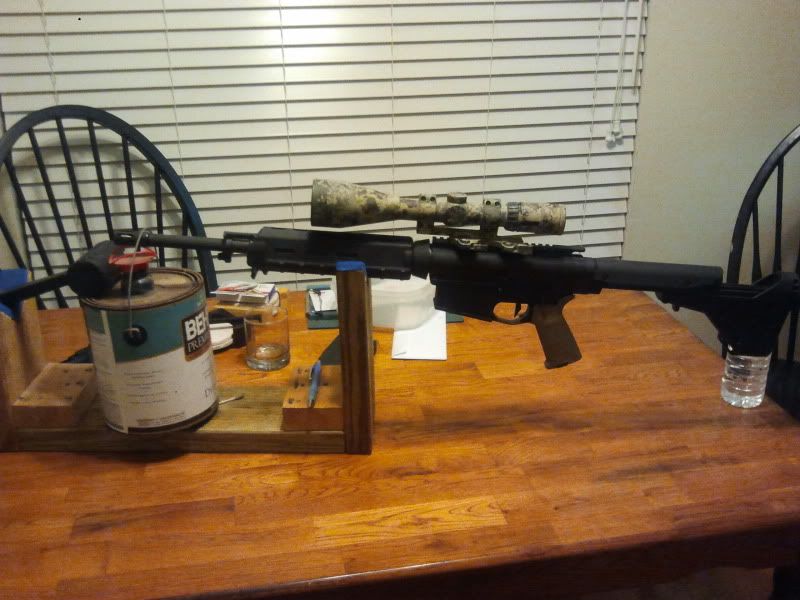
I then I took a million Q-tips and soaked them in WD-40 and started to clean off the excess bedding that had run out of the sides. This process is easy just take your time and use as many q-tips as you need they are cheap. I think that this process also helps push some of the bedding back into the gaps to make sure they are filled. Again no pictures, sorry I know this review is starting to suck ( cause if when I read reviews I want pictures!!)
6. I waited until the left over bedding in the paper plate I used was hard (approx 5 hours) before I attempted to separate the upper from the lower. I was scared that the pins would not come out (remember the copious amounts of wax?) but they came right out. The upper/lower did not come apart right away so I took the barrel in one hand and the stock in the other and hit it on my thigh like I was breaking a stick and it came right apart (on the second try). I then placed the upper on my high-end custom rifle fixture and let it finish curing until morning before re-assembling it.
Here are some pics of the final finish.
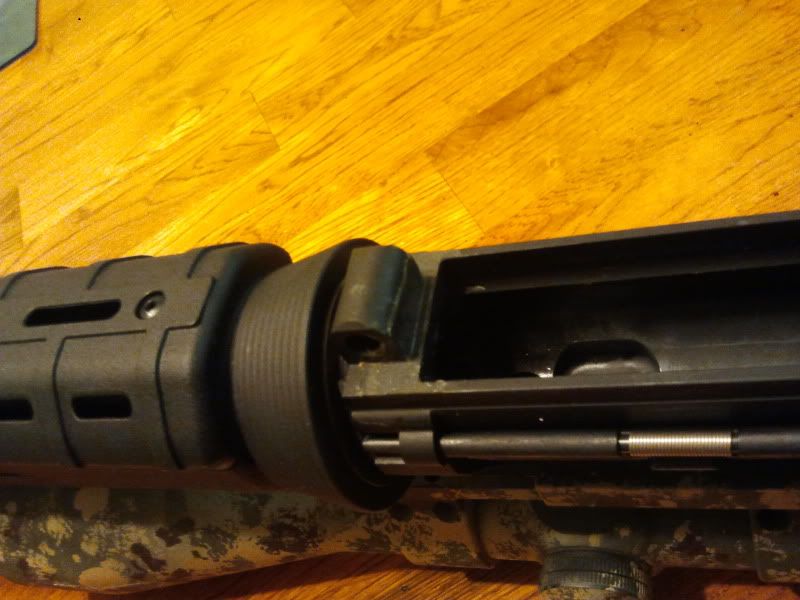
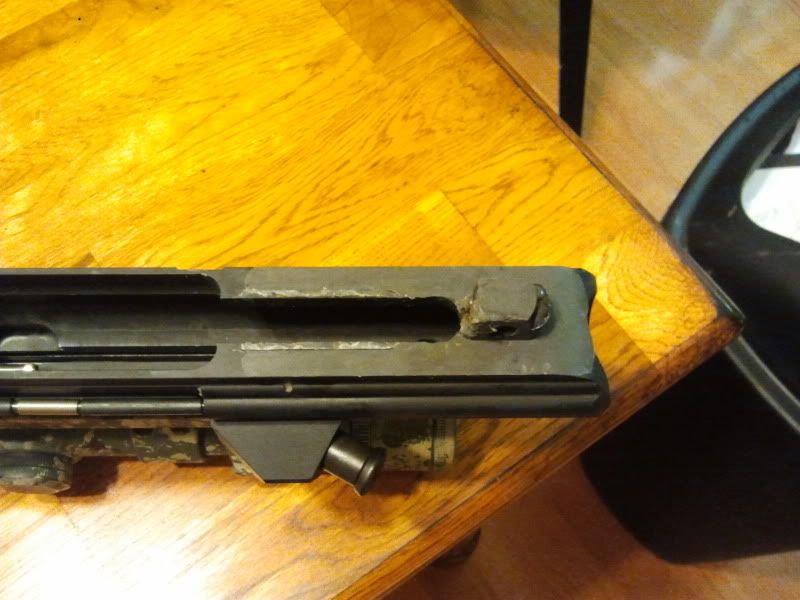
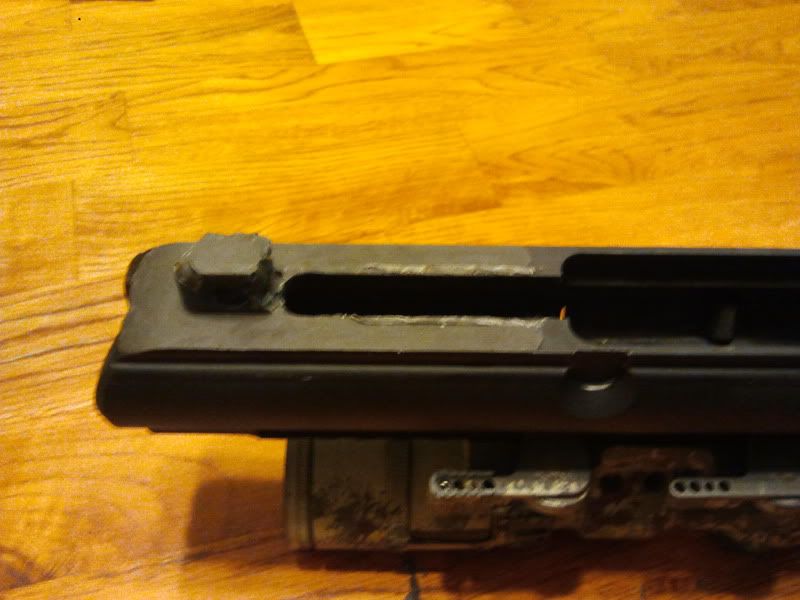
I truly am sorry about the cell phone pics, I was just sending them out to some buds when I had the thought of doing a review type post. I will update the post with pics and a review of how the rifle shoots after it. There have been many mods done at the same time so I will not be able to say that the bedding was the key to accuracy. I can definitely tell you that after feeling it with the bedding it feels like a different rifle to me, it feels well built. Like I said I am picky about the fit on rifles regardless of the accuracy. Over all this was a very easy job. I will definitely do it again when needed.
<span style="text-decoration: underline"><span style="font-weight: bold">When I do this again I would put the bedding inside the lower for the rear lug, instead of globing it on the rear lug itself of the upper. I would still put the bedding on the flats of the upper where it meets the lower. Globing the bedding on the rear lug is hit or miss if you get enough on there or in the right place to work. That's one of the things I'd change about this process. The other would be to scuff the surface of the upper where the bedding is going. The bedding is not peeling off nor do I think it will but scuffing it would insure that didn't happen.</span></span>
Here is the last crappy cell phone pic of the post.
So after searching here I read somewhere that it is better to bed the upper action so that the lower can be used with multiple upper actions with out issues. That seemed very smart to me. For this post/review I will be bedding a Bushmaster (made by DPMS) LR308 ORC.

Before doing this mod I had already changed some things on the rifle. Mods are as follows
Trijicon 2.5-10X56
LaRue Mount
Magpul UBR stock
Magpul Moe forearm
Magpul Moe grip and winter trigger guard
Geissele SDE 3.5lbs trigger
Tubbs BCG carrier weight sys
Tubbs SSS flat wire spring

1. I took the upper and lower and cleaned them both. I removed the BCG and the charging handle.

2. I got some play-doh and covered the firing control group and the safety, leaving only the small but over sized area where the rear lug would go.


3. I took the lower action and applied a copious amount of Johnson's paste wax to every area I thought that might get contacted by the marine-tex, even over the play-doh areas. Refer to the above pictures.
This rifle is a new Bushmaster (made by DPMS) LR308 ORC. The 308's are designed in a way that gives a lot of area to put bedding on without needing it to go down around the rear lug. I was getting some sideways shift so I decided to do the rear lug area as well as the flats on the lower/upper.
I put some wax in the rear and front lug pin holes, the outside edges of the both the lower and upper to prevent the marine-tex from sticking to the metal. Basically anywhere you think that you do not want the bedding put wax there.
4. I mixed the marine-tex bedding 5 to 1 ratio and then put it on the upper on the flats (bottom side where it meets the lower receiver) and around the rear lug area and a small amount on the front lug area for shits and gig's. I did not take pictures of this because I did not think about it. I put enough on the flats but was a little short on the rear lug area. Not to short on the rear lug but it could have used more on the sides and the bottom to get a complete fill. I was afraid of it getting up into the buffer tube threads when squeezed together. The bedding went all the way up to the threads of the buffer tube but not into it. I think that had more to do with putting it on the sides/flats then in the lug area.
5. I wanted to make sure that the gap I had felt in the lower/upper fit was filled with bedding so I basically let the lower hand off the upper action when assembled and curing. Make sure not to slam the upper/lower closed when putting them together or it will squeeze out all of the bedding.
Notice the high speed set up I have. Yes state of the art mechanics. Very high speed low drag shit here, only for the advanced.

I then I took a million Q-tips and soaked them in WD-40 and started to clean off the excess bedding that had run out of the sides. This process is easy just take your time and use as many q-tips as you need they are cheap. I think that this process also helps push some of the bedding back into the gaps to make sure they are filled. Again no pictures, sorry I know this review is starting to suck ( cause if when I read reviews I want pictures!!)
6. I waited until the left over bedding in the paper plate I used was hard (approx 5 hours) before I attempted to separate the upper from the lower. I was scared that the pins would not come out (remember the copious amounts of wax?) but they came right out. The upper/lower did not come apart right away so I took the barrel in one hand and the stock in the other and hit it on my thigh like I was breaking a stick and it came right apart (on the second try). I then placed the upper on my high-end custom rifle fixture and let it finish curing until morning before re-assembling it.
Here are some pics of the final finish.


I truly am sorry about the cell phone pics, I was just sending them out to some buds when I had the thought of doing a review type post. I will update the post with pics and a review of how the rifle shoots after it. There have been many mods done at the same time so I will not be able to say that the bedding was the key to accuracy. I can definitely tell you that after feeling it with the bedding it feels like a different rifle to me, it feels well built. Like I said I am picky about the fit on rifles regardless of the accuracy. Over all this was a very easy job. I will definitely do it again when needed.
<span style="text-decoration: underline"><span style="font-weight: bold">When I do this again I would put the bedding inside the lower for the rear lug, instead of globing it on the rear lug itself of the upper. I would still put the bedding on the flats of the upper where it meets the lower. Globing the bedding on the rear lug is hit or miss if you get enough on there or in the right place to work. That's one of the things I'd change about this process. The other would be to scuff the surface of the upper where the bedding is going. The bedding is not peeling off nor do I think it will but scuffing it would insure that didn't happen.</span></span>
Here is the last crappy cell phone pic of the post.


