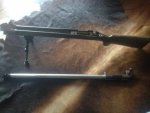
So this is my first truly thought out long range system. Here are the components-
Lock and Barrel:
Blueprinted Rem 700 SA
Bartlein #9 26" stainless barrel chambered in 6.5 LRP
Threaded muzzle break
Harris BiPod
Badger Ord 20MOA full base
Optics:
Zeiss 6.5-20x50mm optic
UTG heavy duty rings (I'll explain)
Butler Creek Lens caps
Zeiss sunshade
Vortex scope level
Stock:
Donor HS Precision hunting stock
36" x 1/2" aluminum round stock
3x brass fittings 1/2" I.D.
1x 5/16" stainless cap screw
1x 5/16" T Nut
Lots of Resin, glass, and epoxy
And a whole lotta texas.

Step 1: Clearancing.
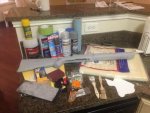
The #9 barrel was WAY too big for the barrel channel in the stock, so that was ground out with a cutting wheel on a dremel being pulled slowly length wise, then lots of hand finish sanding with a 1" dowel rod wrapped in 120 grit.
The recoil lug is massive, that wouldn't fit in the stock either.... to the Mill!
Step 2: non-bedding related stock modifications
I wanted an adjustable comb/cheek riser because so does everyone else and I don't have original thoughts.
But then I had an original thought.
Instead of taking a bandsaw to the stock and cutting out the comb area to put on adjusting pillars, I decided to make my own cheek rest that was the shape of texas.
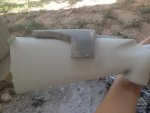
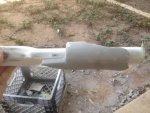
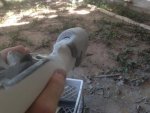
As you can see, the shape of the state could not be more perfect. The bolt can come out of the back of the action all the way and is nested right in the natural notch of the NW region of the state. Perfect.
Furthermore, Texas is plenty big to rest your face on.
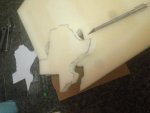
I purchased some medium density upholstery foam, and transferred my stencil onto that.
Then it got cut out.
I masked off the buttstock and applied a liberal amount of remoil as my release.
On some tin foil, I saturated the foam with resin, then transferred it into position on the buttstock.
to press the uncooperative foam down fully, I wrapped the buttstock in oiled wax paper and taped into place.

After 2 hours, it was christmas morning. I unwrapped Texas and popped it free of the stock to apply more release just in case.
Then I mixed up a cup of 1/2 bondo and 1/2 resin to make it not thick, not thin, but just Goldylocks. This porridge was applied liberally by means of a 97 cent chip brush. I thinned the bondo with resin to fill the air cavities in the hardened sponge. depending on if you have any mushy spots on the foam, you may need another coat of just resin before this step.
Lock and Barrel:
Blueprinted Rem 700 SA
Bartlein #9 26" stainless barrel chambered in 6.5 LRP
Threaded muzzle break
Harris BiPod
Badger Ord 20MOA full base
Optics:
Zeiss 6.5-20x50mm optic
UTG heavy duty rings (I'll explain)
Butler Creek Lens caps
Zeiss sunshade
Vortex scope level
Stock:
Donor HS Precision hunting stock
36" x 1/2" aluminum round stock
3x brass fittings 1/2" I.D.
1x 5/16" stainless cap screw
1x 5/16" T Nut
Lots of Resin, glass, and epoxy
And a whole lotta texas.


Step 1: Clearancing.
The #9 barrel was WAY too big for the barrel channel in the stock, so that was ground out with a cutting wheel on a dremel being pulled slowly length wise, then lots of hand finish sanding with a 1" dowel rod wrapped in 120 grit.
The recoil lug is massive, that wouldn't fit in the stock either.... to the Mill!
Step 2: non-bedding related stock modifications
I wanted an adjustable comb/cheek riser because so does everyone else and I don't have original thoughts.
But then I had an original thought.
Instead of taking a bandsaw to the stock and cutting out the comb area to put on adjusting pillars, I decided to make my own cheek rest that was the shape of texas.
As you can see, the shape of the state could not be more perfect. The bolt can come out of the back of the action all the way and is nested right in the natural notch of the NW region of the state. Perfect.
Furthermore, Texas is plenty big to rest your face on.
I purchased some medium density upholstery foam, and transferred my stencil onto that.
Then it got cut out.

I masked off the buttstock and applied a liberal amount of remoil as my release.
On some tin foil, I saturated the foam with resin, then transferred it into position on the buttstock.
to press the uncooperative foam down fully, I wrapped the buttstock in oiled wax paper and taped into place.

After 2 hours, it was christmas morning. I unwrapped Texas and popped it free of the stock to apply more release just in case.
Then I mixed up a cup of 1/2 bondo and 1/2 resin to make it not thick, not thin, but just Goldylocks. This porridge was applied liberally by means of a 97 cent chip brush. I thinned the bondo with resin to fill the air cavities in the hardened sponge. depending on if you have any mushy spots on the foam, you may need another coat of just resin before this step.

