Giraud annealing machine observations

Thank you for the update and I'm glad it's working for you. I've got basic skills when it comes to wiring soldering etc, but very interested in making this modification to my giraud. What initially drew me to this post was I'd noticed some of my pictures in this thread. Glad y'all decided to use them, lol.

Would you mind posting the link to the item(s) you bought, and just a basic run down of how you installed it all?


Sent from my iPad using Tapatalk
The pictures that I used, excluding my own, were from the Giraud website.
Did you send your pictures to Doug?
 
I live my Bench Source , no wait got it in a week set it up and have used it for a year. Will do about 500 cases an hour pretty easy. No you can't load and forget, but it's not a big deal. I have a Giraud trimmer set up for 10 diff calibers and it is a great machine and great customer service , but didn't want to wait , and very happy with my choice. Good shooting! JVON
The Bench Source annealer is also a very good well built machine but it wasn't what I was looking for.
Doug's thinking was out of the box and that is what I liked about the Giraud.
There were a few shortcomings to the machine which were brought out in this thread.
1) lack of fine adjustment to the flame
2) lack of fine adjustment to the speed control.

I think that the lack of fine flame adjustment came from the torch selected.
Let me make this clear, Doug didn't cheap out on the torch.
He chose a Goss torch which sells for nearly $50.00
The ones shown on the Bench Source machine are $12.00 BernzOmatic units.

Let's face it reloaders are tinkerers by nature and we are never satisfied with good enough.
We always want to go a step further and improve on things.
 
Last edited:
The pictures that I used, excluding my own, were from the Giraud website.
Did you send your pictures to Doug?

One of the pictures, is from my website. I took it myself. You used it to show the mounting location for a second torch. I did just get my p-meter set up and working. I think there was a problem with the motor though. The fastest it will cycle is 6.3 seconds. At setting 5 on the p-meter it stops completely. I need to reach out to Doug.
 
One of the pictures, is from my website. I took it myself. You used it to show the mounting location for a second torch. I did just get my p-meter set up and working. I think there was a problem with the motor though. The fastest it will cycle is 6.3 seconds. At setting 5 on the p-meter it stops completely. I need to reach out to Doug.

The fastest I can get mine to cycle is 7 seconds but it really doesn't matter because the best cycle time for my .308 is 10 seconds.
That's 33 minutes for 200 cartridges.
I don't even need to be standing over the machine while it works so I really couldn't care less how long it takes.
 
A bump to the top; the 20k 10-turn potentiometer that I ordered a couple weeks ago finally arrived.

Quick version... Doug should be making the machines with these potentiometers.

There is about 35 degrees of "useful" adjustment on the original potentiometer where the speed falls into the range needed for properly annealing and thus the adjustment is pretty coarse.

With the 10-turn pots there are about 3 complete turns of "useful" adjustment range allowing for much finer control. Also, the turn-counter on the knob combined with the much finer adjustment allows you to very easily and accurate dial back to a desired position & motor speed for each particular caliber.

I've found between the 10-turn pot and the regulator I can now simply use my previous torch pressure and previous potentiometer setting for each caliber and the annealer is ready to go. I still check one case with Templiaq as a sanity check but it's just that-- a check. I haven't had to do any additional adjustments.
 
Last edited:
A bump to the top; the 20k 10-turn potentiometer that I ordered a couple weeks ago finally arrived.

Quick version... Doug should be making the machines with these potentiometers.

There is about 35 degrees of "useful" adjustment on the original potentiometer where the speed falls into the range needed for properly annealing and thus the adjustment is pretty coarse.

With the 10-turn pots there are about 3 complete turns of "useful" adjustment range allowing for much finer control. Also, the turn-counter on the knob combined with the much finer adjustment allows you to very easily and accurate dial back to a desired position & motor speed for each particular caliber.

I've found between the 10-turn pot and the regulator I can now simply use my previous torch pressure and previous potentiometer setting for each caliber and the annealer is ready to go. I still check one case with Templiaq as a sanity check but it's just that-- a check. I haven't had to do any additional adjustments.

completely agree with this. I just installed the potentiometer described earlier in this thread and it works a charm. Much better than the coarse control that comes with the annealer. It takes all of 10 minutes to install. The only "bad" thing about the swap is that the new potentiometer is a little bigger and had some trouble getting the wiring cover back on without dinging up the wiring, but like I said, 10 minute job if you have basic soldering skills.
 
Nice write up.
I just got in 2K 556 cases and the Dewalt / Craftsman socket method might not be the best thing anymore.
Doing 70 or 80 308 is one thing but 2000 is another!
I gotta do something ... was leaning towards the turntable ones because of the wait.
We have done over 7k of 223 for goat shooting this way. Don't knock it.Its very therapeutic.:cool:
 
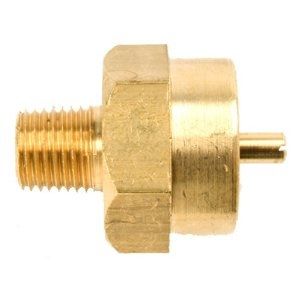
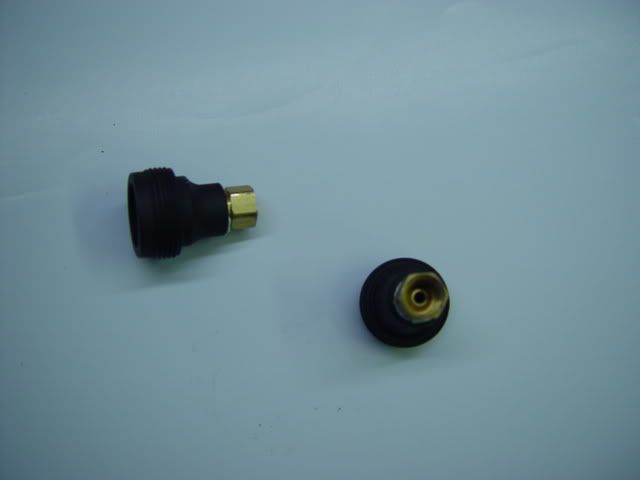
They are called Throwaway Cylinder Thread Fittings and the threading is 1"-20.
They are available in both male and female with a number of different combinations including 1/4" npt.

Mr. Heater P/N: F273754
1/4" Male Pipe Thread x 1"-20 Female Throwaway Cylinder Thread Fitting.
A71E306C-1BB8-46E1-ABA1-0FC5A51DF007-26606-00000DACB4C51B84_zpsab3f5083.jpg


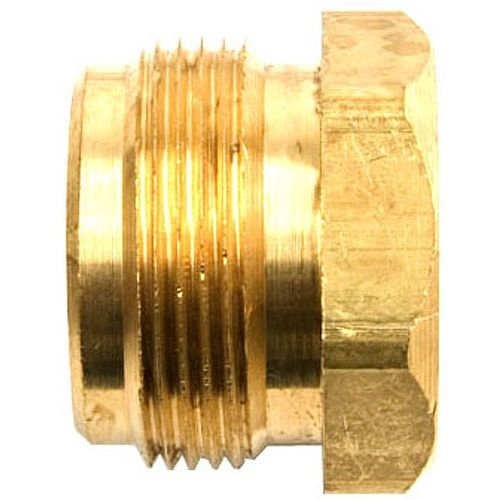
Mr. Heater P/N: F276140
1/4" Female Pipe Thread x 1"-20 Male Throwaway Cylinder Thread Fitting.
C4708D06-2CA7-4983-887E-D658BB6F020B-26606-00000DACBC0B1569_zps78c1036f.jpg

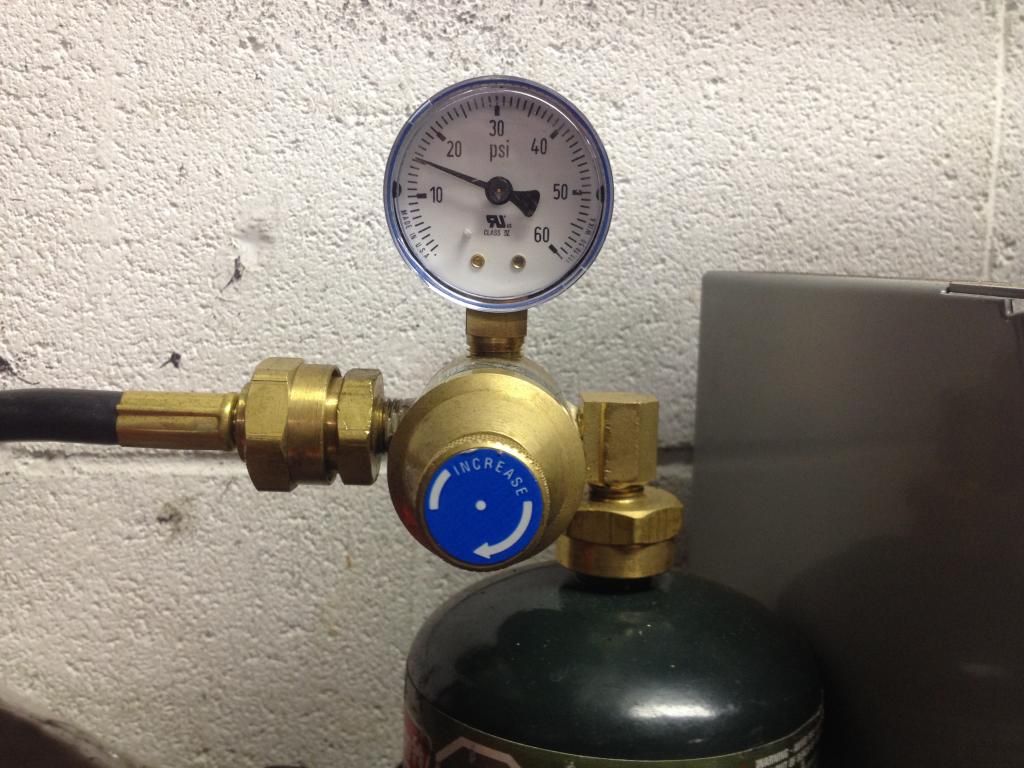
Is this how one should attach them?

39289d1401412875-giraud-annealing-machine-modifications-propane-regulator.jpg
 
Is this how one should attach them?

39289d1401412875-giraud-annealing-machine-modifications-propane-regulator.jpg
No, the opposite way. When looking at the regulator the high pressure supply (inlet) is on the right and the low pressure (outlet) is on the left.

I also added a 90 degree 1/4"NPT male/female elbow to keep the regulator right side up.
 
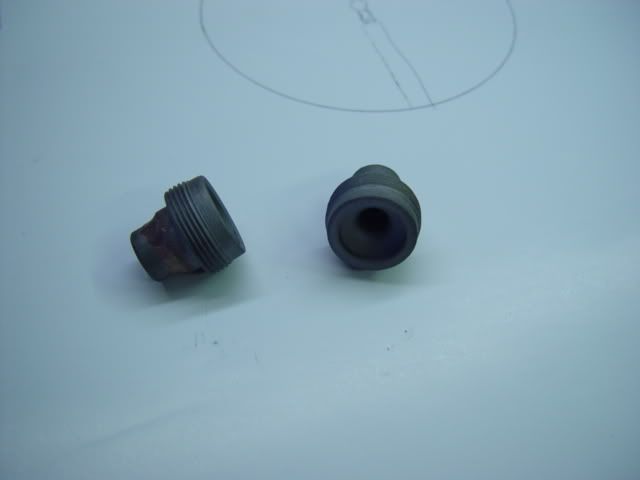
You can also get the threaded ends for the torches off of used small throwaway propane tanks. I cut them off after they are empty and I shoot a hole in them and weld 1/8" NPT fittings to them.

DSC01744.jpg


Then you can thread a regular fitting into them.

DSC01758.jpg


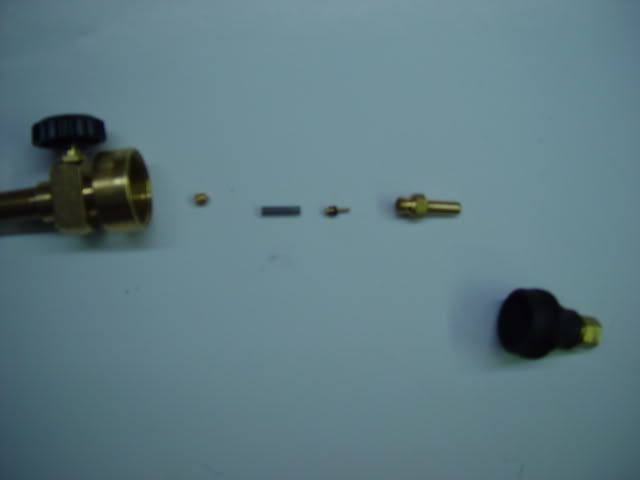
At that point you can take the checkvalve out of the torch head.

DSC01787.jpg


Then build a manifold to connect them directly to a 20 lb tank. I use QD fittings.

DSC01768.jpg
 
Last edited:
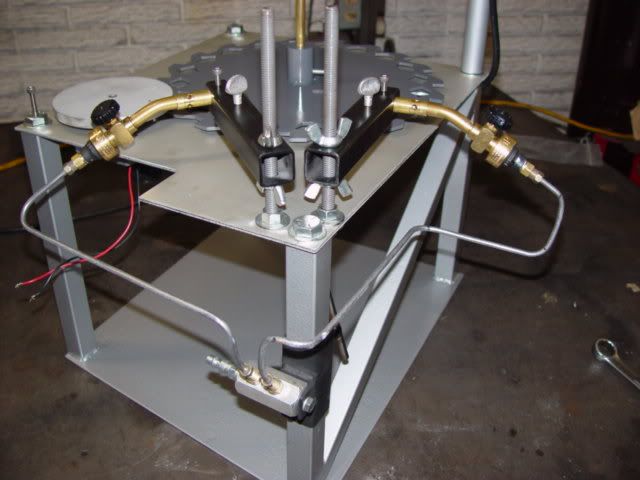
Your picture shows the issue I pointed out in my OP, that the torch tip cannot be positioned closer than 1" with the unit assembled as directed.
If you remove the torch holder form the L bracket, loosen the bolt holding the bracket to the machine, rotate the bracket 180 degrees then retighten the bolt, and reinstall the torch holder on top of the L bracket, you can get the torch much closer to the case. This will put the case neck in the hot part of the flame, a small distance from the blue inner tip of the flame.

Joe

This is a good tip, and I thank you for it. Wish I had the spatial learning/recognition skills to have come up with this myself!

Reorienting the torch as you describe achieves a bunch of benefits:

Faster cycle time, because you can get the case into the very hottest part of the flame.

The flame no longer licks over the machine itself whenever a case isn't in place on the carriage being cooked.

You no longer have to "time" when you are loading the hopper to avoid getting your hand/fingers cooked.
 
Hello -

I'm trying to figure this out. Can someone please give me a sanity check ?

I'm trying to duplicate what [MENTION=59966]Thump_rrr[/MENTION] posted in #74 above except I'd like to add an on/off valve.


My hose looks like the 'Gen2' posted earlier:
http://txbrassworks.com/wp-content/uploads/2013/11/Giraud.jpg


I think I'm going to need:

1lb 'Throwaway' Coleman Propane bottle (from WalleyWorld)

connected to:

Mr. Heater F273754 1/4" Male Pipe Thread x 1"-20 Female Throwaway Cylinder Thread Fitting
Amazon.com - Mr. Heater F273754 1/4" Male Pipe Thread x 1"-20 Female Throwaway Cylinder Thread Fitting - Mr Heater Hose

connected to:

Smith-Cooper International 8140 Series Brass Mini Ball Valve, Inline, Lever Handle, 1/4" NPT Female
Smith-Cooper International 8140 Series Brass Mini Ball Valve, Inline, Lever Handle, 1/4" NPT Female: Industrial Ball Valves: Amazon.com: Industrial & Scientific

connected to:

Dixon Valve & Coupling SE2F2M Extruded Brass Pipe and Welding Fitting, 90 Degree Street Elbow, 1/4" NPTF Female x 1/4" NPTF Male
Dixon Valve & Coupling SE2F2M Extruded Brass Pipe and Welding Fitting, 90 Degree Street Elbow, 1/4" NPTF Female x 1/4" NPTF Male: Industrial Pipe Fittings: Amazon.com: Industrial & Scientific

connected to:

Regulator with 1/4 NPT threads for inlet and outlet
Goss REGULATOR LP CGA-510 W/GAUGE B HOSE - 328-EP-70G - 328-EP-70G at Wares Direct

connected to: (I'm really not sure if this is right)

Mr Heater F276140 1/4-Inch Female Throwaway Propane Cylinder Adapter
Amazon.com - Mr. Heater Propane Male Throwaway Cylinder Adapter 1-20 Male Throwaway Cylinder Thread X 1/4 Inch Female Pipe Thread #F276140 - Propane Cylinder Adaptor

and then use the hose that Giraud sent to the torch.


My major concern is the fitting that's going to attach the outlet side of the regulator. Will my 1/4" NPT Female to male 1"-20 work ? The hose that came from Giraud expects to be attached directly to the colemane propane bottle. It has this cylinder head attached to it. Is that a problem? Or is there a different fitting I should use ?

Thanks for the help.
 
Hello -

I'm trying to figure this out. Can someone please give me a sanity check ?

I'm trying to duplicate what [MENTION=59966]Thump_rrr[/MENTION] posted in #74 above except I'd like to add an on/off valve.

My hose looks like the 'Gen2' posted earlier:
http://txbrassworks.com/wp-content/uploads/2013/11/Giraud.jpg


I think I'm going to need:

1lb 'Throwaway' Coleman Propane bottle (from WalleyWorld)

connected to:

Mr. Heater F273754 1/4" Male Pipe Thread x 1"-20 Female Throwaway Cylinder Thread Fitting
Amazon.com - Mr. Heater F273754 1/4" Male Pipe Thread x 1"-20 Female Throwaway Cylinder Thread Fitting - Mr Heater Hose

connected to:

Smith-Cooper International 8140 Series Brass Mini Ball Valve, Inline, Lever Handle, 1/4" NPT Female
Smith-Cooper International 8140 Series Brass Mini Ball Valve, Inline, Lever Handle, 1/4" NPT Female: Industrial Ball Valves: Amazon.com: Industrial & Scientific

connected to:

Dixon Valve & Coupling SE2F2M Extruded Brass Pipe and Welding Fitting, 90 Degree Street Elbow, 1/4" NPTF Female x 1/4" NPTF Male
Dixon Valve & Coupling SE2F2M Extruded Brass Pipe and Welding Fitting, 90 Degree Street Elbow, 1/4" NPTF Female x 1/4" NPTF Male: Industrial Pipe Fittings: Amazon.com: Industrial & Scientific

connected to:

Regulator with 1/4 NPT threads for inlet and outlet
Goss REGULATOR LP CGA-510 W/GAUGE B HOSE - 328-EP-70G - 328-EP-70G at Wares Direct

connected to: (I'm really not sure if this is right)

Mr Heater F276140 1/4-Inch Female Throwaway Propane Cylinder Adapter
Amazon.com - Mr. Heater Propane Male Throwaway Cylinder Adapter 1-20 Male Throwaway Cylinder Thread X 1/4 Inch Female Pipe Thread #F276140 - Propane Cylinder Adaptor

and then use the hose that Giraud sent to the torch.


My major concern is the fitting that's going to attach the outlet side of the regulator. Will my 1/4" NPT Female to male 1"-20 work ? The hose that came from Giraud expects to be attached directly to the colemane propane bottle. It has this cylinder head attached to it. Is that a problem? Or is there a different fitting I should use ?

Thanks for the help.

You got it right. I used a different on/off valve from amazon and didn't do the 90 degree fitting because I thought the weight might stress it. Looks like this:
i4txIGWmbGUFx.jpg
 
Hello -

I'm trying to figure this out. Can someone please give me a sanity check ?

I'm trying to duplicate what [MENTION=59966]Thump_rrr[/MENTION] posted in #74 above except I'd like to add an on/off valve.


My hose looks like the 'Gen2' posted earlier:
http://txbrassworks.com/wp-content/uploads/2013/11/Giraud.jpg


I think I'm going to need:

1lb 'Throwaway' Coleman Propane bottle (from WalleyWorld)

connected to:

Mr. Heater F273754 1/4" Male Pipe Thread x 1"-20 Female Throwaway Cylinder Thread Fitting
Amazon.com - Mr. Heater F273754 1/4" Male Pipe Thread x 1"-20 Female Throwaway Cylinder Thread Fitting - Mr Heater Hose

connected to:

Smith-Cooper International 8140 Series Brass Mini Ball Valve, Inline, Lever Handle, 1/4" NPT Female
Smith-Cooper International 8140 Series Brass Mini Ball Valve, Inline, Lever Handle, 1/4" NPT Female: Industrial Ball Valves: Amazon.com: Industrial & Scientific

connected to:

Dixon Valve & Coupling SE2F2M Extruded Brass Pipe and Welding Fitting, 90 Degree Street Elbow, 1/4" NPTF Female x 1/4" NPTF Male
Dixon Valve & Coupling SE2F2M Extruded Brass Pipe and Welding Fitting, 90 Degree Street Elbow, 1/4" NPTF Female x 1/4" NPTF Male: Industrial Pipe Fittings: Amazon.com: Industrial & Scientific

connected to:

Regulator with 1/4 NPT threads for inlet and outlet
Goss REGULATOR LP CGA-510 W/GAUGE B HOSE - 328-EP-70G - 328-EP-70G at Wares Direct

connected to: (I'm really not sure if this is right)

Mr Heater F276140 1/4-Inch Female Throwaway Propane Cylinder Adapter
Amazon.com - Mr. Heater Propane Male Throwaway Cylinder Adapter 1-20 Male Throwaway Cylinder Thread X 1/4 Inch Female Pipe Thread #F276140 - Propane Cylinder Adaptor

and then use the hose that Giraud sent to the torch.


My major concern is the fitting that's going to attach the outlet side of the regulator. Will my 1/4" NPT Female to male 1"-20 work ? The hose that came from Giraud expects to be attached directly to the colemane propane bottle. It has this cylinder head attached to it. Is that a problem? Or is there a different fitting I should use ?

Thanks for the help.
Your last piece is incorrect because it is a female thread and the regulator needs a male thread.
Also on the inlet side you will need a brass nipple which can go either between the ball valve and the elbow or the elbow and the regulator.

The bottom line is you can keep all the parts as you have them written above and just purchase (2) 1/4" nipples and you're good to go.
 
What would you guys recommend as the best way to silence the "thwack" from the metal tongue that spins the brass when it resets?
 
Does the Giraud have a fan or some kind of air circulator in the body? I have a Bench Source, and the fan is what moderates the temperature. It keeps the base from overheating and it also keeps the temperature pretty consistent for long runs.

I ordered the Bench Source prior to the Giraud coming out. Since I do runs of about 75 at a time, the Bench Source is probably right for me. I did 200 X 223 cases, and that took a while. The worst thing about it was the smaller 223 cases tend to tip over. I have never had that problem with 308 cases and I have been doing 308 cases for years. If you are a 223 shooter, there is definitely an advantage to Giraud. For 308 and up, the Bench Source seems to be the way to go, just because it seems easier to set up and takes up less space at the Bench. The giant can of propane is kind of nice, but I just went through my first Benzomatic torch after about 3 years. A little bit goes a long way. Also, there is no need to go with an expensive torch. The process is simply not that precise.

These days, I take a dummy shell, turn the lights off, and watch it anneal. The neck needs to start glowing, but not too much, and the brass needs to show a blue coloration when it is done. The coloration when finished is also a function of how long it has been since the brass has been cleaned. Just cleaned brass shows less color than stuff that was cleaned a week or more ago. I also don't want the neck to take on an orange color after annealing. That is a sign of Zinc being burnt out of the brass... or so I've heard. At any rate, I avoid it.
 
The fan is underneath the unit to better serve as a heat sink for the case head. If the Giraud doesn't have one, I can see the unit heating the cases, causing temperature/time required to heat the case neck to drift. Annealing, I have noticed, take less time during the summer (my unit is in my garage), but it doesn't drift for me from the beginning of a session to the end of a session.
 
It'll be interesting to see when mine arrives, but since the only contact point is the case base, there's nothing to trap heat, and the entire unit with it's fan-shaped vertical tray can sink heat I'm betting its not an issue.
 
The fan is underneath the unit to better serve as a heat sink for the case head. If the Giraud doesn't have one, I can see the unit heating the cases, causing temperature/time required to heat the case neck to drift. Annealing, I have noticed, take less time during the summer (my unit is in my garage), but it doesn't drift for me from the beginning of a session to the end of a session.


The case head shouldn't be a source of much heat at all. Watch the video in #64 above. If it has to dwell in the flame long enough for the heat to migrate to the head of the case, that would be a bad design.
 
The case head shouldn't be a source of much heat at all. Watch the video in #64 above. If it has to dwell in the flame long enough for the heat to migrate to the head of the case, that would be a bad design.

You use tempilaq to test that the case head does not get to 350 degrees. The case head gets darned hot when you anneal. Grab a case by the head as it comes off the flame. You can hold it, but you don't want to be doing it long. Sure for the first 5 or 10 cases it doesn't matter. But over the course of 50 case heads... that heat will transfer and stay. There is a reason they put the fan in the Bench Source unit.

Now look at the Giraud unit. That piece of metal that is rotating the cases is not just touching the case head, but running along the body. That has to get hot during annealing, doesn't it? I imagine the longer it runs, the hotter it gets, which is why you probably have to adjust the flame after running a bunch of cases. I imagine is starts out cool as a good heat sink, then as it heats up, it starts transferring heat to the case, but by the time the case heats up, it is acting as a sink again. Over time, I am sure it stabilizes, but it probably take a bunch of cases to get there.
 
Success!!!

The new potentiometer works incredibly well.
Most of the useable range is between 5 and 7 as it is on my original potentiometer.
The difference is that now you can make very fine repeatable adjustments and as an added bonus there is a locking knob which prevents knocking it out of adjustment.

The potentiometer is a 20K ohm which can be found on ebay for around $5.00 including the 10 turn dial.
Even though it comes from China it is made by Bourns in Mexico.
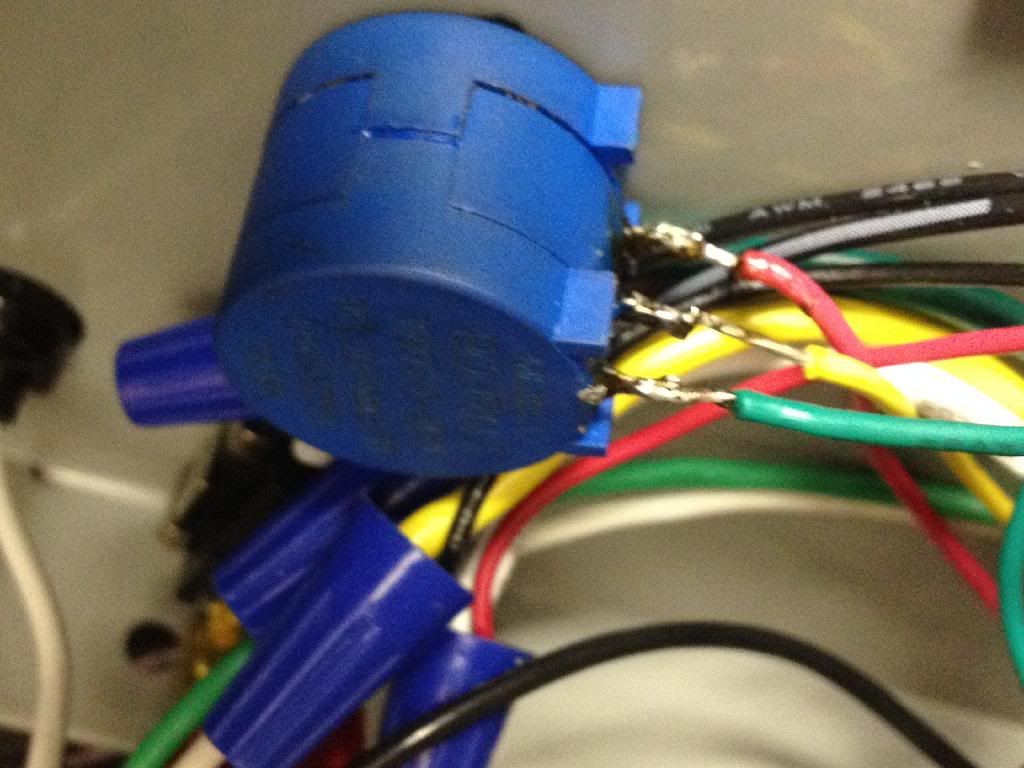
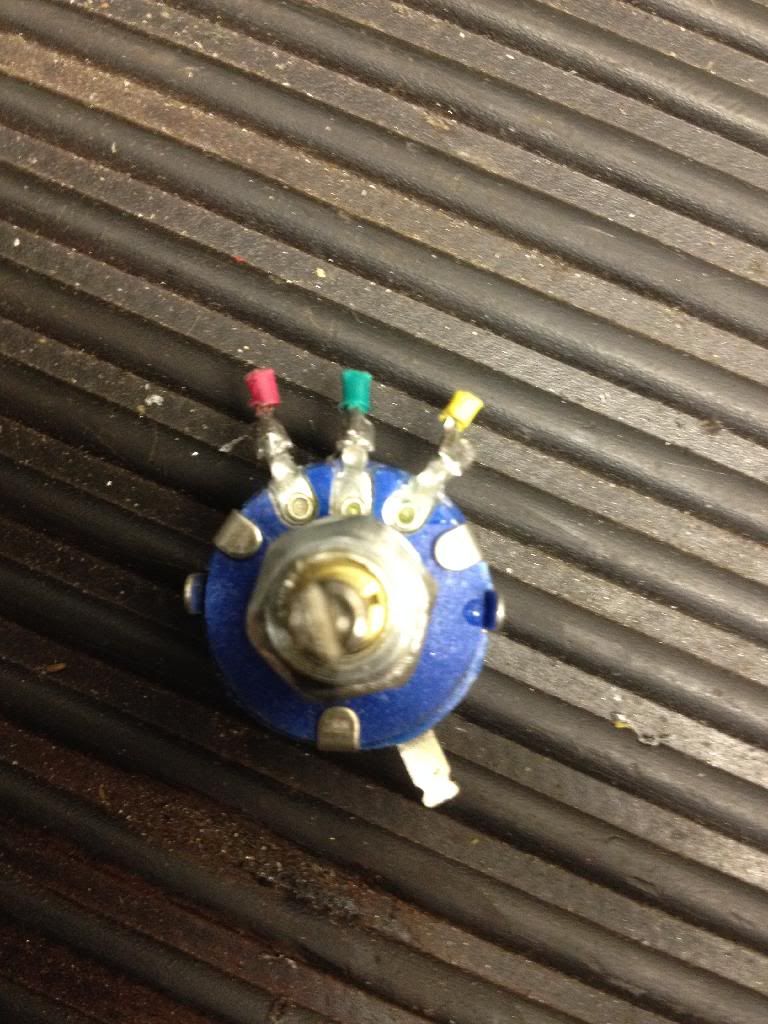
The second picture shows the wiring of the new potentiometer.
The last picture shows the original.

The wiper is in the center location on the original potentiometer (green wire) while it is in the rear location on the new potentiometer.


Man, am I glad some smart people led the way on this! I would never have figured out which wires went where. Thanks [MENTION=59966]Thump_rrr[/MENTION]
 
You use tempilaq to test that the case head does not get to 350 degrees. The case head gets darned hot when you anneal. Grab a case by the head as it comes off the flame. You can hold it, but you don't want to be doing it long. Sure for the first 5 or 10 cases it doesn't matter. But over the course of 50 case heads... that heat will transfer and stay. There is a reason they put the fan in the Bench Source unit.

Now look at the Giraud unit. That piece of metal that is rotating the cases is not just touching the case head, but running along the body. That has to get hot during annealing, doesn't it? I imagine the longer it runs, the hotter it gets, which is why you probably have to adjust the flame after running a bunch of cases. I imagine is starts out cool as a good heat sink, then as it heats up, it starts transferring heat to the case, but by the time the case heats up, it is acting as a sink again. Over time, I am sure it stabilizes, but it probably take a bunch of cases to get there.

I have run several hundred cases through the Giraud and have not noticed any heat buildup due to the slider.
Next time I run a batch I will monitor the slide temperature using an infrared thermometer.

It is funny that Bench Source annealer uses a fan to try keeping the bases cool.
The original rotary annealer was manufactured by Ken Light Manufacturing and it had a chamber filled with hot water to act not only as a heat sink but also to preheat the brass.
Here is a quote from the Accuratr Shooter write up as well as the link.

The Art and Science of Annealing within AccurateShooter.com

"Make Sure There Are NO Live Primers or Charged Cases in the Annealer!!
Place one of the polished cartridge cases in a hole near the flame and let it go around the wheel and drop out. This will take a few seconds so be patient. If you are using a rimmed, semi-rimmed or belted case, it will have to be fed from the bottom of the shell wheel and held until the base can be dropped on the feed ramp. Rimless and rebated cases can be fed from the top.
It should be noted that one of the purposes of the shell wheel is to preheat the case as well as provide a heat sink to keep them from being over-heated. (The center of the BC 1000 is a chamber filled with hot water; this liquid both pre-heats the cases and serves as a heat-sink.) All cases should be fed into the shell wheel in the area of the feed ramp. Starting the cases too close to the flame will not give them time to preheat to 212 degrees (F).
On a bottle-neck rifle case, the central portion of the flame should be on the case neck, and the outer portions of the flame will “wash” over the shoulder and down the side of the case for a short distance. As the cartridge goes around the wheel, it will turn, causing the entire periphery of the neck to be exposed to the direct flame at one time or another.
With this setup, the neck will actually reach a temperature between 750 and 800 degrees. Remember, it’s the combination of time AND temperature that does the job. We have raised the temperature sufficiently to be able to anneal the case necks in 6 to 8 seconds.
The shoulder will be a bit cooler than the neck, and the body cooler yet. The case head will be below 300 degrees (F), which is well below the critical temperature of 482 degrees (F) at which the first changes in grain structure can occur."
 
Last edited:
I have run several hundred cases through the Giraud and have not noticed any heat buildup due to the slider.
Next time I run a batch I will monitor the slide temperature using an infrared thermometer.

It is funny that Bench Source annealer uses a fan to try keeping the bases cool.
The original rotary annealer was manufactured by Ken Light Manufacturing and it had a chamber filled with hot water to act not only as a heat sink but also to preheat the brass.
Here is a quote from the Accuratr Shooter write up as well as the link.

The Art and Science of Annealing within AccurateShooter.com

"Make Sure There Are NO Live Primers or Charged Cases in the Annealer!!
Place one of the polished cartridge cases in a hole near the flame and let it go around the wheel and drop out. This will take a few seconds so be patient. If you are using a rimmed, semi-rimmed or belted case, it will have to be fed from the bottom of the shell wheel and held until the base can be dropped on the feed ramp. Rimless and rebated cases can be fed from the top.
It should be noted that one of the purposes of the shell wheel is to preheat the case as well as provide a heat sink to keep them from being over-heated. (The center of the BC 1000 is a chamber filled with hot water; this liquid both pre-heats the cases and serves as a heat-sink.) All cases should be fed into the shell wheel in the area of the feed ramp. Starting the cases too close to the flame will not give them time to preheat to 212 degrees (F).
On a bottle-neck rifle case, the central portion of the flame should be on the case neck, and the outer portions of the flame will “wash” over the shoulder and down the side of the case for a short distance. As the cartridge goes around the wheel, it will turn, causing the entire periphery of the neck to be exposed to the direct flame at one time or another.
With this setup, the neck will actually reach a temperature between 750 and 800 degrees. Remember, it’s the combination of time AND temperature that does the job. We have raised the temperature sufficiently to be able to anneal the case necks in 6 to 8 seconds.
The shoulder will be a bit cooler than the neck, and the body cooler yet. The case head will be below 300 degrees (F), which is well below the critical temperature of 482 degrees (F) at which the first changes in grain structure can occur."

I concur.
Last 2 times I ran mine it was for several hundred cases each time which took around 1/2 hour per batch.
With just the 20 lb bottle with regulator modification, there was no drift from beginning to end of the batches, as verified by slipping a case prepped with Tempilaq into the process at intervals throughout the batches. The first batch of 200 were Lapua .260 cases with necks turned and the 2nd batch of 200 were LC 7.62 cases, and there was no modification of the setup required between batches. At the beginning of the 2nd batch (run several weeks after the first) I painted up a dozen of the case neck interiors with 750 degree Tempilaq while I let the mechanism run to warm up the components for a few minutes. Then I opened the valve on the tank and without adjusting the valve on the torch (which was left wide open) or the regulator (left at 10 PSI) I lit the torch then fed the first case, poised to knock the case off into the catcher if the cycle was set too long. If set too short I would just slow the pot a little and run it again, but it was perfect. I ran a few more painted cases then once satisfied I loaded up the hopper and let it run while I ran off some .223 plinking ammo on the progressive at the other end of the bench. Every 5 minutes or so I slipped one of the painted cases into the feeder and the last painted case went in with about 10 cases left in the hopper. No detectable drift.
 
Last edited:
Success!!!

The new potentiometer works incredibly well.
Most of the useable range is between 5 and 7 as it is on my original potentiometer.
The difference is that now you can make very fine repeatable adjustments and as an added bonus there is a locking knob which prevents knocking it out of adjustment.

The potentiometer is a 20K ohm which can be found on ebay for around $5.00 including the 10 turn dial.
Even though it comes from China it is made by Bourns in Mexico.
The second picture shows the wiring of the new potentiometer.
The last picture shows the original.

The wiper is in the center location on the original potentiometer (green wire) while it is in the rear location on the new potentiometer.


It took 3 weeks for my purchased from China (via eBay) made in Mexico 10 turn pots to arrive.
A 30 minute installation later and I've got extremely fine control over the cycle time.
This is great, by noting the regulator and pot settings I should, as someone else pointed out, be able to exactly duplicate my setups.
Thanks to all who have participated in this thread, there's a lot of useful information for Giraud Annealing machine owners.
 
I've successfully hooked up a regulator and 20lb tank to my giraud and I'm having some issues.

At first I thought it was a bad torch head so I bought a new goss gp9, the same as the original. When I put the new torch head on, I could get a rather large flame at around 30psi. However, after only annealing about 5k cases, I've got to crank the regulator up to 60psi simply to get it to anneal at all. Were talking a 1" inner core blue flame.

I've used 1/4 hose, approximately 6'. I used yellow gas tape on all connections, twice around each thread. The torch and the 20lb can are wide open.

Any ideas on what might be happening?
 
Do you know what the spacer's should be set at for the .308...mine seems to be dropping some when I changed from .338 lapua to the blue wheel...i imagine i have the spacers setup incorrectly ...but don't seems to find the sweet spots where they drop perfectly. thanks in advance.

Regarding the feed wheels and cases dropping evenly, I've found that you need to play with spacing of the wheels-- and write down the spacer combination for each caliber when you find what works!

Also, make sure and test with at least a partially loaded hopper. A wheel spacer combination that drops the cases evenly when you're testing by dropping the cases in one by one doesn't necessarily work properly with a fully loaded hopper.

Soon after I received the machine I was using spacer combinations that I tested to work well when single feeding but that same spacer combination would often have delayed drops (which leads to partially annealed cases) or vertical drops against the back wall which would bind and stop the feed wheel when running the machine with a loaded hopper.

Once you find a spacer combination that works reliably with a particular caliber with a fully loaded hopper the machine pretty much runs unattended. Some cases with lots of body taper like .22-250 are problematic, they don't stack too well in the hopper and as the pile gets taller and shifts around during a run they slide out. I have to use blocks and tip the machine back to get .22-250 to stack in the hopper and be stable and to run and feed reliably.