Gunsmithing Internal threading question

Re: Internal threading question

I don't consider this an "argument" at all, and I hope you gent's don't see it that way. The only way I learn is to hear positions against my current position. I stick with my position until I am corrected with logic, and I do get corrected on a regular basis.
laugh.gif


On this lathe, with a setting of 29.5, you are walking the tool away from the right side of the V-groove you are cutting, resulting in a V with a left side that is 30 degrees from perpendicular(since it will always be cutting) and a right side that would be 30.5 degrees from perpendicular if you take lots of small passes. What is really happening ot the right side of the V is that it is forming a stepped 30.5 degree side, depending on how large your cuts are. This should create a screwed up thread that is somewhere around 90.5 degrees with a stepped right side of the V.

The goal here is to form a V that matches the tool, but to give the tool an easier time doing it's work by not forcing two large chips into each other.

The proper way, as I understand it, is to let the left side do a full cut which can be accomplished with any compount setting so long as the tool travels left. As to the right side......the optimum if everything is perfect is to set the compound to 30 degrees and let the tool just float alongside the right side of the V. I assume that the left chip can cause problems as it scrapes the right side, and any variance in the setup or machine can cause an inconsistent right side of the V. Because of this, we want the right side of the tool to make a slight cut on the right side as it passes, resulting in a true V without forcing two huge chips into each other.

This is how I was taught, and it makes alot of sense to me.
On this lathe, 60.5 for a 60 degree thread, which is 29.5 degrees from perpendicular.
 
Re: Internal threading question

<div class="ubbcode-block"><div class="ubbcode-header">Originally Posted By: crumpmd</div><div class="ubbcode-body">I amstill grinding high speed tools for the practice. I have ordered carbide insert tools for threading.
I set the compound angle at 29.5 and the tool is 60° grind and is set perpendicular to the workpiece just below the centerline.
This is set up to cut 60° threads. As far an I can tell.

I really appreciate the feedback and am not trying to stir up an argument. these threads are way better than my first attempt above. I suspect when I get the new tooling and start practicing with it the threads will look better.

Is oil brushed on during the cutting acceptable lubrication? </div></div>

The intention is not to lubricate. If you use a lubricant it will work against you.
Get some cutting or tapping fluid. They are made for the purpose.

....and try those threads again with your compound set to 60.5, just for fun.
laugh.gif
 
Re: Internal threading question

ok, i'm all messed up in the head. when i got my lathe, i scribed a line on the compound at the 0 when it is 90* from the work (feeding directly into the work). i swing that mark to 29.5*-30*. now i am trying to reverse all this in my head and think of what the original mark would actually read and i believe i have been doing it correct but calling it the wrong thing in this thread. i believe if i look at the original mark on my compound when i thread, it will actually read 60.5*. i think
smirk.gif
 
Re: Internal threading question

Seekins is right, in the picture you are set at 30 degrees. You need to turn it to 59.5 for proper threading. Do you see how your threads are 60 degrees on the right side of the thread and it is a longer slope "being 30 degrees" on the left side of the thread. Thats where your trouble lies.
 
Re: Internal threading question

The reason to set your compound at 59.5 or 60.5 is so the cutter has a little bit of relief when you feeding in with it you touch on the left side just a bit more. I was taught to always cut at 59.5 on you compound. Which is 30.5 degress included double that cause you cutting on a lathe so you doing both sides of your piece puts you at 61 degrees. Doing this you will lead with the tip of you threading tool which will take some pressure off the tool and reduce chatter.
 
Re: Internal threading question

Whenever you cutting something if your hitting two edges at the same time it can cause chattering. Thats why you dont just cut the threads in at the same time. Maybe a very very slight pressure against the second side might help keeping chatter down but from my experiences its bad. Cutting on two surfaces at the same time you have no relief with your cutter and it will chatter.
 
Re: Internal threading question

Thanks for voicing opinions/experience on this. I do apprecaite it.

The one thing I have a problem with is some of you saying to set the compount to more than 30 degrees from straight-in with a 60 degree thread. Multiple passes would result in a stepped thread on the right of the V(if outside threading on right hand threads).

30, or less than 30 is how I understand it should be done, and how I do it.
 
Re: Internal threading question

The picture of the compound that is set at 30degrees that crumpmd posted is what I am referring to. if he were to turn it clockwise to 59.5 it would be correct and he would not have the "stepped" threads.
 
Re: Internal threading question

<div class="ubbcode-block"><div class="ubbcode-header">Originally Posted By: Moondawg</div><div class="ubbcode-body">clockwise to 59.5</div></div>

60.5 by the scale, not 59.5 = 29.5 degrees

For entertainment, use a fishtail or protractor to set your compound to 30 degrees compared to the carriage and then see what your scale reads. Better yet, make facing and turning cuts on a piece of material and use a protractor to set your compound to 30 degrees and compare that to your dial. Most dials are off a little, some are dead nuts on. At some point you’ll be picking fly shit out of the pepper.
 
Re: Internal threading question

Not meaning to argue here either.
Cutting threads is like killing cats. More than one way!
I was taught to set the compound 29.5 from perpendicular to the spindle.
Set the tool at the centerline.(above or below will cause a change in form.)
The tighter the class and smaller the pitch, it really shows!
Just brush on some black oil (sulpher based cutting oil)with an acid brush.

If you want an insert type od threader, send me a PM.
I think I have something you can use in your lathe.
It's cheaper to crash a free holder and insert!
 
Re: Internal threading question

If your setting your compound to 29.5 off of 90 your cutter will be leading with the edge instead ot the tip. Of course once you make a few cuts it will be cutting evenly. For some reason i tend to stick with my fathers and bruce baers teachings i dont know why....
 
Re: Internal threading question

<div class="ubbcode-block"><div class="ubbcode-header">Originally Posted By: wnroscoe</div><div class="ubbcode-body"><div class="ubbcode-block"><div class="ubbcode-header">Originally Posted By: Moondawg</div><div class="ubbcode-body">clockwise to 59.5</div></div>

60.5 by the scale, not 59.5 = 29.5 degrees

For entertainment, use a fishtail or protractor to set your compound to 30 degrees compared to the carriage and then see what your scale reads. Better yet, make facing and turning cuts on a piece of material and use a protractor to set your compound to 30 degrees and compare that to your dial. Most dials are off a little, some are dead nuts on. At some point you’ll be picking fly shit out of the pepper.
</div></div>

Roger that. I'll do that and give it a go.

TCA4570 Thanks for the offer. I will take you up on it. My tool holder will take up to 5/8 inch shank on the tool.

I think I realize what the error may be. My compound is set 30 degrees(29.5 actually) off of parallel to the work piece. I rotated it clockwise to the mark on the scale fixed to the cross slide. But what I understand from this discussion is it needs to be 30 degrees off perpendicular which would require turning clockwise 60 degrees. Or in my case since I am going to use 29.5 I will turn 60.5 to make it 29.5 off of perpendicular to the work.

When I cut like that I have been using 1.15 as the factor for my feed. For instance if I wish to increase the depth of the next pass by .003 I adjust the compound (0.003 x 1.15) to get the correct depth of cut. Is this correct?
 
Re: Internal threading question

I'll try to do a video next time.
Step by step, the way I was taught, and do.
It's got a few more curves in the process.

29.5, leading edge is cutting.

I can form tap (rigid tap) blind holes at 2000 rpm in the mills, with proper tooling!

Let's move beyond the compound setting.

We need more pics!

Sorry , just saw your edit!
I used a lathe with those scales before.
Need to jog the brain back 20+ years for that one!
Here's another twist.
That lathe would not re-peat with the half nut.
Had to crank out from shoulder and reverse at same time.(cross slide)
It's the way I do now.


Re: Internal threading question

<div class="ubbcode-block"><div class="ubbcode-header">Originally Posted By: crumpmd</div><div class="ubbcode-body">When cutting internal threads, is it a good idea to use a left hand cutter and reverse the spindle direction to cut from the inside out?
I wonder if cutting with a right hand cutter up to a shoulder, blindly, may be done on the lathe with out crashing into the shoulder. I do not have a DRO but I can put a dial indicator on the carriage to measure travel during the cutting. I worry about being able to stop the feed in time. Also it may take 4 passes to cut the threads and each pass is an opportunity for disaster. I ordered some HSS to cut with so I can slow down. The carbide wants more speed than I am comfortable with.

And if you do cut from inside out, when you advance the cutter to make the next pass would you go back to the start point, start the chuck, advance the cutter and then engage the half nut on the fly, trying to catch the right start point.

I have a lot to learn, obviously, but the votech college only offers day classes and I can't quit my day job just yet. Maybe I can get a tutor. </div></div>

This was the original question.

I would check out the machine, and get comfortable with threading.

Where or how the tool goes is meaningless at this point.

Practice what you can see.


Set compound first.

Install threading tool, and check center.

Check with fish tail, where you are going to thread.
You are now just setting up the tool, if everything else is right.
Check gibbs in compound for for snug spot with about .25 travel.
Set zero.
Come over and touch tool to od.
Zero scale, and mark cross slide with sharpie.

easier to do than type!
 
Re: Internal threading question

So I fixed the problem with the angle on the compound and tried getting everything correct as suggested above and I cut another set of 16 tpi .
Disregard the finish, I am not going to be cutting with inserts just yet and I did not use cutting fluid. But the thread geometry looks real good to me now. I can tell a big difference.
I will probably get an action to test the threads on. I will use the carbide inserts and cut at 200rpm. I think that is about as fast as I can manage for now.

IMG_0004-1.jpg


Again thanks for the advice and suggestions.
 
Re: Internal threading question

thanks
The tool is great. I'll post up some pictures this Saturday or maybe Friday night. It seems like I have been having a Sale on gallbladder Surgery because I have been doing at least 2 a day this week.
 
Re: Internal threading question

Many thanks to TCA 4570
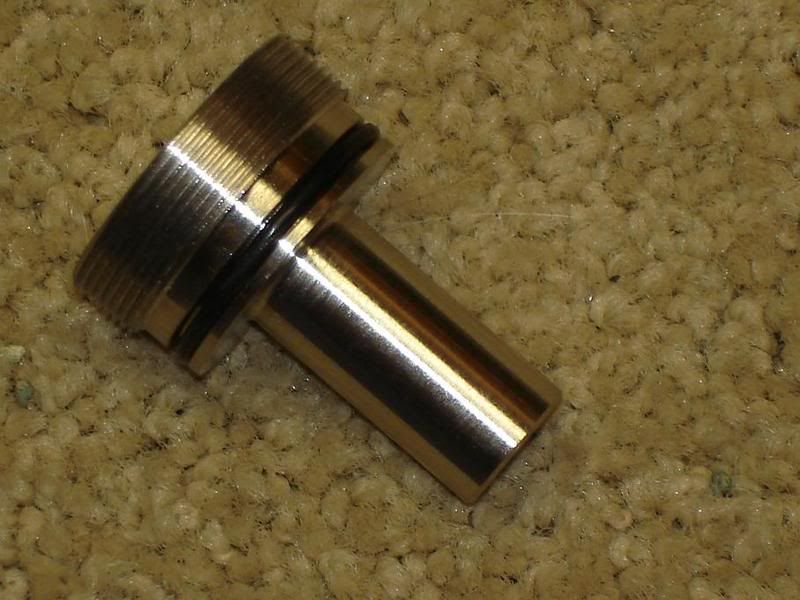
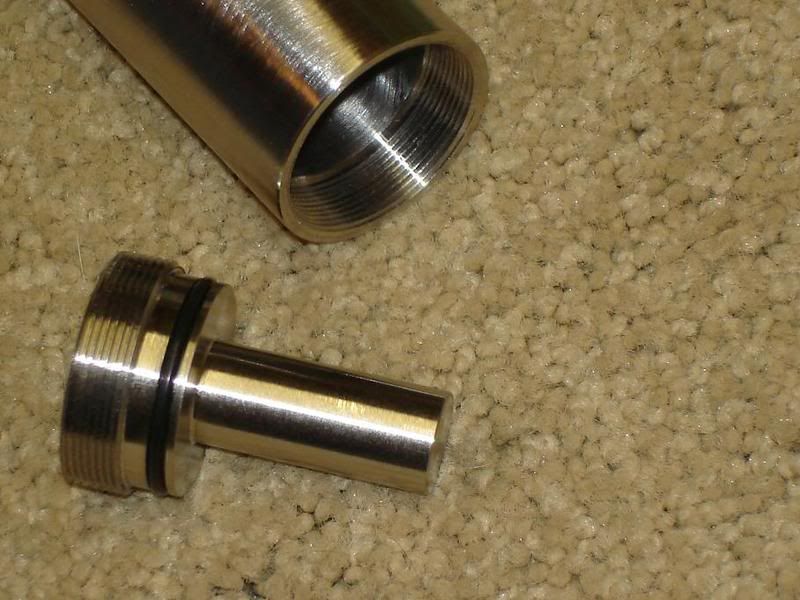
So I have been practicing and today used a premium carbide insert tool to cut some threads.
IMG_0002-1.jpg


IMG_0003-2.jpg


These turned out very well. And I did some internal threading to mate these caps.

IMG_0004-2.jpg


And the fit is excellent. I still have to internally thread one cap for 1/2 by 28 tpi and I have to mill the baffle stack. then I will be done with this little project. I think I will find a tap to do the 1/2 inch x 28 tpi internal threads.

IMG_0005-1.jpg
 
Re: Internal threading question

I would have except I don't have the right size tap.

I do have another 3 feet of bar stock so I can do it over if I need to.

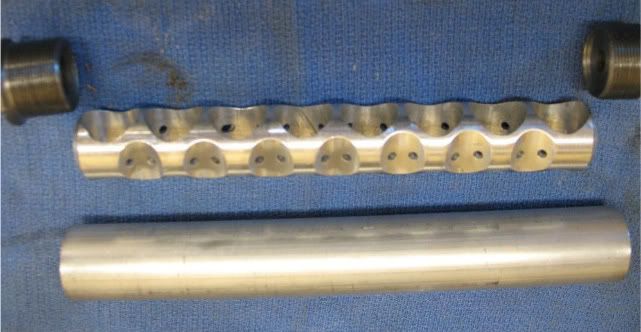
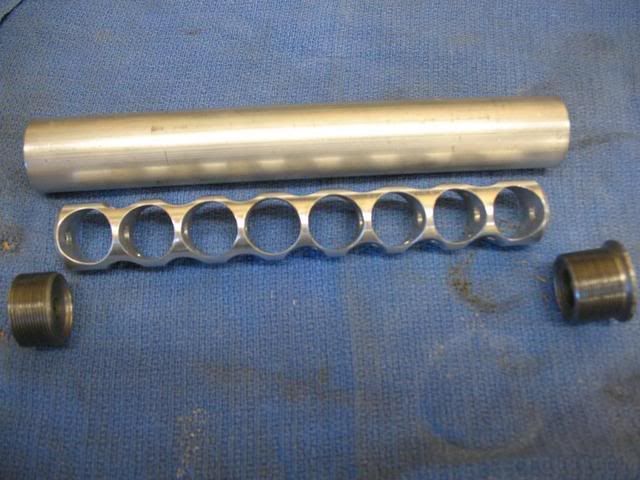
Milling the baffle stack is my main concern now. I plan to cut holes in the baffle and then dish out between the holes on the outside then drill mouse holes from the dish out in to the holes to provide for gas flow.
 
Re: Internal threading question

i'm no professional so this may not be the most efficient way but i know everything would be aligned. i'd chuck up your barstock in a three jaw and face the exposed end. i'd then turn the od to diameter and thread. i would then drill, bore and single point the internal threads. after that is done i would part it off.

i made this for someone else. i didn't do the internal threads that would allow it to be attached to a firearm because i didn't want to even get close to making something that would be considered a suppressor. i left a stub so the person could do what ever they wanted with it. it was done all in one setup. the stub could have easily been left off and the internal threads cut while in that setup. off the top of my head, i think that was a 1.062-28 thread.

i wouldn't use a tap for this project. you are going to have a bullet traveling though a hole that is only .02-.03" larger in diameter over a distance of about 6". you need to give it every chance you can to make it concentric. if you single point the internal and external threads in the same setup, you can't go wrong (with that part at least).


docspart2.jpg


docspart1.jpg
 
Re: Internal threading question

I agree that is the best way to do it, but I did not have an internal threading tool small enough. But my friend did not have a tap either.

So today I spent an hour grinding a small blank into an internal threading tool and single point cut the threads. I chased them with the threads on the muzzle. Then I test fired the setup and no baffle strike.

So far so good.
I'll get some pictures shortly.
Now to find a Bridgeport and put holes in the baffle stack.

IMG_0004-3.jpg


IMG_0005-2.jpg


IMG_0007-3.jpg


My thanks to all for their insight and suggestions. Certainly carbide insert cutting tools provide a superior finish and ease of cutting. However, learning how to grind tools from HSS blanks is very important. If they have correct geometry and the speed and feed is right and use plenty of cutting fluid they give good results.

Now to see about finishing the baffle. It is amazing that just screwing on the unfinished device provided some reduction in noise.