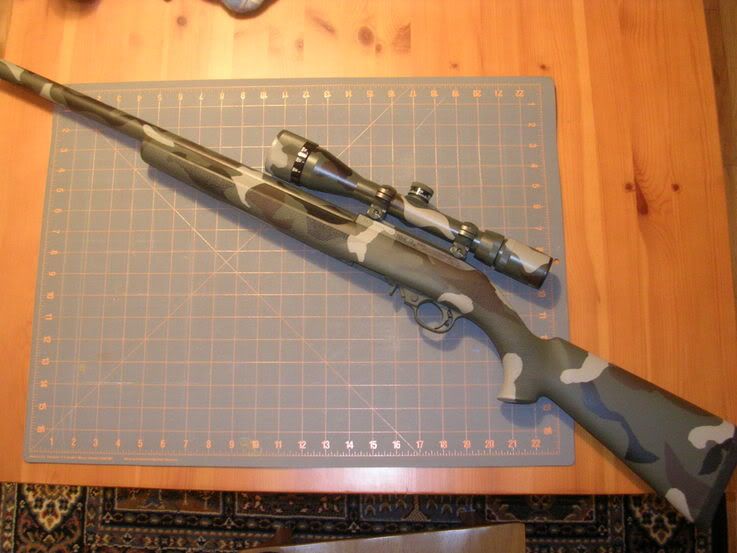
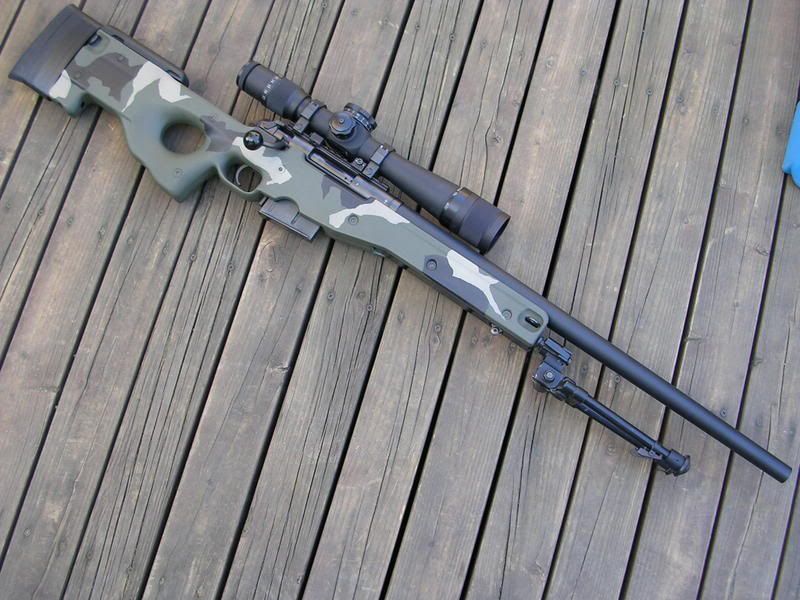
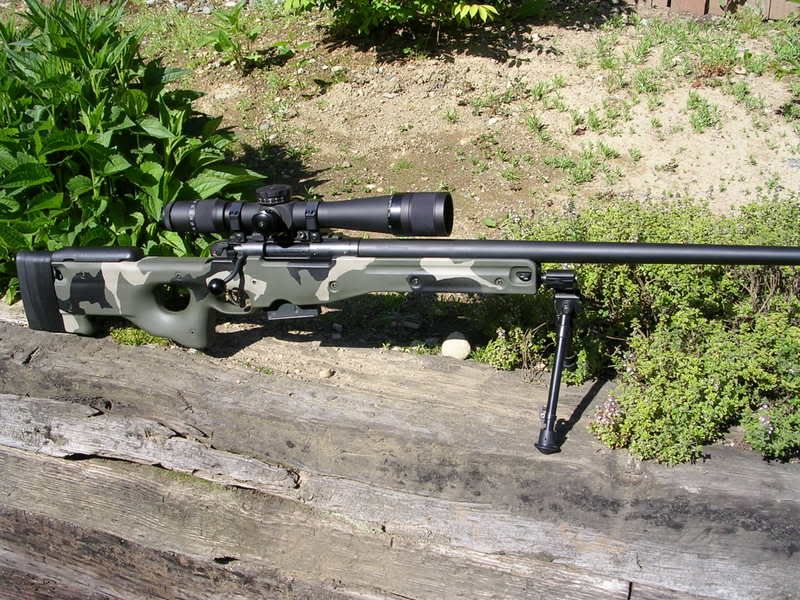
I have been asked a lot of questions from members lately that have come across old pics of rifles and stocks I have painted over the years, so I thought I'd compile some pics with techniques used, as well as specific products you can find about anywhere.
Most of the products I will mention can be found at a auto-body supply store or many hardware stores. First off, preparing the surace to be painted is the most important step in getting good paint adhesion on any surface, especially when painting plastic or rubber surfaces. Cleaning with a <span style="font-weight: bold">plastic prep</span> by <span style="font-weight: bold">SEM or Krylon</span> or similar products works best. Acetone and laquer thinner works in a pinch, but make sure to apply it to a rag and test a small area to see how the material reacts.
After cleaning and preparing the stock, you will need to apply a flexible base coat or primer, this will give the paint a surace to stick to. <span style="font-style: italic">This is especially important when painting rubber overmolded stocks like the Hogue units</span>, and will give far better results than just Krylon alone. I use a product called <span style="font-weight: bold">Bulldog</span>, which is an adheasion promoter, it is flexible as well. Similar products can be used, <span style="font-weight: bold">SEM plastic primer</span> works just as well.
picture of stock after cleaning and application of plastic primer
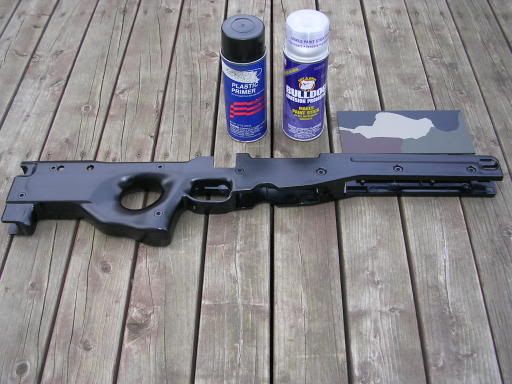
The next step is to apply your base coat of paint. It is very important to apply the paint in multiple thin coats, 4-6 thin coats will give far better results than 1-2 heavy coats, and will dry faster and be more durable. Make sure your paint is not too cold, I like to place the paint cans in warm water 10-15 minutes before they are to be used, it applies much easier and more evenly. Also, a slight texture can be achieved by increasing the distance from the spray can to the surface you are painting, closer = smoother surface, further = textured surface
picture of "base coat"
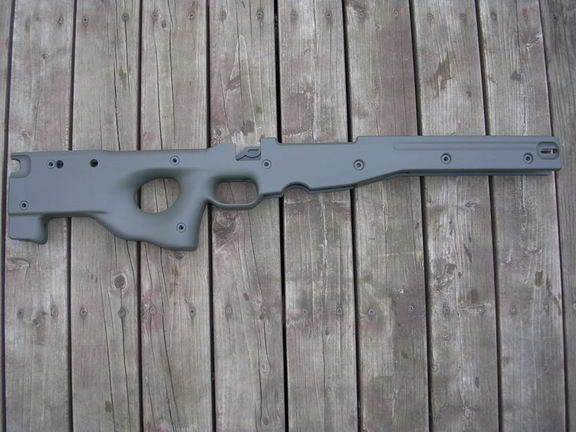
You can call it quits here, or keep going with multiple colors. A camo patern is achieved by masking off random shapes after the base coat is applied. You want to mask off the entire area, except areas for the next color stage
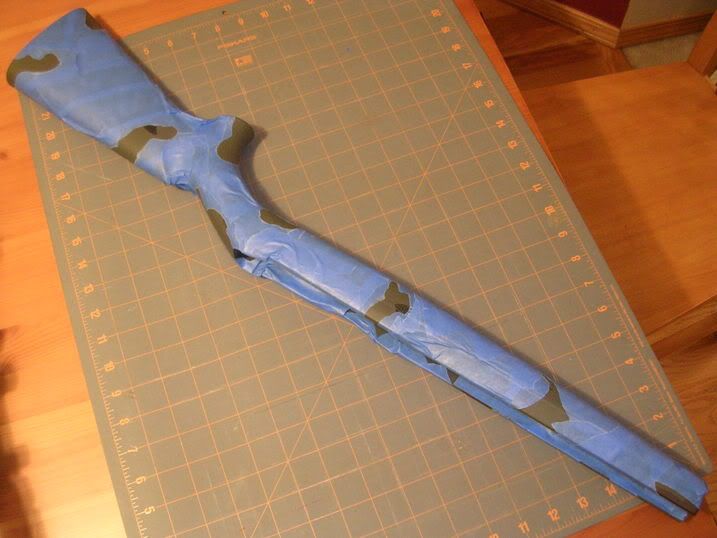
After base coat and second color stage
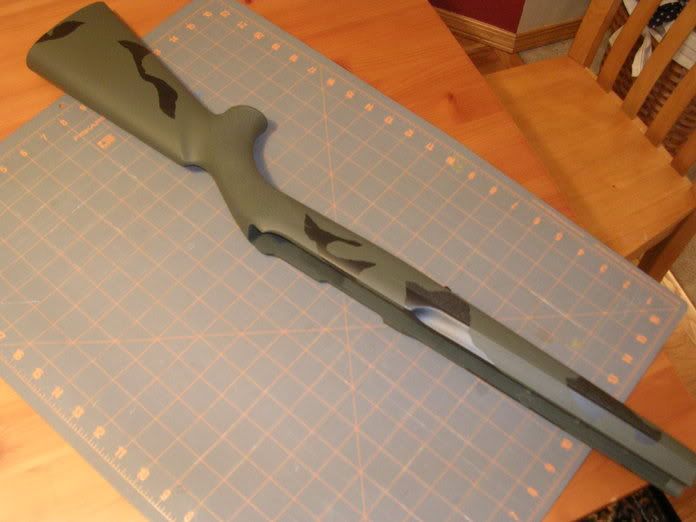
after the third stage
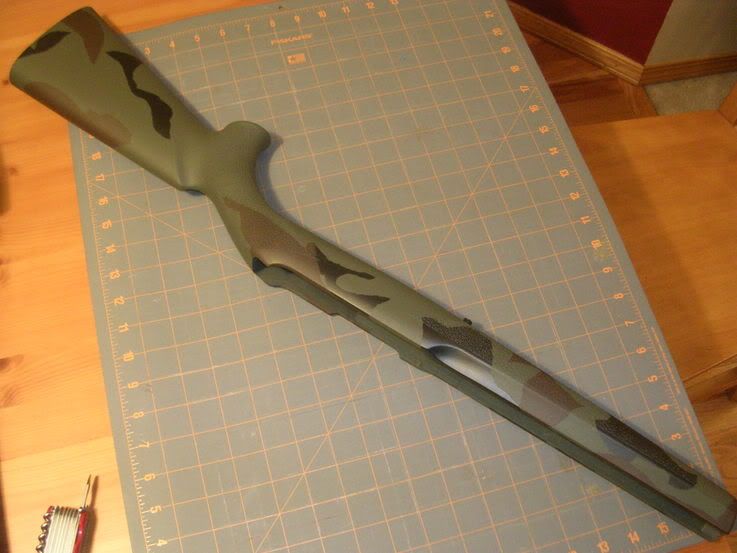
after the forth stage, remember to mask off the entire stock except the area(s) to be painted with the next stage of color
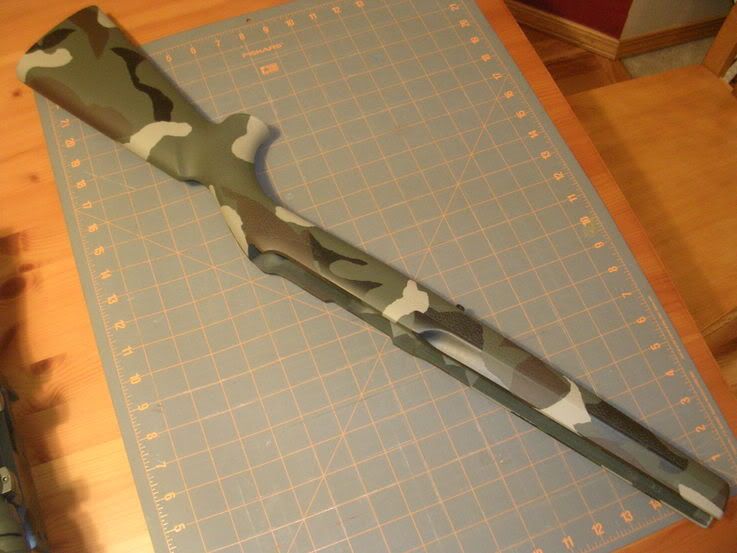
There are a few techniques you can use for stencil paterns. The first method is to use wide masking tape (blue painters tape works the best here). Place strips of tape on any suitable cutting surface and use an exacto-knife or razor blade to cut out random paterns. You can then apply the stencil to the area to be painted after removing the center trimmings. A second method and one I prefer is "tearing" the masking tape and using the torn edge for your stencils. The more random you are, the less deliberate and natural the patern will look. For this technique, see pic #3 above
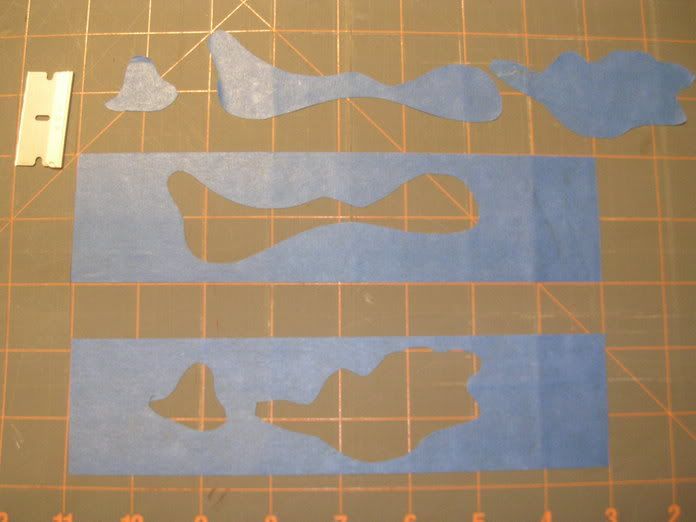
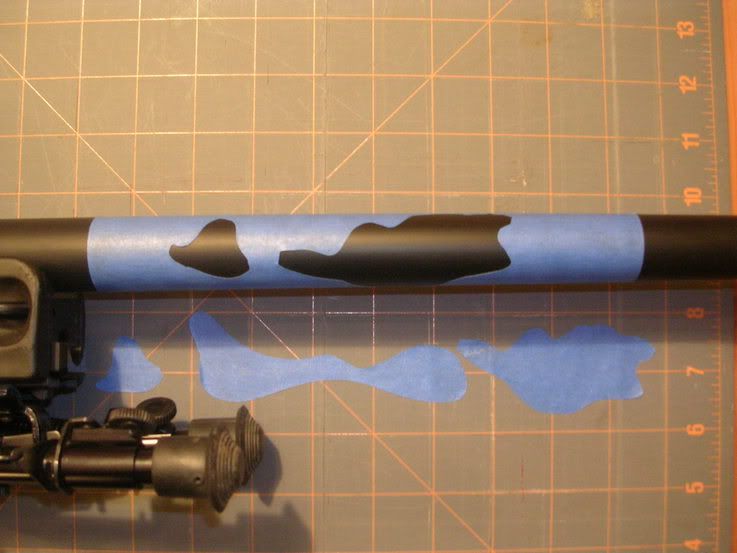
Afer the desired look and patern is reached, its time to protect the surface. A clear coat works best for this, <span style="font-weight: bold">Krylon matte clear</span> works well. I avoid using any clear coat other than a "matte" or "low luster" on a tactical rig, satin or high gloss clear coats will make the surface very reflective.
The best thing about Krylon is the fact it is inexpensive, very durable (if applied properly), and can be removed fairly easily. A note on Krylon removal, I use plain ole gasoline, paint thinner and laquer thinner work good as well. Avoid using heavier solvents such as acetone or MEK, they also evaporate too fast and wont stay on the surface long enough to break down the paint before they can do their job.
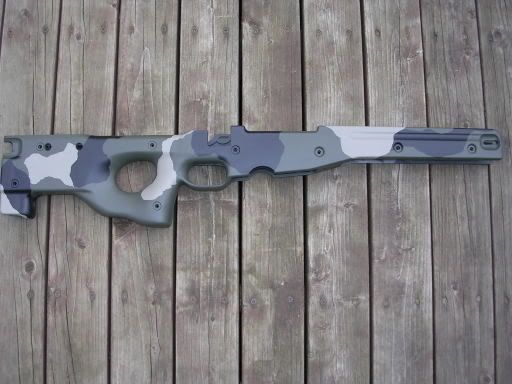
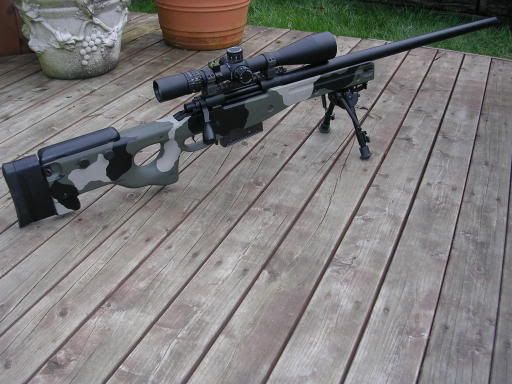
Thats it, here are a few more pics of completed stocks, all Krylon, enjoy
Most of the products I will mention can be found at a auto-body supply store or many hardware stores. First off, preparing the surace to be painted is the most important step in getting good paint adhesion on any surface, especially when painting plastic or rubber surfaces. Cleaning with a <span style="font-weight: bold">plastic prep</span> by <span style="font-weight: bold">SEM or Krylon</span> or similar products works best. Acetone and laquer thinner works in a pinch, but make sure to apply it to a rag and test a small area to see how the material reacts.
After cleaning and preparing the stock, you will need to apply a flexible base coat or primer, this will give the paint a surace to stick to. <span style="font-style: italic">This is especially important when painting rubber overmolded stocks like the Hogue units</span>, and will give far better results than just Krylon alone. I use a product called <span style="font-weight: bold">Bulldog</span>, which is an adheasion promoter, it is flexible as well. Similar products can be used, <span style="font-weight: bold">SEM plastic primer</span> works just as well.
picture of stock after cleaning and application of plastic primer

The next step is to apply your base coat of paint. It is very important to apply the paint in multiple thin coats, 4-6 thin coats will give far better results than 1-2 heavy coats, and will dry faster and be more durable. Make sure your paint is not too cold, I like to place the paint cans in warm water 10-15 minutes before they are to be used, it applies much easier and more evenly. Also, a slight texture can be achieved by increasing the distance from the spray can to the surface you are painting, closer = smoother surface, further = textured surface
picture of "base coat"

You can call it quits here, or keep going with multiple colors. A camo patern is achieved by masking off random shapes after the base coat is applied. You want to mask off the entire area, except areas for the next color stage

After base coat and second color stage

after the third stage

after the forth stage, remember to mask off the entire stock except the area(s) to be painted with the next stage of color

There are a few techniques you can use for stencil paterns. The first method is to use wide masking tape (blue painters tape works the best here). Place strips of tape on any suitable cutting surface and use an exacto-knife or razor blade to cut out random paterns. You can then apply the stencil to the area to be painted after removing the center trimmings. A second method and one I prefer is "tearing" the masking tape and using the torn edge for your stencils. The more random you are, the less deliberate and natural the patern will look. For this technique, see pic #3 above


Afer the desired look and patern is reached, its time to protect the surface. A clear coat works best for this, <span style="font-weight: bold">Krylon matte clear</span> works well. I avoid using any clear coat other than a "matte" or "low luster" on a tactical rig, satin or high gloss clear coats will make the surface very reflective.
The best thing about Krylon is the fact it is inexpensive, very durable (if applied properly), and can be removed fairly easily. A note on Krylon removal, I use plain ole gasoline, paint thinner and laquer thinner work good as well. Avoid using heavier solvents such as acetone or MEK, they also evaporate too fast and wont stay on the surface long enough to break down the paint before they can do their job.
Thats it, here are a few more pics of completed stocks, all Krylon, enjoy


