Sorry for keeping you guys waiting, but I've finally had time to assure this is 100% reliable

Here's some photos and explanation on this project.
Parts used:
- TRG-21/22 skeleton
- KRG Bravo rear stock
- KRG Bravo forend
- KRG aluminium T3 Trigger guard
- KRG extended magazine catch
Things I modified:
- Skeleton:
1. Because I used TRG skeleton instead of T3 Bravo skeleton, I had to make a couple of millimeters widening on front action screw towards rear action screw (TRG action screw spacing is couple of millimeters shorter than T3 but they're so close it's plain and simple). Of course if you use T3 skeleton you don't need to touch these action screw holes. (photo no 1 shows action screw spacing)
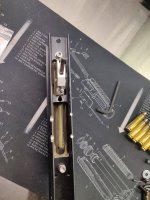
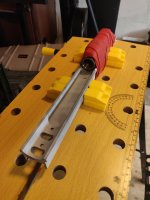
2. Magwell filing. TRG magwell starts couple of millimeters rearward compared to T3 magwell, so I filed around 3-4 millimeters on each end to make room for around 7 millimeters longer XM magazine. Of course if you use T3 skeleton you only file it from the rear. (photo no 0)
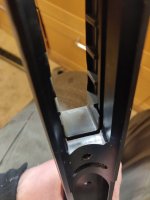
3. On the TRG skeleton there's holes only for the TRG forend but you need some kind of fastening if you're using KRG forend. I decided to make 3 attaching holes spacing the same as MDT Arca rail so I can secure it securely to skeleton and It'll also squeeze the forend tightly on the skeleton. I used KRG fasteners from the other side. (photo no 6 & 7). Skip this if you're using KRG skeleton.
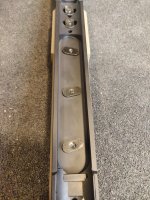
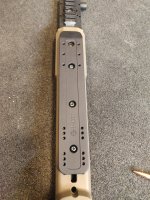
4. Milling new slot for T3 recoil lug. TRG's recoil lug is more rear so had to mill slot for the T3 lug and then I bedded everything with Acraglas. Before bedding the skeleton went to aluminium oxide blasting so bedding will attach to aluminium like hell and it'll be ready for cerakote after bedding. (photos 8 & 9)
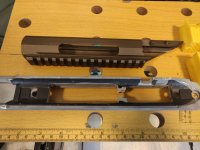
Voila! Skeleton after cerakote on photos 10 & 11.
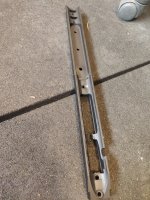
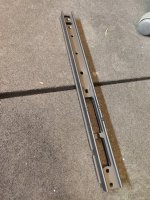
- Oother parts:
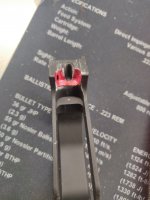
1. T3 Trigger housing. Since KRG triggerguard needs to come rearwards, you need to make room for it. The T3 aluminium trigger housing will allow some 5 millimeters filing before the attaching screw. I also had to use different kind of trigger attaching bolt and cut it to make room. This is shown on photo 1.

2. KRG trigger guard. You also need to make room for the trigger guard to come rearwards towards the trigger housing by filing the guard itself. This is shown on photo 2. It's coloured in red so I noticed where I need to file more.
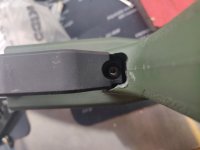
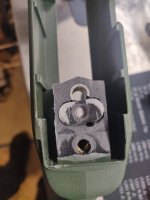
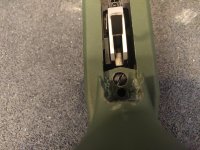
3. Rear stock. You need to mill room to the pistol grip for backing up the trigger guard. My dremeling skills doesn't do honor but hey this is for use not for exhibition! I you also need to drill new hole around 7mm rearwards from the rear action screw to secure the trigger guard. Of course the trigger guard needs some threaded counter part so I milled a slot for KRG counter part to the top of rear stock. For the actual rear action screw you need to make countersunk and use countersunk bolt so it'll stay flat beneath the trigger guard. (photos 3, 4 and 5)
That's it! Now you need to assemble the whole puzzle

1. Insert action to bare skeleton, fasten front action screw
2. Slide rear stock on skeleton and fasten rear action screw which will hold it secure. You can also fasten the top bolt which secures rear stock from the top
3. Slide forend and fasten it
4. Insert trigger guard and tighten it from the rear bolt
Voila! Final product shown on photo, It's a .284win and rounds shown on XM magazines are loaded to 81,5mm with 180 Lapua Scenars. Very light to carry and capable long range rig! XM magazine takes 10 rounds.

I still need to do final touch which is camo paint with stencils when I have next free time!
Final words, If I were able to do this with a dremel, drill and a file I think anyone could do it. Of course getting the magazine 100% right means annoying 1 millimeter trials and errors to get it perfectly right which took some time and figuring out couple of things. And use the extended magazine catch which will allow for custom filed fit! Usually sleeping over night helps alot with planning.


