• Frank's Lesson's Contest

    We want to see your skills! Post a video between now and November 1st showing what you've learned from Frank's lessons and 3 people will be selected to win a free shirt. Good luck everyone!

    Create a channel Learn more
  • Having trouble using the site?

    Contact support

Post anything that has helped you as a reloader!

What are some things to watch for. I was going to set up my torch, set up a metronome, record the temperture of the brass after so many seconds and than Quinch in water, sound good?

Honestly I haven't re-visited it yet. I decided to anneal because I was having a hard time getting consistent neck tension but I think I've solved the problem by setting up my lee-collet die differently. I've never had a neck split in either 7mm RM I own so maybe I don't even need to worry about it. I tend to lose brass due to case head separations. I think I have that sorted out so if my brass gets enough fires on it to have neck problems I will have to revisit annealing.
 
What's the best way to size your brass, I like to Fl and am using a redding "S" FL sizer, I would rather control the inside of the neck not the outside, and would like it to be adjustable (keep FL), any options?
 
I put a little Brass-O in my tumbling media for polish. You have to allow the ammonia to evaporate before you mix it in (let it sit on top for a couple hours), but it's a cheap additive and was created for cleaning brass.
 
case headspace gauges from JP Enterprises for 223 and 308--Not simply straight drilled to a certain depth, but cut with chamber reamers to check ALL dimensions of a loaded round

CH4D primer pocket swager to remove crimps--cheap, fast, built like a tank in USA
 
Last edited:
I added a small shelf at eye level on the wall next to my bench. I only use beam scales and having it at eye level really helps, plus the advantage you mentioned of not moving the scale.

I'm working on a shelf too but more at counter-top level so I don't have to raise my arms so much. Then I'm going to commandeer an old laptop that one of my grand kids has abandoned because it's "so yesterday". Add a simple webcam mounted in front of the beam pointer and I'll be able to see when the scale is "balanced" without having to invoke my bifocals. Big screen view instead of "squinting and cocking my head". Others that have done this have found it to be super accurate as well. By mounting the webcam directly in front of the pointer and scale it can be adjusted to eliminate any parallax error.
 
I to am thinking about adding the webcam.

I would like to hear how you resiZe your brass, should I take the expander out of my redding type S die, I didn't neck turn the brass, but every piece falls within .0015" case neck thickness difference.

PLEASE HELP
 
I'm working on a shelf too but more at counter-top level so I don't have to raise my arms so much. Then I'm going to commandeer an old laptop that one of my grand kids has abandoned because it's "so yesterday". Add a simple webcam mounted in front of the beam pointer and I'll be able to see when the scale is "balanced" without having to invoke my bifocals. Big screen view instead of "squinting and cocking my head". Others that have done this have found it to be super accurate as well. By mounting the webcam directly in front of the pointer and scale it can be adjusted to eliminate any parallax error.

I use a Loupe magnifier with a light on it at about eye level.

rtc111,

You could try both ways of resizing your brass to see which your gun likes better. Typically you want .002-.003 neck tension on the bullet and you could check if there's any difference in runout with sizing different ways if you have a runout gauge . The expander will stretch cases more vs without it so more trimming is necessary, that won't matter if you are going to trim every sizing, I don't though. Try to only bump the shoulder back the least amount possible, like .001" or so. If you take the firing pin out of the bolt and set the die so the bolt has a little tension at the bottom of it's stoke on the sized case that is a great place to be.
 
I'm working on a shelf too but more at counter-top level so I don't have to raise my arms so much. Then I'm going to commandeer an old laptop that one of my grand kids has abandoned because it's "so yesterday". Add a simple webcam mounted in front of the beam pointer and I'll be able to see when the scale is "balanced" without having to invoke my bifocals. Big screen view instead of "squinting and cocking my head". Others that have done this have found it to be super accurate as well. By mounting the webcam directly in front of the pointer and scale it can be adjusted to eliminate any parallax error.

I should add that I normally DO NOT weigh every charge unless I'm doing accuracy load development or very small lots.
 
I would like to hear how you resiZe your brass, should I take the expander out of my redding type S die, I didn't neck turn the brass, but every piece falls within .0015" case neck thickness difference.

PLEASE HELP

I've been experimenting with several methods. I have pretty much settled on using a Forster Neck Size/Shoulder Bump Bushing die for most of my resizing. I've found that it gives me great results WITH the expander ball in place. Because it's a bushing die I don't have to undersize the the neck and then expand it a significant amount. I neck turn ALL my brass but just enough to knock the bumps off. Some cases in a lot may have a cut up all the way around the circumference and others only 270 degrees or so. With the uniform necks and the bushing only sizing the case the minimal amount, the expander ball merely becomes a final check. If I feel a heavy or light pull of the ball as the case is removed I set it aside for further work.

I find that my cases sized this way are concentric to less than .001" TIR. I've lately taken to just using my Hornady CG ND F/L sizing die to straighten the cases with high runout and then shoot them as sighter/foulers. The get a second chance to join the "main group" after they're annealed and resized with the bushing die. Some make it and others don't.


Great info Deadshot thank you, I always thought you were able to control neck tension on a redding type S die, how would you be able to do that with an expander? Do you neck turn into the shoulder or just let the expander push any donuts to the outside that might form?
 
I've been experimenting with several methods. I have pretty much settled on using a Forster Neck Size/Shoulder Bump Bushing die for most of my resizing. I've found that it gives me great results WITH the expander ball in place. Because it's a bushing die I don't have to undersize the the neck and then expand it a significant amount. I neck turn ALL my brass but just enough to knock the bumps off. Some cases in a lot may have a cut up all the way around the circumference and others only 270 degrees or so. With the uniform necks and the bushing only sizing the case the minimal amount, the expander ball merely becomes a final check. If I feel a heavy or light pull of the ball as the case is removed I set it aside for further work.

I find that my cases sized this way are concentric to less than .001" TIR. I've lately taken to just using my Hornady CG ND F/L sizing die to straighten the cases with high runout and then shoot them as sighter/foulers. The get a second chance to join the "main group" after they're annealed and resized with the bushing die. Some make it and others don't.


Also why do you choose to neck size your brass instead of FL? I thought it would have been a lot easier to get the cases the same volume in the inside if I FL size. Here's some things im worried about FL sizing the Brass

Cons:
Over working
Taking a concentric case to my camber (once fired) and making in off alignment by FL sizing
to much side room for the case

Pros:
Every case should "theoretically" be the same, if I take my once fired brass and size them all the the smallest head spacing case, If you only neck size would their be varations on your headspaces between each case?
 
i'm cheap and have a relatively basic setup than most but this is what i've learned over the years

GOOD

besides the usual basic stuff like press, primer pocket cleaning brushes, calipers digital, lubing pad, a tumbler, trimmer, chamfer tool and so on...

a dedicated reloading area away from the missus - bench / desk / whatever to mount the press(s), trimmers, etc. with an electrical receptacle or two close by. i use a L shaped office desk, a 90deg turn gets me from my brass processing only area to charging area.

good lighting

cleaning up (small brush and dust pan) & putting everything back in place when finished, every time. getting residue out the press, keeping it lubed. rags and paper towels.

using an apron instead of pant legs to wipe hands

drawers, filing cabinets, cupboards to organize "stuff" like dies, stuck shell removers, lube, etc.

masking tape to label stuff and times shot brass using ink, not pencil, to write the label with.

a notebook

squirreling away and using small containers - aspirin bottles, small rubbermaid containers, .22LR plastic slide top boxes, etc for putting attachments, loose bullets, etc in. ammo cans - get as many as you can. i love coffee cans.

a comfortable swivel chair, with some sort of adjustability for height and lumbar support.

a mat for the floor

chronograph, even a cheap one is a fantastic tool.

dedicated reloading tool kits kept at the bench - wrenches, allen wrenches, pliers, files, socket set, screwdrivers, etc. even a dedicated cheap electric drill or rotary tool.

a decent digital scale for mass producing short range plinking rifle and pistol ammo, i still rather a balance beam for more the more serious stuff.

making my own dippers out of a spent shell that equals my load to get me close on those scales, then trickle in.

never dull - works great on brass

bullet puller. for impact pullers, a wad of papertowel or cotton in the tip to not destroy the bullet tip

carbide dies for pistol ammo

clock radio - easy to lose track of time when loading, radio covers up the missus' mumbling about it

saving tossed 50 hole plastic pistol factory ammo holders from the range to hold brass while processing and loading

making dummy shells for OAL, case trimming, etc for resetting dies.

using 2 old colanders to sift brass from tumbler media

using a decapping rod and pin to clean brass flashholes

hand priming tool

making sure to check twice that all brass is primed before charging, and all brass is charged before seating heads.

make your own targets, measurements and sizes that gets yo the data you want.

manila folders - keep your test targets and all previous test data that "you know you'll never need to refer to again"

load 1 caliber at a time

loading up in .3 or .5 grain increments, sometimes the sweet spot is in those little graduations

keeping a bad or too used brass bucket, taking it for scrap $ a few times a year.

keeping what you know you will not use in a milk bottle crate - easy to quickly take it all to swop with someone for something you need.

using forums like this to gain info, compile it using Excel, and see what works best over a group of folks comparing similar bullet weight and design, cases, primers, and powder charge

getting to get familiar with powder burn rates vs. barrel length and / or bullet weight.

BC comparisons to judge a bullet against another is only as good as the FPS the bullet is traveling

keeping a picture of my ol' man on the bench reminding me to do all of the above.


BAD (some just a pain in the butt or a DOOH!)

drinking more than 2 beers and continuing to load

hurrying

reloading while tired

having your mind on something else when reloading

thinking hot loads are always better than tame ones

not checking everything at least twice

pushing how many times you load an under $1.00 piece of brass than just tossing it. makes no sense to take a chance of messing up your rifle over this. like driving a corvette fast in the rain on bald tires.

loading up an excessive amount of ammo vs anticipated next few months usage. you never know when the next best bullet comes out, you chop your barrel or sell the rifle having all that ammo to pull apart sucks.

not give a fair shake trying other safe powder, bullet, OAL or trim length combinations just to see if you can come up with a more accurate load for your rifle.

trusting just 1 source of load data, cross reference many books.

not realizing that bullet "A" does not work well with powder "B" at "C" FPS through barrel length "D" with an "E" rate of twist

thinking you know everything without trying something different, as long trying something new is generally considered safe

handling freshly molyed bullets before realizing i should have worn surgical gloves.

putting too much liquid or gell brass cleaning additives to tumbler media making it too gummy caking inside the case and primer pocket.

using brass that is a different manufacturer for working up a load vs. the brass you are actually going to use - case capacity varies per manufacturer!


STILL EXPLORING

neck sizing

HBN coating
 
Also why do you choose to neck size your brass instead of FL? I thought it would have been a lot easier to get the cases the same volume in the inside if I FL size. Here's some things im worried about FL sizing the Brass

Cons:
Over working
Taking a concentric case to my camber (once fired) and making in off alignment by FL sizing
to much side room for the case

Pros:
Every case should "theoretically" be the same, if I take my once fired brass and size them all the the smallest head spacing case, If you only neck size would their be varations on your headspaces between each case?

In theory, if you only neck size, then you will most likely find after several sizings that you will not be able to close the bolt, as the case will have grown too long to allow easy closing. That is why so many people more experienced than I suggest that you F/L size every time with a very carefully adjusted die so you only barely bump the shoulder back no more than .002" In this way, you can get good consistency with the least amount of brass working.
I have had a match grade bushing F/L die on order for about 8 months now, meanwhile I use my F/L die with the expander ball removed. I then use my expander mandrel die. With this set up, my runout is generally within .002-.0025" which is acceptable to me for now.
 
Do you neck turn into the shoulder or just let the expander push any donuts to the outside that might form?

I just push any donuts out and then trim them off when I do followup neck turning. I have a forster neck turning tool I just leave set for my Lapua brass and from time to time just even out the necks. Brass is always moving around. After all, wouldn't you if you were squashed under 55-60Kpsi? :) I'd rather just clean up any donuts in this manner than to take the chance of weakening the shoulder/neck junction and STILL have them form.

Want to get rid of donuts entirely, go to .308 Ackley Improved. Crappy for use in an autoloader but can do some interesting things in a bolt gun. Also improves case life. AI chambers can still shoot factory .308 ammo as that's how you get the brass for that round, fireforming. Not "legal" for F/TR but if not constrained by those rules it does give an edge to the already great .308 case.

If a mandrel is able to push them to the outside wouldn't a expander on a sizing die do the same? I also found it takes a really long time to cut in the shoulder, there has to be a better way, I have 400 cases if I wanted to neck turn!

What case holder are you using? My K&M wobbles really bad.
 
So I neck turned my brass and it was perfect neck wall thickness .014 and perfectly concentric, I than FL in my redding S (no expander), seated with my Forster ultra, checker runout on my case and some a good and some are .006", what's going on!?
 
So I neck turned my brass and it was perfect neck wall thickness .014 and perfectly concentric, I than FL in my redding S (no expander), seated with my Forster ultra, checker runout on my case and some a good and some are .006", what's going on!?

Pull the seater stem and check for any play with the bullet in the seater cup. If you feel any, that is the likely source of the runout. I fought the same thing on several loads and then did this check and found many of my seater dies had a sloppy fit for the bullet I was using. Got a new seater cup that fit and all runout disappeared.
 
Can Forster make a custom seater cup for me? I am using berger bullets

One of the BR shooters at our local range just drills out the hole in the seater plug on his lathe then puts some Devcon in a small ring just inside the opening. Waxes up a bullet seated and checked for 0 runout in a dummy case. Puts case in shell holder, runs it up into the die, and screws the seater adjustment down until it hits the bullet. Hard enough to squish the devcon back into the plug and for the outer ring of the plug to just make contact with the jacket. Let cure overnight and separate the next day.

Key is to make sure every surface that the devcon can come in contact with is well covered with wax (he recommends KIWI Neutral Shoe Polish) and you only use enough devcon to form about a 1/3" ring just inside the opening of the seater plug.

You can make one of these for every bullet you use.
 
Well I'm an idiot, when I was checking them the first time I didn't have the clamp tightened on my hornady runout gauge! I was getting .008 run out I was freaking out all morning, I tightened it and rechecked all of them again, the average was .002, with the largest (only one) being .004, still I think I can do better with neck turned brass.. Any suggestions?
 
Well I'm an idiot, when I was checking them the first time I didn't have the clamp tightened on my hornady runout gauge! I was getting .008 run out I was freaking out all morning, I tightened it and rechecked all of them again, the average was .002, with the largest (only one) being .004, still I think I can do better with neck turned brass.. Any suggestions?


I've found that neck turning and consistent annealing produces the least runout. Although I really like Deadshot2's suggestion about modifying the seater cup with Devcon; I'm going to give that a try. Apparently that tip came from a BR guy... and I thought I was OCD. Those BR guys are certifiable :p
 

Your post reminds me of a saying we had in the aerospace industry, "Sometimes you just have to shoot the engineers and get on with the project!"
I got my first engineering job at Boeing in 1978 working on the 767 design before roll out.
My first engineering boss said that sentence about getting shot to me.
I soon left to go to smaller companies, but I hear he was fired for forgetting that a single point failure should not cause a later aircraft to loose communication with the ground.

It has taken me a lot of years to learn what reloading rituals are worth doing.
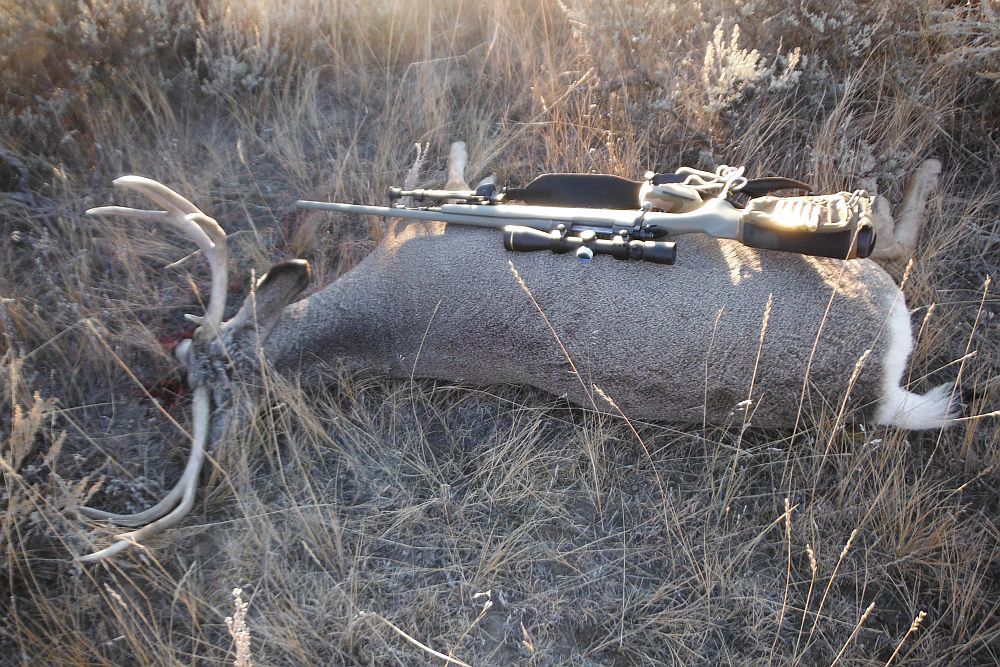
I shot a buck at 477 yards last week.
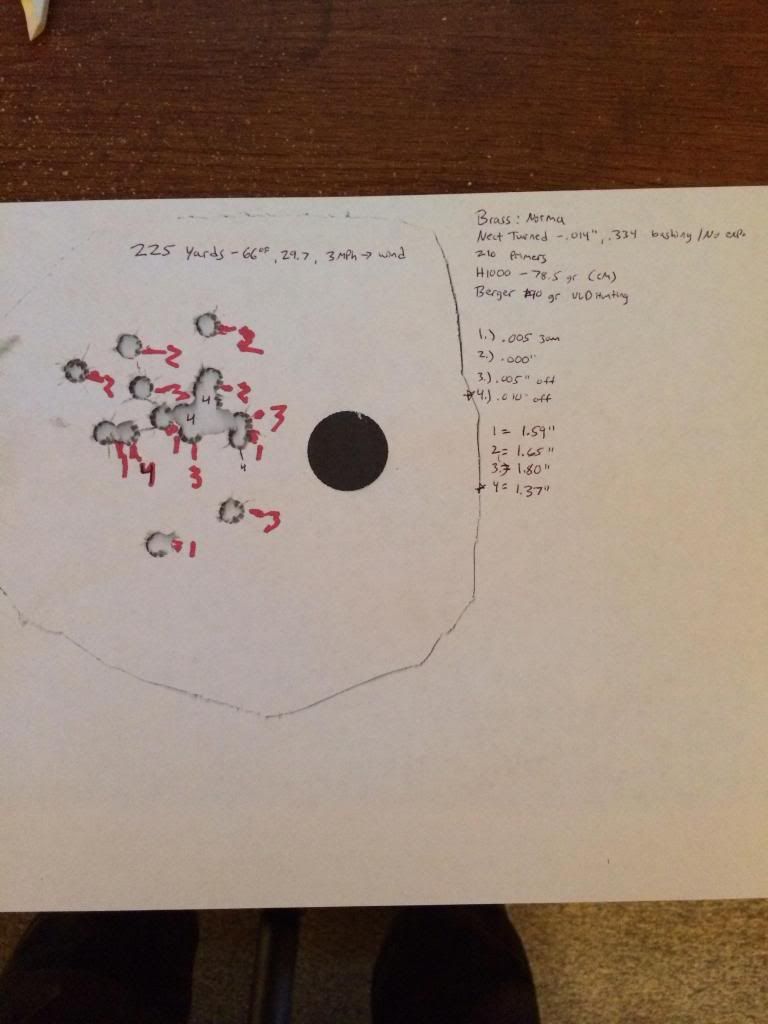
I had more accuracy and precision than I needed.

Buck2013436meterss7mmRemMag.jpg
 
I've found that neck turning and consistent annealing produces the least runout. Although I really like Deadshot2's suggestion about modifying the seater cup with Devcon; I'm going to give that a try. Apparently that tip came from a BR guy... and I thought I was OCD. Those BR guys are certifiable :p


You haven't seen OCD until you've met this guy. He even makes his own sleeves for the Forster/Bonanza seating die. For him, the originals are "too loose". To the average guy, if they were any tighter a case wouldn't fit or the sleeve slide. This guy used to "bore" the inside of the jackets he used to make bullets with. Felt that J-4 Jackets weren't good uniform enough. Also measures his finished BULLETS for run-out. He doesn't know about "Thousandths", only "Ten-Thousandths". He obsesses over the weight of his powder pan, making sure that it reads the same on every scale he owns. Apparently doesn't trust the "tare/zero" feature on any of the three digital scales he owns. At the range he'll drop his powder charges from a Harrels powder meaure, then weigh them on two separate scales.

We give him a bad time about bothering to buy a complete target. All he needs is the 1/2" part in the middle. The rest of us could make use of the rest. He can go "paste" a target and cover all his shots with a single paster at 300 yards.

Oh, did I mention that he posted a 400-17X in a 300 yard match recently? Was also crowned the Club's "Shooter of the Year". Wonder why.

Neat thing is that I get to pick his brain and don't have to buy him a beer/drink. He shares very willingly.
 
Using a separate decapping die before tumbling in Stainless Steel media.
Saving a couple dryer sheets after a load of laundry to use as anti-static wipes works well.
If you're running the RCBS Chargemaster, then the McDonald's straw mod is a huge help for Varget and some other powders.
Keeping the press on a separate table from the scale helps me as well.
 
I would like to hear how in deapth people get in brass prep, is uniforming primers and deburring, neck turning, annealing really worth while. I just want my loads to be completely consistent throughout my loading poccess. For example I want to be able to load my batch of 100 pieces of brass and get the exact same drop data, MV, BC everytime.
There's no such thing as a free lunch. The closer you want to get to single digit ES on MV, the effort goes up exponentially. With a moderate amount of work I got down to an average ES of 30-35. I have had to pull out all the stops and do literally everything mentioned on this site (that I have found) just to get my ES down to 13. (turning necks, trimming flash holes, normalizing primer pocket, sorting brass into .1gn groups, setting neck tension to .002", annealing, trimming meplats, repointing, coating with HBN, sorting bearing length (boattail to ogive) to .001" groups, weighing powder to a single kernel of Varget, ladder tests, adjusting OAL, more ladder tests, more adjusting of OAL, actively cooling the barrel between groups of 10 shots. I have not tested each technique by itself to figure out which ones have the most effect yet, so I do it all. The only test I have done in any depth, other than ladder tests, is a comparison of the effect of bearing length vs bullet weight. I proved, at least to myself, that bearing length has a much greater effect on ES and SD than bullet weight does (from the same batch of bullets.) Only a hundred more tests to conduct. I guess that's why it takes so many years to get good at this endeavor, and also what keeps us trying to get a consistent single digit ES.
OH yeah, and the money spent goes up exponentially too. You will not have the ability to even know that your ES is in single digits without something like an Oehler 35P proof chronograph. You cannot weigh powder to a single kernel without a high end (magnetic force restoration) lab scale. Getting a consistent annealing job will require something like the Giraud Annealing machine.
 
Last edited:
There's no such thing as a free lunch. The closer you want to get to single digit ES on MV, the effort goes up exponentially. With a moderate amount of work I got down to an average ES of 30-35. I have had to pull out all the stops and do literally everything mentioned on this site (that I have found) just to get my ES down to 13. (turning necks, trimming flash holes, normalizing primer pocket, sorting brass into .1gn groups, setting neck tension to .002", annealing, trimming meplats, repointing, coating with HBN, sorting bearing length (boattail to ogive) to .001" groups, weighing powder to a single kernel of Varget, ladder tests, adjusting OAL, more ladder tests, more adjusting of OAL, actively cooling the barrel between groups of 10 shots. I have not tested each technique by itself to figure out which ones have the most effect yet, so I do it all. The only test I have done in any depth, other than ladder tests, is a comparison of the effect of bearing length vs bullet weight. I proved, at least to myself, that bearing length has a much greater effect on ES and SD than bullet weight does (from the same batch of bullets.) Only a hundred more tests to conduct. I guess that's why it takes so many years to get good at this endeavor, and also what keeps us trying to get a consistent single digit ES.
OH yeah, and the money spent goes up exponentially too. You will not have the ability to even know that your ES is in single digits without something like an Oehler 35P proof chronograph. You cannot weigh powder to a single kernel without a high end (magnetic force restoration) lab scale. Getting a consistent annealing job will require something like the Giraud Annealing machine.

Without having tried all the things you list, I have concluded similarly that a larger of money and a more extreme amount of work gets less and less results the farther you pursue this---may the law of diminishing returns???
So, my question for you is simple. Did you see a marked difference in group size as your ES dropped from 35 to 13? And then a follow up, if you answer,"YES," can you actually attribute that improvement in group size to the drop in ES, or is it also likely to have been influenced in large part to your having gained proficiency by extended trigger time while testing your improved hand-loads?

If you live in a world where "good enough" is adequate then you're right. You will reach a point of diminishing returns for effort expended.

That said, if you are an exacting person, chances you don't use the phrase "good enough" It's either "Good" or "It's Not".

If you are a competitor, a reduced ES will often mean the difference between an "X" or a "10". A "10" or a "9". Even if your game is not that exacting, just think of it as the difference between 9 hits or 10.

True enough that most game won't know the difference between a hit in the middle of the heart or one that takes out both lungs. They will still die.


Many competitors end up "Buying their points" both through the use of expensive tools or intensive labor investment. "Just good enough" has never won a Championship.
 
If you live in a world where "good enough" is adequate then you're right. You will reach a point of diminishing returns for effort expended.

That said, if you are an exacting person, chances you don't use the phrase "good enough" It's either "Good" or "It's Not".

If you are a competitor, a reduced ES will often mean the difference between an "X" or a "10". A "10" or a "9". Even if your game is not that exacting, just think of it as the difference between 9 hits or 10.

True enough that most game won't know the difference between a hit in the middle of the heart or one that takes out both lungs. They will still die.


<b>Many competitors end up "Buying their points" both through the use of expensive tools or intensive labor investment.</b> "Just good enough" has never won a Championship.

That sure makes it sound like fun!
 
Last edited:
That sure makes it sound like fun!

The neat thing about being picky and exacting is that it gives someone a lot to do when they aren't at the range. Being retired I have a lot of time I can use for case prep. Fills a lot of rainy and windy days when shooting isn't much fun anyway.

When it comes to brass prep I tend to keep lots of brass on hand for each caliber. Almost 10k for .223 AR's, 500+ for .223 Bolt action, and a couple thousand for .308 "Precision" loads. The latter is sorted into weight groups and then further segregated by sized case neck runout. I always have brass ready to go, just a matter of priming and loading. About an hour or so to have another 100 rounds ready to take a trip through the barrel and down range.
 
For those that load .308 here's something I've found really works to store and carry a lot of handloaded rounds.

Save or scavenge all the plastic inserts from Federal Gold Medal Match ammo boxes. The ones that can be threaded on a belt if you wish. I have been able to scavenge about 100 or so that were discarded at my local range.

When you finish loading your SHTF load in quantity, place the rounds in the plastic inserts and then store then in a .30 cal ammo can placed on end. I can get about 18 of these strips in an ammo can with a couple lying flat. You can also put in a desiccant pack if you wish for long term storage. Makes for easy handling if you don't want to carry ammo loose in a pouch or in a "rattle box" like the MTM's. I keep a can full of these in my truck loaded with 178gr A-max bullets. Kind of "just in case". Cases fit nicely under the rear seat of my pickup. Flip the seat up and it's right there.
 
I'm working on a shelf too but more at counter-top level so I don't have to raise my arms so much. Then I'm going to commandeer an old laptop that one of my grand kids has abandoned because it's "so yesterday". Add a simple webcam mounted in front of the beam pointer and I'll be able to see when the scale is "balanced" without having to invoke my bifocals. Big screen view instead of "squinting and cocking my head". Others that have done this have found it to be super accurate as well. By mounting the webcam directly in front of the pointer and scale it can be adjusted to eliminate any parallax error.

I saw a YouTube video where a guy used the magnifying glass app on his smartphone to do this. He rigged a little stand to hold the phone aimed at the pointer on the scale. I tried it, it works great. On the app I used you can even turn on the light to brighten up the picture. Very clever.
 
Reloadingincar10-28-2012tiny_zps767345dc.jpg

I have been reloading in my vehicle, and driving from the long range paper target.
That is in a remote location miles from the nearest other human being.

One day of that target practice is worth a month of Saturday trips to the suburban range.
The ammo gets tuned up.
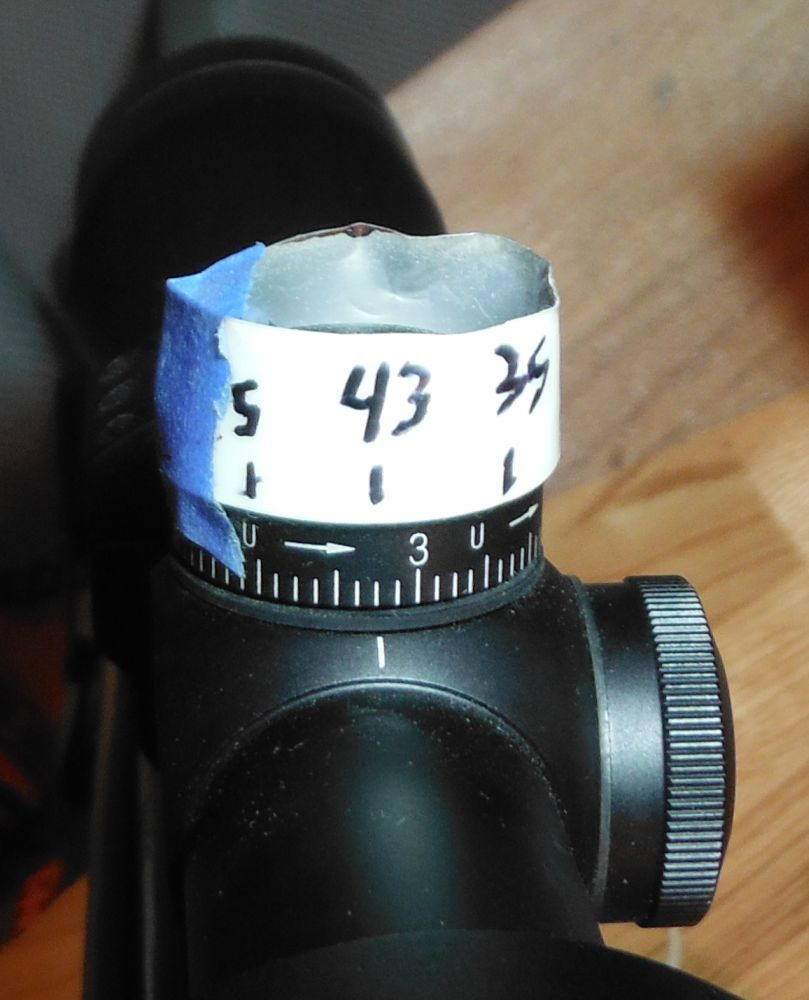
The scope elevation turret gets marked for ranges.

LeupoldCDStapedoverwithglowtapeandsharpiepen11-18-2013.jpg
 
There's no such thing as a free lunch. The closer you want to get to single digit ES on MV, the effort goes up exponentially. With a moderate amount of work I got down to an average ES of 30-35. I have had to pull out all the stops and do literally everything mentioned on this site (that I have found) just to get my ES down to 13. (turning necks, trimming flash holes, normalizing primer pocket, sorting brass into .1gn groups, setting neck tension to .002", annealing, trimming meplats, repointing, coating with HBN, sorting bearing length (boattail to ogive) to .001" groups, weighing powder to a single kernel of Varget, ladder tests, adjusting OAL, more ladder tests, more adjusting of OAL, actively cooling the barrel between groups of 10 shots. I have not tested each technique by itself to figure out which ones have the most effect yet, so I do it all. The only test I have done in any depth, other than ladder tests, is a comparison of the effect of bearing length vs bullet weight. I proved, at least to myself, that bearing length has a much greater effect on ES and SD than bullet weight does (from the same batch of bullets.) Only a hundred more tests to conduct. I guess that's why it takes so many years to get good at this endeavor, and also what keeps us trying to get a consistent single digit ES.
OH yeah, and the money spent goes up exponentially too. You will not have the ability to even know that your ES is in single digits without something like an Oehler 35P proof chronograph. You cannot weigh powder to a single kernel without a high end (magnetic force restoration) lab scale. Getting a consistent annealing job will require something like the Giraud Annealing machine.

It would be very interesting to find out through testing what the gain is for each extra additional step.
 
Following advice from top level shooters and spending lots of time doing my own research / trial and error.

Buying the best equipment and having the right tools for the job also made it a lot more enjoyable.
 
Having friends that know more than i do to tell me what works and what is useless BS with little to no real effects so i don't waste my time with those things and can focus on the things that do!!!
 
A couple of things I have learned/adapted to..

After priming I put my cases in the tray upside down until I drop a charge into them. This eliminates 2 things. The first is I used to have my head up my ass and dropped a couple primers upside down (You know a firing pin will set them off?). The other is the possibility of a double (Almost impossible with most of the stuff I reload but possible with handgun stuff).

Photo0022.jpg


Another thing is if it wont shoot Varget or RL-22 then there has to be something wrong with it.

I buy a shellholder with every set of dies. Kinda pointless but it works for me.

If you don't have a RCBS electronic powder drop/scale then get one. Worth every penny.

I gave up on the trim thingy and buy trim dies now. I think they are worth the price of admission but to each their own.

Redding type S dies... My FIL has been reloading for like 30 years and he used a set of mine and now has one for each caliber of his own. Was a steep investment for him at one shot but again worth the price of admission.
 
Last edited:
Going-to/Shooting-in Benchrest Competitions,... There are usually a bunch of guys there reloading on-site. Just asking them questions and talking with them about reloading (which they LOVE to do) you're undoubtedly going to pick up tips and tricks on not only reloading, but working up a tack-driving load and reading wind/conditions. You'll typically see that most of the competitors involved are older, but don't think that deter you. Just because they don't know squat about MIL-RAD's, hold-overs, or range-cards doesn't mean that they don't know anything about making tack-driving loads for rifles,... Most have forgotten more about reloading than any of us know. In my area, a lot of the contestants are retired aerospace engineers and machinists who love to tinker and tweak endlessly with their competition rigs. They typically don't stop tweaking 'til their rifles are shooting 0.10-0.15 MOA... ALL DAY LONG!!

Keep in mind that Benchrest Comps differ from Practical Comps in that the shooter is really subordinated to the weapon system. They typically just aim the rifle with their front/rear rest, touch the trigger (usually set at mere ounces), and let the rifle free-recoil through the shot - it's 'precision' of the rifle and load taken to the extreme. However, because these rifles are so accurate, it requires the shooter to be very attuned to wind conditions and the environmental changes that affect their rifle/load. It's definitely a science, but there is a fair amount of art to it as well. I really liked shooting benchrest as the accuracy of the rifles/loads is intoxicating, but it definitely requires years and years of tinkering to learn well,... not to mention a lot of money.

A great source for insight into the world of Benchrest Competition and reloading for precision rifles is the book "The Book of Rifle Accuracy" by Tony Boyer (12-time World Champion and 11-time Shooter of the Year). It's definitely geared toward benchrest, but there's a lot of wisdom in it that any shooter interested in accuracy will appreciate and utilize,...

Ry
 
The single greatest reloading "tool" is a good, well designed, sturdy and smooth topped loading bench with the press(es) mounted high enough you can fully depress the handle without bending over. The main press, powder measure, scale and trickler placed in a well thought out work flow path. Good book/tools and component storage. And lots of lighting.