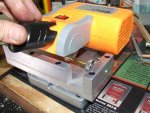
I have a Dillon 550b with a special tool head and trimmer die I got from Brad's Warehouse that runs with the Dillon 1200 electric trimmer motor. I run it through there and then I run them through a Forster full length size die. Made around 1000 for myself and about 500 for a buddy with no issues what so ever. I need to make some more, but have been lazy lately.
Here is a thread I made on a few others forums to show my process.
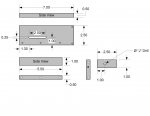
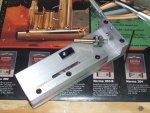
Brad's Warehouse modified 550b tool head and trimming/forming die. These are made by Whidden Gun Works. The tool head is not simply a cut down Dillon tool head, but a CNC machined brand new tool head. I had to shave some material off of one side because it would not slide into my press. You can see the little step up right at the hole the locator pin drops into. I didnt have to take all that material off, but a bit to get it to slide in. The other side needed no work, the back needed no work, just that one part. A little work with a file had things working a lot better. I guess this is better than if it was way under sized and loose in the press. The trimming/sizing die is pretty nice too. This tool head is also milled on the bottom to allow your lock ring to go there since there isnt room on the top. I had to try 3 or 4 lock rings before I found one that was small enough to work. You have to take the tool head out of the press to snug it down because there was no way to turn it with the tool head in the press. This and the little filing I had to do on the tool head where the two things that made me want to pull my hair out, but once I figured those two issues out everything else went well. I am not sure if my lock ring was a factory dillon ring, a Lee ring, Hornady, or RCBS, I dont know. It was a standard with no set screws or anything like that, fairly small OD. I will try to shoot a picture and get it up here.


First step in the process is to set head spacing. To do this you simply run the forming/trim die down until you are at spec. You need to have a case gauge for this. I didnt take pictures of any of the brass I used for this because I ended up trimming it for use so I didnt actually waste any brass except for the 2 or 3 where I set the shoulder slightly low. I think I used 5 or 6 pieces of brass to get it just right and then after running 10 pieces through I actually ran the die down just slightly lower. I used a piece of new factory loaded ammo as well as a piece of once fired brass from my gun to setup head spacing. I think I set it up kind of in between, but at the point I was at I was trying to get it within maybe a couple thousands so pretty dang close. Factory non-fired dropped slightly deeper into the gauge and the once fired was slightly higher. If I find I have issues with it running in my gun I will probably crank down the die just ever so slightly more, but I am pretty happy with where I am at. I also have not run this brass through a full length die with an expander ball. That may sharpen everything up just slightly more and get me even closer to being perfect.


Factory non fired round in the case gauge
I believe this is where I ended up. I cant find the picture of the once fired in the case gauge, but it was basically level with the top of the gauge. The factory was level with the bottom, and I was in between.
But, like I said, once I started running a few cases through I dropped the die down slightly more, but I dont know if I took any pictures of them in the case gauge, but it looked way closer to factory non fired than the first 10 or so I did(I ran them back through).


