SAKO TRG - Trigger Group Removal Question

sakohunter

Private
Full Member
Minuteman
Oct 1, 2010
17
1
59
Queensland, Australia
SAKO TRG Brains Trust,

I have just picked up a new TRG-22 and am unable to remove the trigger group to adjust the second stage per instructions.

There are a few minor differences with this newer version over the previous, in particular the safety catch now has a wider
"spade" fitted to it that enables easier safety operation and this is the rub.

It would appear that the new safety catch set-up is not allowing the allen key to seat home thus allowing the undoing of
the trigger group screw and remove the trigger group assembly?

Anyone else had a similar experience?

Regards,
SH
 
I would like to know the answer to that question myself. Hey there KRG, I was the one who contacted you about your mag release working on the new 2013 models..... Can't really tell what is keeping the Allan wrench fron fully seating, its really hard to see down in the trigger assembly.
 
Can you post pics? There's not too many of those here floating around. You might have to remove the safety extender.

Removal of the safety extender looks tricky too?

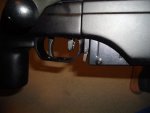
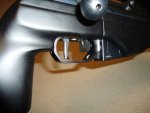
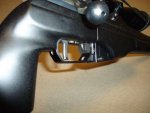
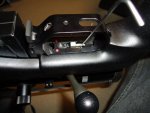
Here are a couple of pics from the front engaged, rear engaged and front safety off.

Regards,

SH
 

Attachments

  • Front Engaged.JPG
    Front Engaged.JPG
    54 KB · Views: 91
  • Rear Engaged.JPG
    Rear Engaged.JPG
    62.2 KB · Views: 98
  • Rear Off.JPG
    Rear Off.JPG
    60.8 KB · Views: 91
Just a word of caution in case you are considering lowering the second stage pressure to below 1kg - Don't!

I wrote to the Sako factory some years ago asking how low I could safely adjust the pressure on the second stage.

Their reply: "TRG-trigger is a single lever design and made for 1-2kg trigger weight, if adjusted too low pressure inside builds & drop safety feature starts to work and pull will come very stiff and long."
 
Get some of those "round-headed" allen wrenches.......the ones with the little o-ring in the tip; they allow you to come in at an angle with out buggering up the screw head. Also, I was under the impression the bolt had to be removed when doing anything with the trigger
 
Well, after speaking with Beretta Australia (very helpful chaps) I was able to learn how to remove
the trigger group - for starters!

The new trigger design requires the trigger to be pulled to enable the 5 mm hex head key in to engage
the trigger group removal screw. Easy.

I now discover that the alleged second weight adjustment screw does not exist where described in the manual.

After looking over the trigger assembly which has some significant differences from the previous model, AND the
bloody owners manual in the box, I also discover that the second weight is now adjustable externally.

So, no trigger group removal required at all.

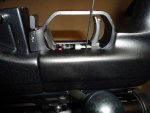
Refer images, a 1.5 mm ball head hex key does the trick and use micro adjustments.

It appears to do the trick...I will find out tomorrow at the range whether or not!

Regards,

SH
 

Attachments

  • Trigger Adjust.jpg
    Trigger Adjust.jpg
    96 KB · Views: 88
  • LHS Trigger Group.jpg
    LHS Trigger Group.jpg
    92.3 KB · Views: 84
  • Like
Reactions: RedBreast21
Sakohunter, about a month ago, I ran into the same trouble as you did attempting to remove a new style TRG trigger. The information is available on the "2013 sako TRG upgrades" thread.
The new triggers first and second stage are not independently adjustable as was the previous model. The lightest adjustment I can make with this new trigger is about 16 oz on the first stage followed by 30 oz on the second, for a total pull weight of 46 oz. I don't like a heavier second stage than first. I prefer the previous model trigger and will exchange the trigger in my new TRG 22 with the old style.
 
I'm sorry but I don't get it.
On the picture above you see 2 screws in the triggerguard.
I thought that the right screw was the second stage trigger pull adjustment screw, isn't that right?
And what does the left screw do? Is it just securing the right screw?
And how do you loosen the left screw? There is no hole in the triggerguard to loosen it.
 
I have one of the new 2013 models with the upgrades and I spent a bit of time loosening and tightening screws and this is my trial and error experience. both adjustment screws are right together in front of the trigger and are meant to be adjusted at the same time. start by loosening the screw that is closest to the safety paddle and run it out(loosen) a few rotations. then run the other screw out a couple rotations. now tighten the first screw back down onto the second screw. the first screw tightens and locks the second screw. I think what the designers at Sako did was to come up with a setup that adjusts and locks at the same time. don't strain either one of these screws, go gently until the setup makes sense to you. I got my trigger down to about 1 1/2 lbs. it is a very crisp break. if someone has better knowledge of the Sako trigger setup, please let us know, this was my experience with it.
 
8 years later . . . the whole "pull the trigger in order to remove the trigger group retaining screw" info was very useful . . . after trying for an hour to somehow get the hex key in (because I'm used to the pre-2013 version!).