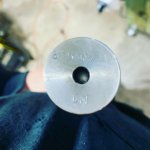
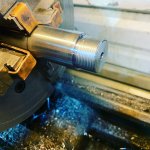
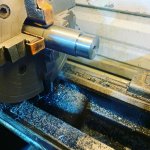
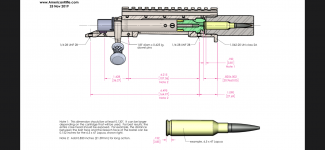
I should say up front, im becoming quite proficient on my lathe but I’m no machinist. I feel I’m ready to start practicing on threading mock barrels for actions and build up some confidence before I plunge into an actual blank. I have a few questions and was hoping y’all could help a dude out.
1. What is recommended the distance from the bolt nose from the barrel tenon? Is every action/tenon different?
2. What is the typical case protrusion from the barrel tenon?
3. When measuring an action for a shouldered barrel, do you just need the distance from action face to bolt nose then ream the chamber to proper headspace?
Thanks for any advice you can give, I’m open to hear all you have to say.
I'll try and help.
There's three different basic tools that I use for doing this.
1. A depth micrometer with the appropriate stylus for the required reach. Generally, a 0-1" range will work.
2. A 1-2 inch micrometer that hasn't been used as a C clamp
3. A pair of calipers, 0-6" range
Numbers:
1. Ensure your action is tore down into two primary components, The receiver and the bolt. No springs in the bolt. We want it "dumb".
2. Throw the bolt into the receiver and roll it into battery (closed)
3. Measure from the face of the receiver to the highest point on the bolt. On an M700 this would be the nose projecting off the forward side of the bolts lug features. Record that value.
4. Now measure to the top side of the bolt's lug faces. Record that value as well.
For sake of simplicity, we'll say value from #3 is .9 and the value of #4 is 1.0. This would give you a .100" difference.
If this were real and I was doing it, I'd take the 1" value, add the thickness of the recoi lug (again, assuming an M700 type action where it's a "washer" stuck between the barrel/receiver), then subtract .01" from that total number. So, if your using a .250" lug for instance, you'd end up with 1.0+.250='s 1.250-.01"
1.240" would be your ultimate tennon length as measured from shoulder of barrel to the face where your threads start. .01" provides the clearance so the bolt doesn't wipe the face of the barrel.
Now, take the 1.24 value and subtract the .100" from it to know how deep to go on your counterbore. The .01 is already factored in. This would be the actual breech clearance (I guess).
On most M700's the value actually hovers around .150-.155. If you add .01 to that then you would figure on having .160-.165 as your value for unsupported case. (meaning how much is dangling out of the chamber on the barrel. If you take some brass and slice it in half, you'll find you are well in front of the thinwall portion of the case web. You really gotta goof it bad for the brass to fail at this value.
Headspace.
There's a bunch of ways to do this. I like dumb, simple stuff. If I know that an M700 is setup so that the case head is basically flush with the face of the barrel and my reamer has a witness mark for the case head location, then its a pretty simple task of just laying a 6" scale along the length of the tool and measuring from the tip of the pilot screw to that mark. Lets say it's exactly 3.5".
Setup your reamer however you do and set a zero point. What would do in a manual lathe is just have a gauge block of a known thickness handy. It can be anything. Squash it between the end of the tennon and the tip of the reamer. Zero your stuff, remove the block, advance it by that thickness, then zero again.
So, you start chewing your hole in the barrel for the chamber. At say, 3.250" depth (roughly a quarter inch from the estimated target depth) I'd stop, clear any swarf, stuff a GO Gauge in the bore, and thread the lug, receiver, and install the bolt. Screw em on until it snugs up. Not silly tight, just firm contact. You should see a gap between forward side of lug and the shoulder. Measure that gap. In my shop I have a .01-.06 set of gauge pins. First time around I'll grab the calibers and get a "knotted string" distance to go. We'll save the gauge pins for once were under the .06" value.
Once there, we just start sticking pins in the gap until one sticks, yet allows the bolt to just barely open freely. In our example of ".250 to go" lets pretend the value was actually .241". If this were me, I'd go .241" + an additional .002" to .003" (what your doing is trying to anticipate how much your threads will load up once you torque everything down. At 100lbsft on the torque wrench with copper antisieze and a "good" thread fit (not super slopply loose, but not requiring a pipe wrench either, just "silky" in feel) it'll typicaly pull up .002" to .003" on a SS barrel.
Ok, so you get this all done, screw it all together, throw a gauge in it, and the bolt closes on the GO, but sticks on the NO GO. Great. One more thing I do. I have a tin full of .03" solder cut up in little snips. Stick one of those pieces to the bolt using some grease or antisieze. With the barrel torqued up fully, throw the gauge back in it. Now chase the bolt in behind it. LUBE the lugs! Now, using some forward pressure on the bolt handle, roll it into battery. You are squishing the solder. Pull the bolt, recover the solder, then measure how thick it is. That is your "no shit" value for headspace over the GO Gauge. Here, we call this "GO plus .001" or whatever. Attempting to keep it conservative (under .002") generally helps with brass life as you avoid excessive case web growth. (assuming the brass is setup properly of course)
The thing to keep in mind here is the tool. Reamers are ground on a taper along the body. That means the body is growing as it heads rearward. If your brass is meant to be in the low ".470's" (a typical value for most 30-06 case head diameter cartridges) yet you go plunge an extra .005" on the depth and choose to ignore it, the brass will still likely shoot. The issue is the back of the case is now encouraged to grow.
Guys used to do this all the time on Dashers by just cramming the BR reamer the extra depth, then could not figure out why the cases were splitting.
Hope this helps. Its not hard to do. Maybe buy some round stock and just practice threading. That is far more challenging than the reaming part imo when doing it manually. I would also look at insert grades made for "hard turning". The chip load is much less than a typical insert used for production stuff. You'll be able to sneak up on pitch diameters much easier and avoid work hardening the threads while doing so.
Last, if you are using an M16xtr on the bolt, ensure the Id of the breech ring has enough room for it to slip over the case rim. Very common "newb" goof. Qualify it with a piece of brass before pulling the barrel. It'll save your bacon!
Good luck.
C.


