So I just finished my first bit of smithing on my first rifle.
It started with my savage 10pc, and mounting a aluminum 20moa scope base from TPS. I noticed when I torqued it all down, it seemed a little off. When eyeballed from the back it seemed to have a hump in the middle, so I used a striaght edge to check things out
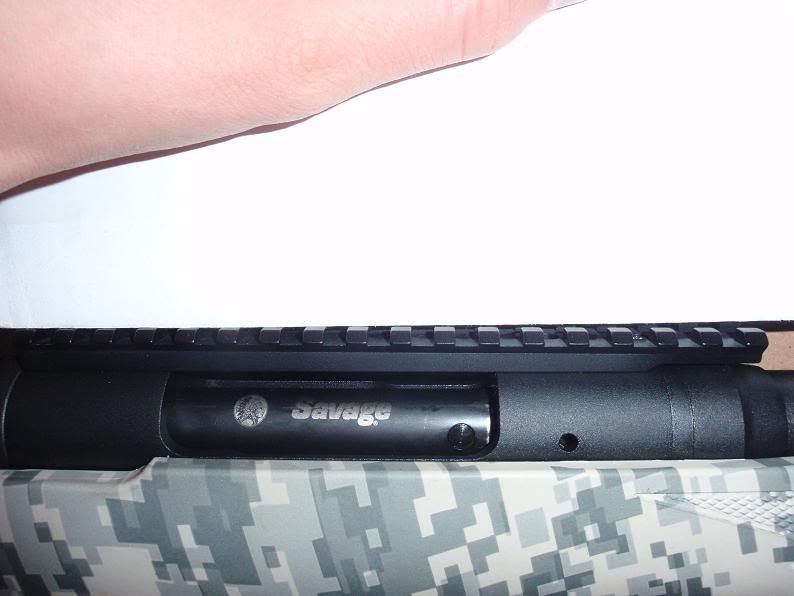
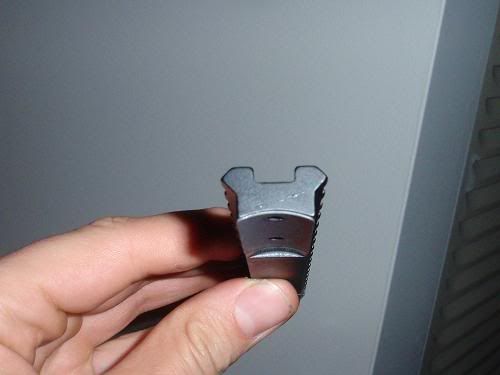
As you can see it caused the rail to be out front to back a couple of degrees.
So I read what I could find, and i was told to just torque one side at a time to see were the error in the action was and then bed that end.
I torqued the front down.
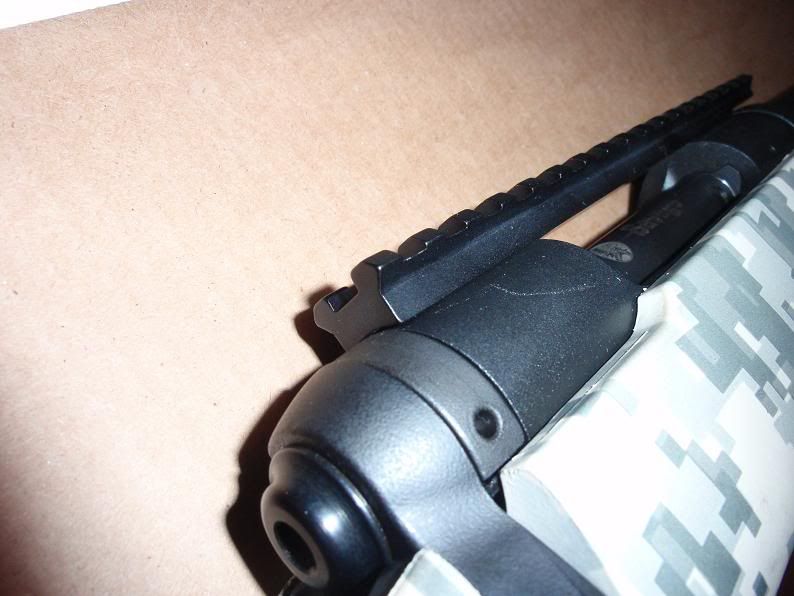
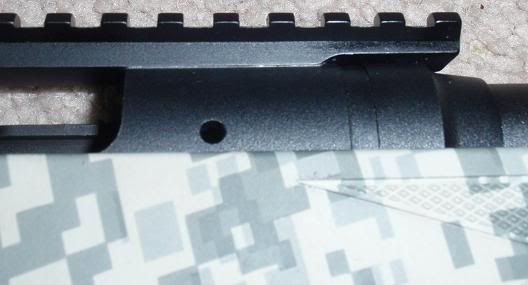
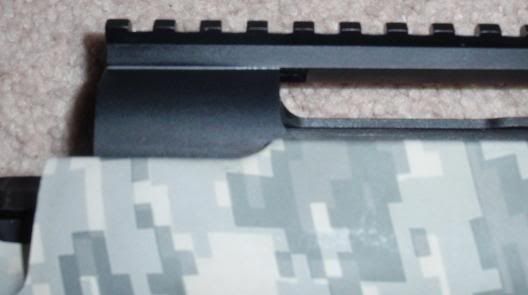
And as seen at the rear of the bases, there was a slight gap.
I then took out the front screw and torqued down the back.
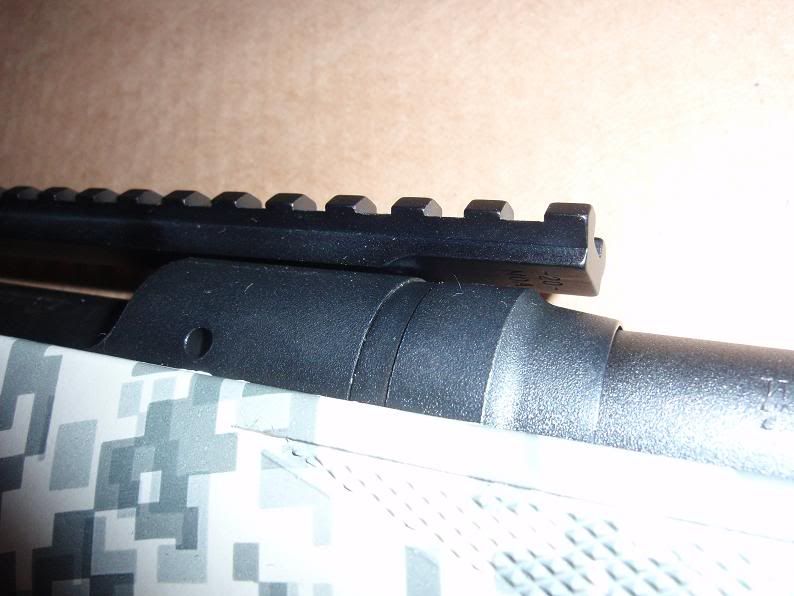
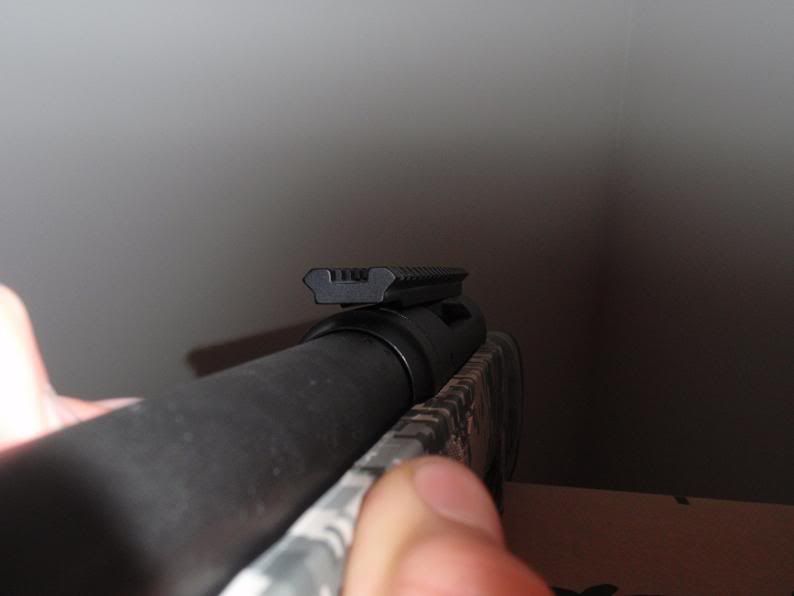
As seen in the last two pic there was a huge ( at least I would call it huge) gap. So from what I heard I should bed the back. But as I thought about it, a gap on the front that big would lose any MOA gain I had from the 20 MOA base. And just because the gap is higher at the front dosn't mean the problem is at the front.
Think a teeter tooter, but you move the fulcrum (high point)to one side the other side then goes higher (bigger gap)
So I decided to bed the entire base torquing down only the front and letting the epoxy fill in the gaps anywhere else, and might even get a at least a extra 1/4 MOA out of it.
SUPPLIES
Rifle action
TPS scope base
VARSOL for degreasing
JB WELD for bedding
KIWI polish for a release agent
CREDIT type card for mixing and applying bedding
SCOTCH BRITE pad for ruffing up base
Q-tips and rags fro clean up
1.I started by using shoe polish on my action and anywhere I didn't want bedding to stick to, as well as the base screws
2. I used scotchbright pads to ruff up the rail surfaces, as well as used a knife to scratch in some deeper groves for the bedding to bite to. ( will use a heavy grit sandpaper net time)
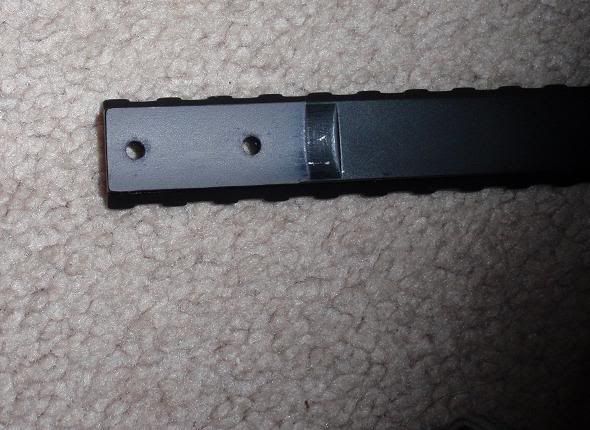
3. Mixed my JB weld and applied it to the scope base coming short of the screw holes.
4. Placed the base on the action, as snugged the very front screw down, and lightly put in the other screws to line every thing up.
5. I used Q-tips and Varsol to go around the base and action removing any execss bedding.
6. I left for 2 hours, then removed all but the front screw, cleaned the holes and the screws of any bedding, and re waxed the screws replaced them finger tight. I then removed the front screw , cleaned the hole and screw and torqued it back.
7. I left it for 24 hours, unscrewed the screws, took a breath and prepared to have my base welded to my base, then just a slight tug and *pop* she came right off.
8. I then cleaned everything off with varsol, reassembled and the base is tight full contact and true.
It started with my savage 10pc, and mounting a aluminum 20moa scope base from TPS. I noticed when I torqued it all down, it seemed a little off. When eyeballed from the back it seemed to have a hump in the middle, so I used a striaght edge to check things out

As you can see it caused the rail to be out front to back a couple of degrees.
So I read what I could find, and i was told to just torque one side at a time to see were the error in the action was and then bed that end.
I torqued the front down.

And as seen at the rear of the bases, there was a slight gap.
I then took out the front screw and torqued down the back.


As seen in the last two pic there was a huge ( at least I would call it huge) gap. So from what I heard I should bed the back. But as I thought about it, a gap on the front that big would lose any MOA gain I had from the 20 MOA base. And just because the gap is higher at the front dosn't mean the problem is at the front.
Think a teeter tooter, but you move the fulcrum (high point)to one side the other side then goes higher (bigger gap)
So I decided to bed the entire base torquing down only the front and letting the epoxy fill in the gaps anywhere else, and might even get a at least a extra 1/4 MOA out of it.
SUPPLIES
Rifle action
TPS scope base
VARSOL for degreasing
JB WELD for bedding
KIWI polish for a release agent
CREDIT type card for mixing and applying bedding
SCOTCH BRITE pad for ruffing up base
Q-tips and rags fro clean up
1.I started by using shoe polish on my action and anywhere I didn't want bedding to stick to, as well as the base screws
2. I used scotchbright pads to ruff up the rail surfaces, as well as used a knife to scratch in some deeper groves for the bedding to bite to. ( will use a heavy grit sandpaper net time)
3. Mixed my JB weld and applied it to the scope base coming short of the screw holes.
4. Placed the base on the action, as snugged the very front screw down, and lightly put in the other screws to line every thing up.
5. I used Q-tips and Varsol to go around the base and action removing any execss bedding.
6. I left for 2 hours, then removed all but the front screw, cleaned the holes and the screws of any bedding, and re waxed the screws replaced them finger tight. I then removed the front screw , cleaned the hole and screw and torqued it back.
7. I left it for 24 hours, unscrewed the screws, took a breath and prepared to have my base welded to my base, then just a slight tug and *pop* she came right off.
8. I then cleaned everything off with varsol, reassembled and the base is tight full contact and true.

