Another DIY project for you guys willing to tackle your own repairs and work.
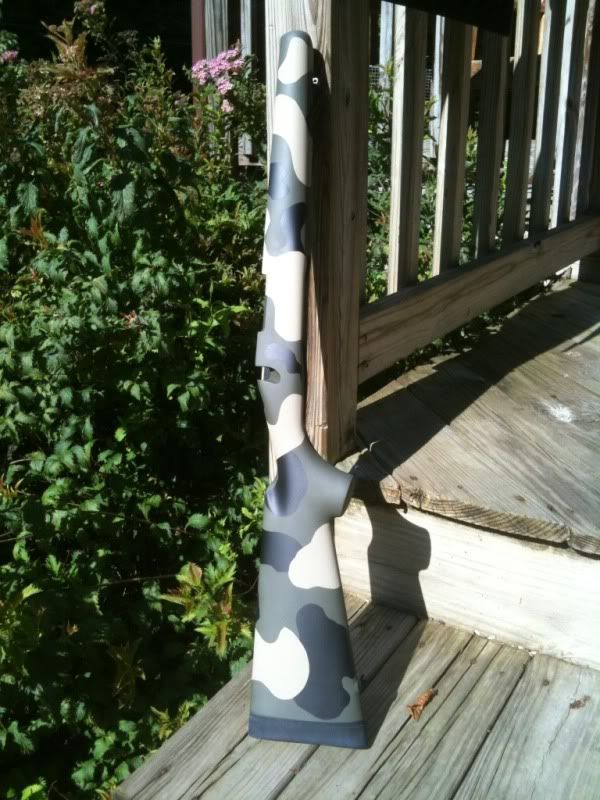
Hide member <span style="font-weight: bold">fw707</span> recently sent me an HS Precision LTR stock for a bit of work (stud reinforcement and flush cup install) and I thought I'd share a few tips for you guys. It's an easy fix if you have stripped or broken a sud out of your stock and takes minimal time/equipment to fix.
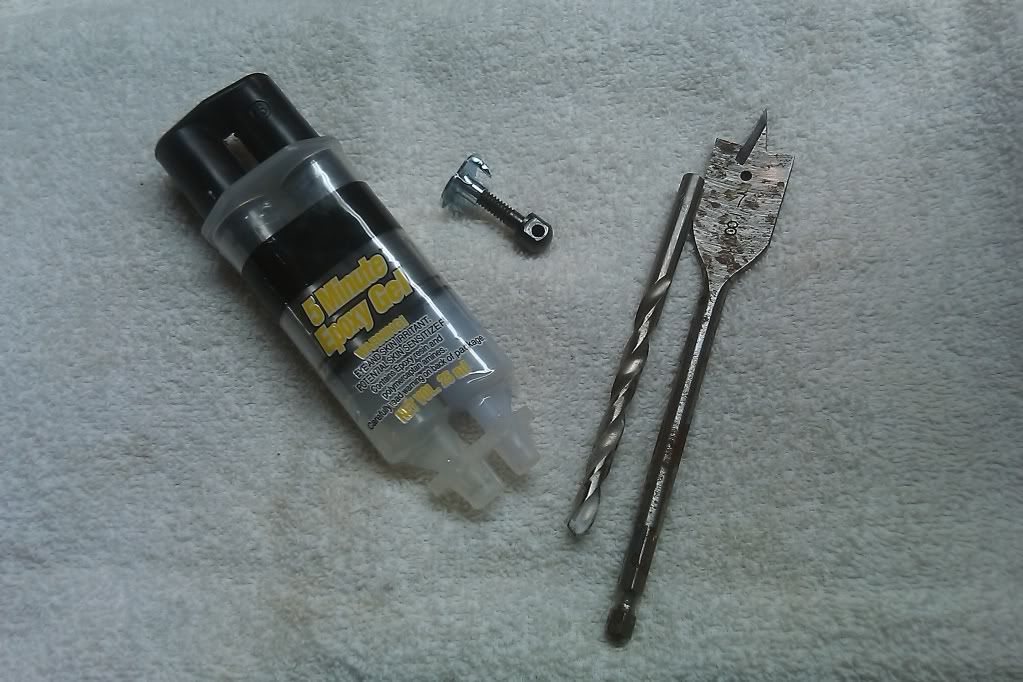
Here's a list of what you are gonna need.....
1. 10/24 T-Nut
2. 5/16" bit
3. 7/8" spade bit
4. Epoxy of some sorts (Dev-Con 2-part 5 minute used here)
Photo of needed items.....
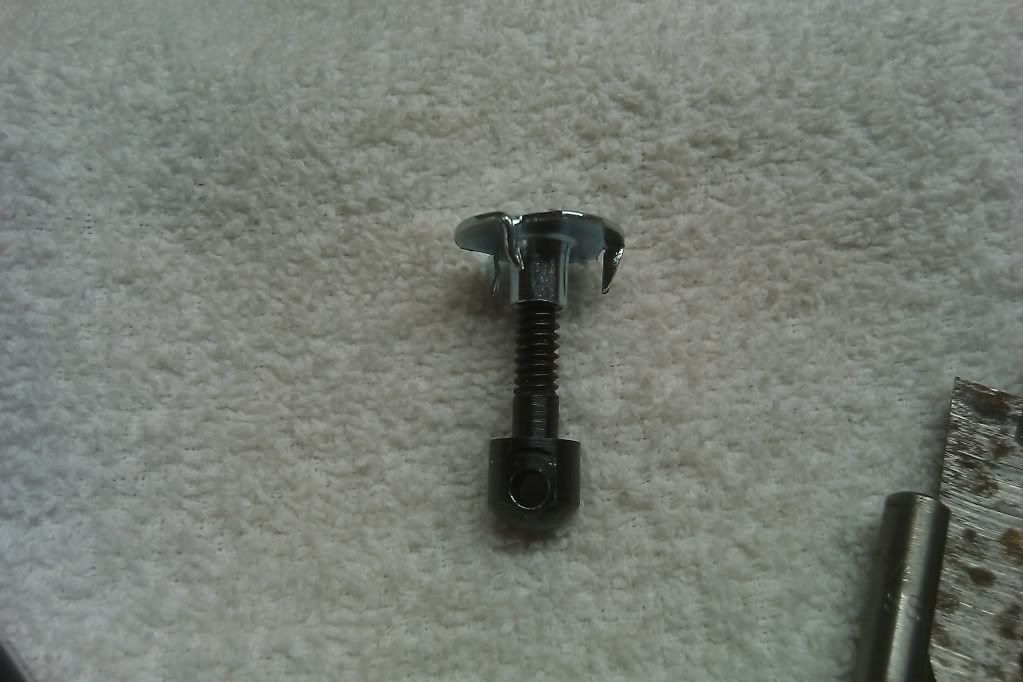
For those not familiar, this is a T-Nut.....
Here's the outline for the project......
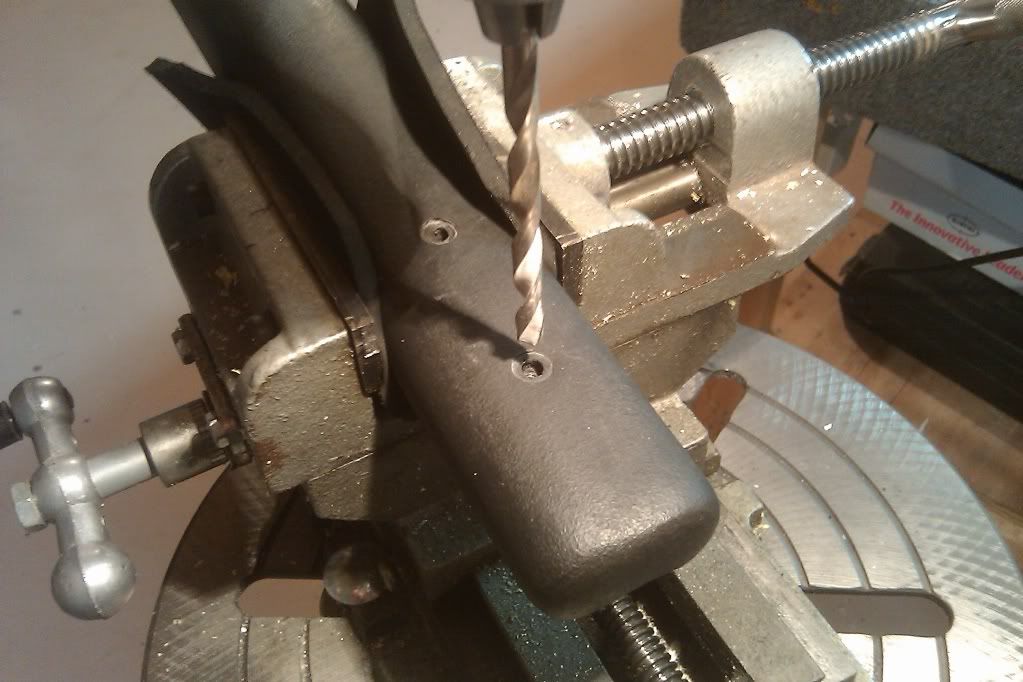
1. First we have to open up the existing stud location for the through hole on the stock for our T-Nut, here we use the 5/16" bit. You can accomplish this with an ordinary hand drill, I did this project on my drill press and a cross slide vise. We flip the stock "belly up" and drill our hole from the bottom towards the barrel channel like so......
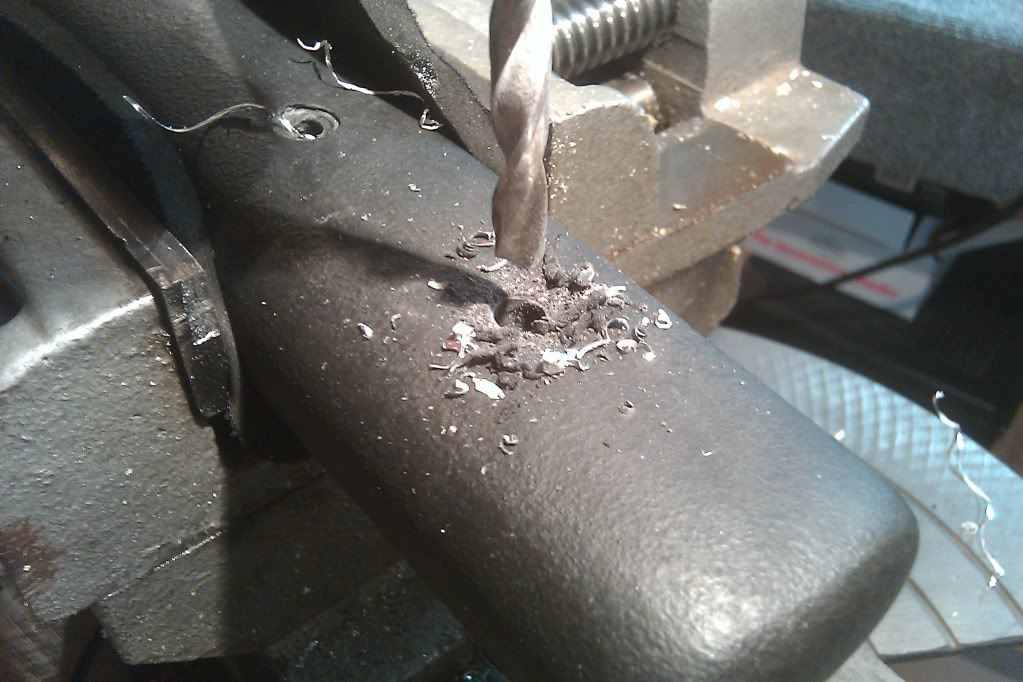
2. After we drill out our through hole, we need to flip her over and prepare the recess for the T-Nut. We need to insure we are centered in out through hole and drill <span style="font-weight: bold">JUST</span> deep enough to recess the T-Nut below the barrel channel. This is where we are gonna use the spade bit to recess everything below the barrel channel. Goes a little somethin' like this.....
Before.....

After.....

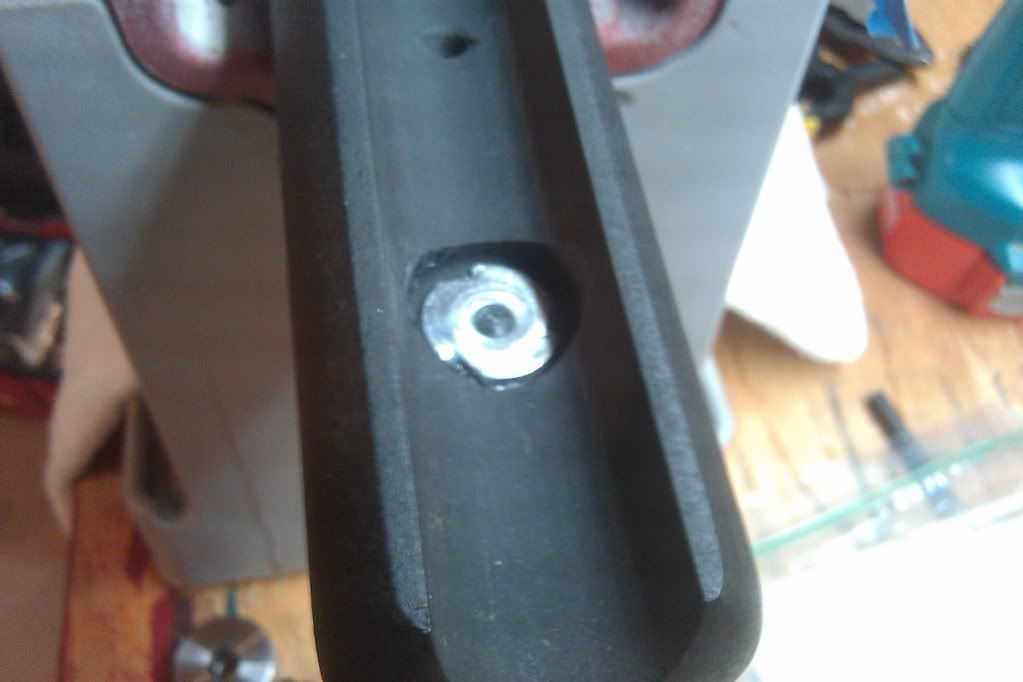
3. Once we have our through hole opened up and the recess for the T-Nut we're ready to install the T-Nut. Mix a small dab of epoxy and place it in the recess for the flange of the T-Nut <span style="font-weight: bold">ONLY</span>, a little dab will do here, no need to go overboard. After the epoxy is in, press the T-Nut into the stock. Now, take the stud and screw it into the T-Nut. As you thread the stud in, it will pull the teeth of the T-Nut into the stock material itself to prevent it from turning. Slow and steady wins the race here, even pressure when you tighten her down. Make sure that you only thread it in far enough to bottom the flange of the T-Nut into the recess.....<span style="color: #FF0000">NO GORILLA TORQUE NEEDED</span>!
As the epoxy eases up around the flange, smooth it out and allow it to set up. You now have a reinforced/repaired front sling stud!
The finished product.....
Total time is about 30 minutes or so on the repair/install and is super sturdy when completed. As usual, hope this helps you DIY guys or those wanting to tackle this but didn't know how!
Hide member <span style="font-weight: bold">fw707</span> recently sent me an HS Precision LTR stock for a bit of work (stud reinforcement and flush cup install) and I thought I'd share a few tips for you guys. It's an easy fix if you have stripped or broken a sud out of your stock and takes minimal time/equipment to fix.
Here's a list of what you are gonna need.....
1. 10/24 T-Nut
2. 5/16" bit
3. 7/8" spade bit
4. Epoxy of some sorts (Dev-Con 2-part 5 minute used here)
Photo of needed items.....
For those not familiar, this is a T-Nut.....
Here's the outline for the project......
1. First we have to open up the existing stud location for the through hole on the stock for our T-Nut, here we use the 5/16" bit. You can accomplish this with an ordinary hand drill, I did this project on my drill press and a cross slide vise. We flip the stock "belly up" and drill our hole from the bottom towards the barrel channel like so......
2. After we drill out our through hole, we need to flip her over and prepare the recess for the T-Nut. We need to insure we are centered in out through hole and drill <span style="font-weight: bold">JUST</span> deep enough to recess the T-Nut below the barrel channel. This is where we are gonna use the spade bit to recess everything below the barrel channel. Goes a little somethin' like this.....
Before.....
After.....
3. Once we have our through hole opened up and the recess for the T-Nut we're ready to install the T-Nut. Mix a small dab of epoxy and place it in the recess for the flange of the T-Nut <span style="font-weight: bold">ONLY</span>, a little dab will do here, no need to go overboard. After the epoxy is in, press the T-Nut into the stock. Now, take the stud and screw it into the T-Nut. As you thread the stud in, it will pull the teeth of the T-Nut into the stock material itself to prevent it from turning. Slow and steady wins the race here, even pressure when you tighten her down. Make sure that you only thread it in far enough to bottom the flange of the T-Nut into the recess.....<span style="color: #FF0000">NO GORILLA TORQUE NEEDED</span>!
As the epoxy eases up around the flange, smooth it out and allow it to set up. You now have a reinforced/repaired front sling stud!
The finished product.....
Total time is about 30 minutes or so on the repair/install and is super sturdy when completed. As usual, hope this helps you DIY guys or those wanting to tackle this but didn't know how!