Gunsmithing Threading and chambering

^ Pretty much what he said.

I doubt any shooter could get behind several identically built rifles other than chambering method used, and pick out which was which by looking at the target.

Bores on premium rifle barrels are far straighter than the internet would lead one to believe.

Many builders, both hobbyists and pros are fooling themselves thinking they are measuring to, and working into the “tenths”, yet have no way to realistically qualify it.


A bore scope is a good tool to check concentricity of a throat/leade. A target and/or won matches is the best feedback.

Don’t get too caught up in the internet hocus pocus, as it’s real easy to do so. Find the method that makes the most sense to you that gives the results you’re after, be in simply if a 4j chuck, “between centers”, between spider chucks, or whatever.
 
Last edited:
^ he nails it perfectly.

Most quality barrels are indeed straight, it's actually impressive how straight holes can be drilled, over long distances.

Measure twice, cut once... What are you measuring ? Is your lathe Chuck balanced properly ? Do you have a brand new insert for thread cutting ? How clean is your coolant ? This can all effect your setup.

For YEARS (ww2 time up to the mid 70s) "between centres" was the method used. There have been multiple VERY small groups shot that took years to break, and when broken, have still stood for a long time.

It works, but as machines, tools and coolants have advanced over the years, as have our machining techniques.

F1 / NASCAR cars change and develop all the time. It's not that the old one is bad, they have found different ways to make or do things. Guns are no different.
 
I’m obviously over thinking this. I had a tough time finding this barrel so I don’t wanna mess up. I’m gonna practice on the inexpensive barrel and find what works for me. It doesn’t sound like there’s anything wrong with the between centers method but others have found different ways that can produce better results.
The practice barrel should arrive Friday and I’ll go from there. I appreciate everyone’s help with this.
 
I call bullshit on that.
If he feels he now has a better method, so be it. But, it obviously "works", and works just fine.

Don't shoot the messenger...

Quoted from "Chambering rifles for accuracy" by Gordy Gritters:

"Although I occasionally find a barrel that will run out almost .030 off center at the outboard end (0.060 total indicator reading, most custom barrels I've measured are somewere in the .002-.020" (.004" - .040" TIR) range"

"No matter the type of rod used, I look at the range rod as a 'roughing-in tool' in most cases."

Also don't think I'm a Gordy fan-boy, I'm not. But when the guy who popularized something says that there is a better way, seems to be a sign that you should consider a better way.
 
  • Like
Reactions: iceng and jcmullis2
Don't shoot the messenger...

Quoted from "Chambering rifles for accuracy" by Gordy Gritters:

"Although I occasionally find a barrel that will run out almost .030 off center at the outboard end (0.060 total indicator reading, most custom barrels I've measured are somewere in the .002-.020" (.004" - .040" TIR) range"

"No matter the type of rod used, I look at the range rod as a 'roughing-in tool' in most cases."

Also don't think I'm a Gordy fan-boy, I'm not. But when the guy who popularized something says that there is a better way, seems to be a sign that you should consider a better way.
I’ve noticed that there’s always countless ways of machining the same part. Each person has to pick the way that they will do it based on their own individual skills, equipment and time. The reason everyone thinks they’re way is the best is because it is, for them. A few of the people said they have changed how they do it over the years. There techniques changed with their skills equipment and time allotted for the job.
I appreciate everyone’s input and help with this. Thank y’all
 
Good, cheap, fast. You can pick 2.

You want it good quality, fast delivery ? Well it won't be cheap.

You want it good quality, and cheap ? Well you can wait 6 months. Etc.

Same applies to machining barrels. Many ways to do it.
That’s true for just about everything isn’t it
 
Good, cheap, fast. You can pick 2.

You want it good quality, fast delivery ? Well it won't be cheap.

You want it good quality, and cheap ? Well you can wait 6 months. Etc.

Same applies to machining barrels. Many ways to do it.
I had a similar one drummed into me,

Fast, cheap, reliable.
You can only have 2 out of 3
 
  • Like
Reactions: iceng
I call bullshit on that.
If he feels he now has a better method, so be it. But, it obviously "works", and works just fine.

Try dialing in the throat for a long magnum with an Interapid.
Ain't happening unless you can strap it to yo dick and run it that far up the bore :)
I've used mine, don't like that method, and went back to the rod.

I intentionally use an undersize pilot with Grizzly rods. I want the bushing to just ride the bottom center of the bore. I sling a weight (cut-off barrel shank) from the rod just ahead of the barrel to keep downward tension on it.

At the end of the day, the indicator and borescope don't lie. Zero runout, and borescope confirming perfectly concentric throat means it's "right"- no matter how anyone gets there.

So here's the thing- I honestly don't care what anyone says- the vast majority of "what works best" is subjective.
Nothing related to the barrel chambering process can be replicated under tightly controlled conditions.
Because every barrel is different, and once you cut a chamber in it, it's done- using a different method, on a different barrel, won't tell you shit when it comes to the minutiae we all seem to love discussing.

Plenty of record-setting rifles have been chambered between centers- and I could post up some links from some major, well-known players that do it this way today- paying no attention to the "my way is the best way" noise.

Just understand the objectives, the geometries involved, and decide how you want to get there.
Get a cheapo GM blank, chamber it- then check your results. If you have runout, or the throat isn't concentric, try to understand what you may have done wrong in your setup.

Soooo much exaggeration, bores that look like fucking bananas... I don't buy into any of it.
QUALITY blanks are lapped, inspected/AIR GAUGED to consistency of no more than .0001.

Flame suit on. I'm getting old and don't give a fuck :)
I had no problems indicating in my 338 edge with an interapid.

I’ve heard good things about the rigidly held rods with bushings and would have no issues using that method.
 
I had no problems indicating in my 338 edge with an interapid.

I’ve heard good things about the rigidly held rods with bushings and would have no issues using that method.
Lol. That’s a bold statement brother considering you haven’t tried them. You’ll have the same issue as I did but you might proceed with cutting the chamber where I asked for clarification on things. You’ll get different readings just like anyone else who rechecks their setup after using rods to indicate the bore. Remove the rod and replace it in the bore and your indicator will show it’s not indicated like you thought.
 
You’ll get different readings just like anyone else who rechecks their setup after using rods to indicate the bore. Remove the rod and replace it in the bore and your indicator will show it’s not indicated like you thought.
I wasn't getting repeatable indications until I slung a weight ahead of the indicator on the rod.
This keeps tension on the bushing-removing the clearance between the bushing and the reamer itself, and the bushing and the grooves.
Otherwise, I found it would kind of "bounce around" giving inconsistent readings with every revolution of the spindle.

Adding the weight (not my idea, had read about it elsewhere) made a dramatic difference. For anyone using these rods and having difficulty getting repeatability suggest they give it a try.
 
Lol. That’s a bold statement brother considering you haven’t tried them. You’ll have the same issue as I did but you might proceed with cutting the chamber where I asked for clarification on things. You’ll get different readings just like anyone else who rechecks their setup after using rods to indicate the bore. Remove the rod and replace it in the bore and your indicator will show it’s not indicated like you thought.
My mentor uses them.
I trust his opinion.
The ones he said to avoid is the tapered range rods.
 
My mentor uses them.
I trust his opinion.
The ones he said to avoid is the tapered range rods.
That’s understandable and it’s good that you have someone that you can learn from. I don’t have a mentor and I’d look like a weirdo at my age calling someone a mentor. However I do ask here on the hide. You’re obviously young and are talking about things you have zero experience with. Im retired and my experience is only marginally more so don’t take it as if I’m busting your balls. FWIW the range rods are supposed used on barrels that haven’t been chambered yet and the indicator rods are used to indicate barrels that were previously chambered.
Next time your hanging out with your mentor and he finishes indicating a barrel but before he chambers it put the rod back in place and see what the indicator says.
Hanging weights is an interesting concept. It’s strange that I can’t find it in any machinery handbook. Surely in Precision machining there’s a manual telling how much weight I need to hang on the parts to be indicated. Probably don’t exist because doing so is influencing the readings on the indicator. Sorta like checking & rechecking measurements until you find one you like.
 
Hanging weights is an interesting concept. It’s strange that I can’t find it in any machinery handbook.

Never been a job-shop machinist; but I'm not aware of any other application where this would be relevant.

When I first looked at Grizzly rods, I wasn't clear on exactly how they they served their purpose. I couldn't see how a rigidly held rod in the tailstock could be in precise alignment to the bore. Problem was that I was looking at it all "wrong". Alignment is irrelevant, it's just relative movement of the bushing at the end of the rod which will change if the bore isn't spinning in perfect alignment with the spindle axis.

The weight keeps any available clearance between bore and bushing at the top and sides and forces the bushing to ride the bottom of the bore.
It doesn't take much weight to keep tension on the rod (mine is a couple inches of barrel cut-off with a zip tie through it)- and I don't believe it matters how much weight (within reason).

I did try the tapered rods initially and could never get it to repeat; completely different animal.

I've thought about a DIY rod that would simply have a small ball bearing on the end instead of a bushing- sorta like an overgrown indicator tip.
Weight to keep downward pressure on the "tip", ball bearing small enough to be able to drop down into the grooves- just like an indicator.
Very rigid and no limit as to how far up the bore it can be placed. We'll see if it works...
 
  • Like
Reactions: jcmullis2
Never been a job-shop machinist; but I'm not aware of any other application where this would be relevant.

When I first looked at Grizzly rods, I wasn't clear on exactly how they they served their purpose. I couldn't see how a rigidly held rod in the tailstock could be in precise alignment to the bore. Problem was that I was looking at it all "wrong". Alignment is irrelevant, it's just relative movement of the bushing at the end of the rod which will change if the bore isn't spinning in perfect alignment with the spindle axis.

The weight keeps any available clearance between bore and bushing at the top and sides and forces the bushing to ride the bottom of the bore.
It doesn't take much weight to keep tension on the rod (mine is a couple inches of barrel cut-off with a zip tie through it)- and I don't believe it matters how much weight (within reason).

I did try the tapered rods initially and could never get it to repeat; completely different animal.

I've thought about a DIY rod that would simply have a small ball bearing on the end instead of a bushing- sorta like an overgrown indicator tip.
Weight to keep downward pressure on the "tip", ball bearing small enough to be able to drop down into the grooves- just like an indicator.
Very rigid and no limit as to how far up the bore it can be placed. We'll see if it works...
I was being somewhat facetious about the weights. If it works for you that’s all that really matters. My biggest mistake or problem has been my choice of 1st barrel. It was a hard to find barrel blank so I’m waiting on a cheap blank from green mountain now. I bought the ptg range rods and they’re tapered and I like you I can’t get repeatable results with them. I’m gonna see how my long tip starrett thingy does and cut the chamber. I wasn’t planning to rebarrel several rifles but it’s looking that way. I might make a few switch barrels for my hunting rifles with green mountain barrels being as inexpensive as they are.
 
I use range rods to get close then finish with a long stylus Interapid. What I do like about range rods is the ability to place two DTIs on the rod (one as close to the bore as possible, the second at the far end) at the same time. This way I can go back and forth between the 4 jaw chuck radial adjustment and the outboard spider axial adjustment without relocating anything.

Additionally, you can see the effect of one adjustment on the other since both DTIs are in view. After that I remove and finish with a direct read from the bore. There's usually very little adjustment left.

I do agree that if the range rod is removed and reinserted, there is some change in reading. There's also a surprising amount of flex, even from the weight of a dial indicator plunger (less with a DTI stylus).
 
I am yes. A floating reamer holder doesn’t just help with the barrel being dialed in, it helps with tailstock misalignment as well. Most tail stocks have horizontal alignment adjustments but not vertical, which is complicated to correct well.

It’s not hard to get your tailstock aligned to .002, it’s very hard to prove it’s aligned within .0002
 
  • Like
Reactions: E. Bryant
When you guys are dialing in the chamber to the half thousand or less are you still using a floating reamer holder ?
I use a floating reamer holder.
Reamers like to follow a hole and I want it to do so freely.
I suppose it can also tell you if something went wonky.
As above it proves for some misalignment.
The tail stock on the Hardinge HLV I use is not adjustable, it’s really close but not perfect.
 
  • Like
Reactions: jcmullis2
That’s understandable and it’s good that you have someone that you can learn from. I don’t have a mentor and I’d look like a weirdo at my age calling someone a mentor. However I do ask here on the hide. You’re obviously young and are talking about things you have zero experience with. Im retired and my experience is only marginally more so don’t take it as if I’m busting your balls.
I’m 50 and starting building and fixing things at a quite early age on the farm plus years with heavy equipment and manufacturing
Ever make a drive sprocket section for a dozer to get it down from a mountain with a torch, grinder and file?
I have.
I’m pretty handy at making things.

We have 4 lathes at work that I’m on a quite often so I know a bit about them as well but I’m certainly no master machinist.
But I have made some interesting stuff including thermoplastic extrusion heads and dies.
 
  • Like
Reactions: Baron23
I use range rods to get close then finish with a long stylus Interapid. What I do like about range rods is the ability to place two DTIs on the rod (one as close to the bore as possible, the second at the far end) at the same time. This way I can go back and forth between the 4 jaw chuck radial adjustment and the outboard spider axial adjustment without relocating anything.

Additionally, you can see the effect of one adjustment on the other since both DTIs are in view. After that I remove and finish with a direct read from the bore. There's usually very little adjustment left.

I do agree that if the range rod is removed and reinserted, there is some change in reading. There's also a surprising amount of flex, even from the weight of a dial indicator plunger (less with a DTI stylus).
I got a starrett no. 196 Dti kit with a nice box and everything last Xmas. It’s made for stuff like this. I’ve never had an occasion to use it so I’m not very comfortable using it. At least the readings are repeatable with it and I’m getting more comfortable using it. I was really hoping for a easy fool proof method that’s impossible to fudge up but there’s no such animal. I‘ll turn the taper after I’m good with the rest of the job. That way I have more to cut off if I screw it up. Lol
Mail is running slow so I’m still waiting on a practice barrel from Green mountain. I‘ll turn the taper after I’m happy with the rest of the job. That way I have more to cut off if I screw it up. Lol
The comment about floating reamer holders wasn’t lost on me. I believe ol “Easy E” was suggesting that a floating reamer holder negates the need to indicate at all. I don’t know maybe I misunderstood the fella. It sure would take a bunch of the headache out of this. I wonder if he’d be interested in letting me do his barrel like that? Who’s barrel you’re doing like that is what it comes down to. I’ve seen some real crappy built rifles shoot sub moa groups. These things probably don’t matter nearly as much as the quality of the barrel. However if you’re gonna do something you should do your best.
It would be nice to see how much difference it makes from one technique to the other. I might take one of my old remy 700’s and cut off an inche or more of it’s barrel. Then re-chamber it and see what difference it makes if any. If my practice barrel doesn’t arrive soon that’s exactly what I’ll do.
 
Yes floating reamer holder. As pointed out, aids in tailstock misalignment and your final tolerance.

Say I dial to 0.01mm, or 1/4 thou, and the tail stock is out by 0.01mm, that has the potential to make the chamber oversize by half a thou, or potentially out of round by that much. Helps finish also I've noticed.
 
  • Like
Reactions: lariat
Having used a few different floating reamer holders, I can say that they can compensate for static misalignment (such as misalignment of the tailstock axis to the headstock axis), but I certainly would not depend upon them to counteract dynamic runout (such as misalignment of the barrel bore to the headstock axis). The reason is that they are not completely free of friction, and thus they will tend to resist radial motion once the reamer's cutting action begins to generate torque. So, by all means use one, but don't expect that it will fully compensate for poor setup.
 
Sorry guys had some crap going on didnt have time to reply .
We use the Mason reamer holder and it helps to cut some nice chambers . We started out like most using the rod system and build some really nice shooters .
After doing research on here years ago and reading some articles we ordered the long stem indicator and never looked back.
I always wanted to try a solid reamer holder didnt know how many here were going that way or still using a floater ?
 
I always wanted to try a solid reamer holder didnt know how many here were going that way or still using a floater ?
Area 419 has a fantastic setup IMHO.
Hardened rods EDM'd into the chuck jaws to allow the barrel to freely pivot.
The rigid tooling block is bolted to the cross, and was drilled/reamed using the headstock.

To me, it's simple yet ingenious.
We all know that no matter WHAT you do- it's (practically) impossible to get perfect alignment of head/tail stocks. It may look aligned, but accounting for tailstock tilt, and a headstock with angular misalignment are still problematic for using a rigid holder.

By using the headstock to drill and ream a tooling block rigidly mounted to the cross, I don't see how it can be anything but in perfect alignment.
The only thing I question is absent a pre-bore to get the reamer started true to the area indicated further up the barrel, whether the reamer will still be influenced by the bore when it enters- or whether being rigidly held is enough for it to counter this. I assume it does- it works for them.
 
That was one of the original ways on old cheap lathes to get bigger, or more universal holders. Mount a solid block to your cross slide, mount a boring bar in the chuck, bore out the block.

Remount it when needed. A travelling steady is the same concept.
 
  • Like
Reactions: lariat
Having used a few different floating reamer holders, I can say that they can compensate for static misalignment (such as misalignment of the tailstock axis to the headstock axis), but I certainly would not depend upon them to counteract dynamic runout (such as misalignment of the barrel bore to the headstock axis). The reason is that they are not completely free of friction, and thus they will tend to resist radial motion once the reamer's cutting action begins to generate torque. So, by all means use one, but don't expect that it will fully compensate for poor setup.


I tried a few floating reamer holders that were on the market, and never really found one I liked.

One day I have a little free time and designed one to match my own preferences.

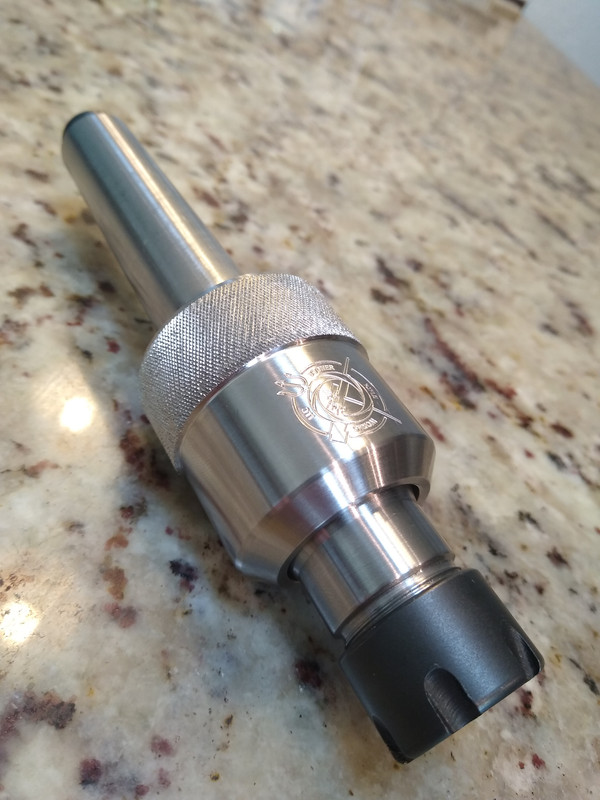
It uses er20 collets, floats both axially and radially, and has a locking collar that, when tightened, pulls everything to center and locks it for rigid drilling/tapping.

You can't quite see it in the pic, but there's a hardened ball in the center of the holder body, which let's in float axially.

It's a hybrid design, with aspects borrowed from Hemingway's kit and a couple of my own ideas. It took about a day and a half to fabricate.

The top pic was after roughing. The drive plate got lots of polishing, and some redline grease before assembly.


I've used it twice so far. Seems to work better that the versions I have, which are limited to axial or radial float, but not both.

The hardened and polished alternating 4 pin drive plate seems to keep friction from pulling the reamer to the tailstocks center. I still don't count on it to follow a bore that's rotating off center.
I still dial the bore as close to center as I can, with my long reach Tesa indicator.


My other, purchased, floating reamer holders use 3 drive pins spaced 120° apart., The higher the torque, the harder they pull to center.
 
Last edited:


Gavintoobe has a new video with Fred Zeglin in this video doing some chambering at about the 20:00 mark . It's a different way to chamber kinda like between centers .

It sounds interesting and I’ll check it out. Machining is a new hobby for me so my skills will never be on par with guys that do it all day for a living. Everything appears to be straight forward lathe work. Until I read what everyone has to say and then I start second guessing my plan of attack. Hopefully I’ll turn my first one this weekend and see how it shoots.
 
I started out just like you bought a used lathe from my gunsmith and started cutting threads. Read or watch everything on the subject you can find . Youtube still has some really good videos I'll find some more tomorrow for you.
 
It sounds interesting and I’ll check it out. Machining is a new hobby for me so my skills will never be on par with guys that do it all day for a living. Everything appears to be straight forward lathe work. Until I read what everyone has to say and then I start second guessing my plan of attack. Hopefully I’ll turn my first one this weekend and see how it shoots.
It IS straight forward lathe work, don’t let the internet fool you.
 
You can't ream between centers thats why you have to indicate the bore for a prefect reamer cut.


Actually, in a manner of speaking, you sort of can.

1. Mount between centers and turn the cylinder portion of the barrel until it cleans up.
2. Mount steady rest on said cylinder, leave tail stock alone with live center still stuck in the hole.
3. Turn/thread. Slide TS out of the way to check thread fit, breech clearance, etc. . .
4. Once your finished, move the TS back and load up a tool for reaming.
5. Cram that shit down the bore until your either done or screw it up. :)
6. Fluff n buff accordingly
7. Check your HS and then your basically done.

25+ years ago this is how I started. Haven't done it for the last 17 or so years but it does work.

All the best

C.
LRI
 
Depending on your definition of working between centers is , to me that using two live centers and a dog. You can thread and turn the outer diameter but you would be unable to do any work to the bore. Naturally after truing up the OD and using the OD as support and clamping you can work on the bore.
 
Depending on your definition of working between centers is , to me that using two live centers and a dog. You can thread and turn the outer diameter but you would be unable to do any work to the bore. Naturally after truing up the OD and using the OD as support and clamping you can work on the bore.
Again, the reamer absolutely can be used as a center.
And in reality, although technically not always correct, it is pretty much a given that "working between centers" means working over the bed.
 
Last edited:
Again, the reamer absolutely can be used as a center.
And in reality, although technically always correct, it is pretty much a given that "working between centers" means working over the bed.
I just did a barrel where I chucked it between centers and machined where I am going to thread the muzzle. I had an OD that was concentric to the bore so I put that 1/2" of concentric area in the headstock. I had like 14" of barrel hanging out the front without a steady rest. The reamer went in fine. I scope my chambers as I thread and I could not see any problems. Worked up loads are hovering around 1/2 MOA.
 
  • Like
Reactions: Rubicon Precision
Again, the reamer absolutely can be used as a center.
Rod Hendrickson works between centers, and "floats" the barrel (minimal clearance) in the steady- and uses the reamer itself as the center.
Barrel spins freely with no support from the steady as he runs the reamer in with a flush system fitted to the bore through the headstock.

Gives me the heebie-jeebies thinking about it worrying about chatter alone, but he swears by it.

I don't work between centers much anymore (just preference), but I used to true the muzzle end first, flip it around and hold it in a collet. Much easier than trying to strap the shit to a faceplate and use a dog...
 
I went with between centers and the steady rest. The reamer in a floating reamer holder in the tail stock with the steady rest near the end. It shoots sub moa so I’m happy with it. It’s a green mountain gunsmithing special so I wasn’t expecting perfection. I’m trying to figure out what bore scope to get so I can see what the chamber looks like after or even while I’m cutting it. I think it might help some. I’ve gotta lot to learn and wanna thank you guys for all your help and support.
 
I went with between centers and the steady rest. The reamer in a floating reamer holder in the tail stock with the steady rest near the end. It shoots sub moa so I’m happy with it. It’s a green mountain gunsmithing special so I wasn’t expecting perfection. I’m trying to figure out what bore scope to get so I can see what the chamber looks like after or even while I’m cutting it. I think it might help some. I’ve gotta lot to learn and wanna thank you guys for all your help and support.
Congrats on your barrel. As much as I try to avoid buying or recommending Chinese tools, the Teslong series of gunsmithing borescopes have proven to be a good value.

https://teslong.com/collections/rifle-borescopes
 
I went with between centers and the steady rest. The reamer in a floating reamer holder in the tail stock with the steady rest near the end. It shoots sub moa so I’m happy with it. It’s a green mountain gunsmithing special so I wasn’t expecting perfection. I’m trying to figure out what bore scope to get so I can see what the chamber looks like after or even while I’m cutting it. I think it might help some. I’ve gotta lot to learn and wanna thank you guys for all
I started out using the Greenmountain barrels and I have to tell you they shoot great for the cost .
Congrates it all starts here you will be doing many more it's like a sickness 😉
 
  • Like
Reactions: jcmullis2
I started out using the Greenmountain barrels and I have to tell you they shoot great for the cost .
Congrates it all starts here you will be doing many more it's like a sickness 😉
It damn sure is. I’m gonna do my better barrel after I get a decent bore scope. I want to record the life of a barrel from the chambering process to when the accuracy drops off. I might learn something you never know.
My next question is, do yall help your buddies out with their rifles? I wouldn’t mind getting some extra practice in and a couple buddies ask when I could do theirs.

I don’t mean anyone that is licensed because I’m sure there’s rules that apply when you make money with things
 
Last edited: