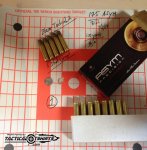
Blaser Tactical 2 (LRS 2, R93, R8) Loads
Reloading
"Handloading theories may number in the hundreds, but the basics are pretty simple: buy good tools and good components and load up the best ammo you can. I've found that paying attention to the neck area of the case pays the greatest dividends. I outside neck turn my cases to make them more uniform and size my brass without an expander. I full-length size all my cases. Even slow-fire loads should chamber easily; besides, with the chamber dimensions necessary for reliable function in a highpower rifle, full-length sizing lets the round better center itself. This is one reason you'll often get your best accuracy with new brass."
G. David Tubb, Highpower Rifle
Reloading Article Sources
Several of these articles are from the Rifleman's Journal
http://riflemansjournal.blogspot.com/p/articles-index.html
The Rifleman's Journal: Articles Index
Reloading Articles and Forum Posts
General Overview
New Brass Preparation
by Germán A. Salazar
The Rifleman's Journal: Basics: New Brass Preparation
Preparing Cases for Long-Range Accuracy
Complete Precision Case Prep within AccurateShooter.com
Preparing Brass for Match Shooting
Preparing Brass for Match Shooting
6mmBR Loading for Newbies
6mmBR Loading for Newbies within AccurateShooter.com
Case Preparation & Loading Procedure
Case Prep and Reloading Procedures
Hand Loading for Long Range 5: inspect & tips
Hand Loading for Long Range 5: inspect & tips
Some Finer Points on Handloading/Reloading
Varmint Al's Handloading/Reloading Page
Reloading for F-Class and T/R (Basic advice for first timers)
http://bcrc.iinet.net.au/reloading....Basics: A Few Reloading Hints and Tips Part 1
Basics: A Few Reloading Hints and Tips Part 2
A Few Reloading Hints and Tips Part 2
by Germán A. Salazar
The Rifleman's Journal: Basics: A Few Reloading Hints and Tips Part 2
How to Load More Concentric Ammo
How to Load More Concentric Ammo within AccurateShooter.com
Reloading Advice from Sinclair Int’l
Reloading Advice from Sinclair Int?l within AccurateShooter.com
Accurate Shooter Tech Tips
Tech tip rotating cartridge « Search Results « Daily Bulletin
Preparing Cases for Long-Range Accuracy
One of the Many Great Articles from the Archives of Precision Shooting
Well Guided Bullet Reloading
[url]http://www.thewellguidedbullet.com/pdfs/BenchrestReloadingTechniques.pdf
Case Cleaning
Wet Tumbling
Cleaning Cases - Wet Tumbling w/Stainless Steel Media- MassReloading Article
Wet Stainless Steel (SS) Tumbling Instructions
1. For 2 lbs of brass, use 5 Lbs (2.27 kg) of SS media, 1 gallon (3.78 Liters) of cold water, 1 -2 Tbs (15-30 mL) of dish soap (Dawn, Ivory, or Joy), and 1/4 Tsp. (1.25 mL) of Lemishine.
2. Tumble 3-4 hours with the Model B High Speed Thumler’s Tumbler.
3. Separate brass and soak brass in a gallon of warm water.
4. Wipe off excess water with paper towel from brass and air dry in plastic loading block.
Stainless Tumbler Media and Neck Damage
http://forum.accurateshooter.com/index.php?topic=3793032.0
Foam lined Thumbler to minimize neck damage
Neck Turning and Neck Tension
Tight Neck Case Preparation
http://bossons.awardspace.info/Case Preparation.htm
Outside Neck Turning
http://www.reloadsa.co.za/Info/Events/OutsideNeck.asp
Basics: Neck Tension
Neck Tension, Bushing Dies and Other Reloading Mysteries
The Rifleman's Journal: Basics: Neck Tension
Neck Tension — Not Just Bushing Size
Neck Tension ? Not Just Bushing Size within AccurateShooter.com
The Complexities of Neck Tension — Why Bushing Size is Only One Factor to Consider
The Complexities of Neck Tension ? Why Bushing Size is Only One Factor to Consider « Daily Bulletin
TECH TIP–Neck Tension vs. Time
TECH TIP?Neck Tension vs. Time « Daily Bulletin
Neck Tension / How much do you like and why?
http://forum.accurateshooter.com/index.php?topic=3748485.0
Neck-Turning Basics
Neck-Turning Basics within AccurateShooter.com
Neck-Turning Tool Cutting Tips
Neck-Turning Tool Cutting Tips within AccurateShooter.com
Tool Tip: Optimize Your Cutter Angle for Improved Neck-Turning
Tool Tip: Optimize Your Cutter Angle for Improved Neck-Turning « Daily Bulletin
Expander Mandrels and Neck Tension
Expander Mandrels and Neck Tension within AccurateShooter.com
Neck-Expander Mandrels for More Uniform Neck Tension
Neck-Expander Mandrels for More Uniform Neck Tension « Daily Bulletin
Neck-Turning Tip: Match Your Cutter Angle to the Shoulder
Neck-Turning Tip: Match Your Cutter Angle to the Shoulder « Daily Bulletin
Purpose of Neck Turning
purpose of neck turning
Neck Tension Changes with Time
http://forum.accurateshooter.com/index.php?topic=3792938.0
Consider using a feeler gauge to set/measure adjustments to the neck turning tool.
"Of the four manufacturers you list here: PMA, Sinclair, 21st Century and K & M, K&M is the odd man out. K & M uses a .312" (5/16") shank while the other 3 use a .375" shank (major dia). PMA and 21st Century both offer the ability for their neck turners to accept the K&M mandrels though if you so choose.
The specs on the minor diameter are different as well. The K & M spec on the minor diameter is .001" under bullet diameter for turning mandrels and bullet diameter for the expanding mandrel. The PMA and Sinclair mandrels share the spec of .002" under bullet diameter for the turning mandrels and .001" under for the expander mandrels. I'm not sure what the specs are for the 21st Century mandrels.
You're gonna have to trust me on this one."
Pat
http://forum.accurateshooter.com/index.php?topic=3833027.msg36333165#msg36333165
-PMA Tool
"If you watch David Tubb's video on reloading, he says that turning necks is the single most important aspect of precision reloading with flash hole deburring a second. I agree. It's PITA but that's what it takes to get accurate hand loads."
http://forum.accurateshooter.com/index.php?topic=3845849.msg36412244#msg36412244
Joe R
Trimming
Case trim to length specs
.338 Lapua Magnum 2.714" (69 mm)
.300 Winchester Magnum 2.610" (66.3 mm)
.308 Winchester 2.008" (51 mm)
Good Stuff: Giraud Case Trimmer
http://riflemansjournal.blogspot.com/2010/08/good-stuff-giraud-case-trimmer.html
New Case Trimmer “How-To” Videos from L.E. Wilson
http://bulletin.accurateshooter.com/2013/07/new-case-trimmer-how-to-videos-from-l-e-wilson/
Quote from: ttfreestyle on 09:32 PM, 06/03/11
i used the sinclair chamber length gage to find out the max length. (for trimming my brass) my 260 rem was 2.055 so at what length do i need to trim and how far under this do i need to trim?
Here's a good guide:
Chamber Length Safety Zone
Q: How many thousandths shy of actual chamber length does one establish as a safety zone, before assigning a trim "from" length, once measurements have established a rifle's true chamber length?
Mike Bryant
A: I use .010" for each increment. For instance, if the chamber length is 1.570" from the base to the end of the neck on the chamber, then the maximum case length would be 1.560" with a trim length of 1.550". Don't let the cases get over 1.560" and you'll be in good shape.
Jackie Schmidt
A: I use a .010" window. 6mmPPC chambers have been shortened to 1.510". Since shooters fire cases to expand them, the cases come out close to 1.500". I trim them back to 1.490."
http://forum.accurateshooter.com/index.php?topic=3766700.0
Adjusting the cutting head on a Giraurd [Trimmer]
Erik Cortina
http://forum.accurateshooter.com/index.php?topic=3832491.msg36328341#msg36328341
"Unplug the machine, loosen the cutter head, and lower the "shell holder" so that the case makes firm contact with cutter blade. The case neck will go into the "V" on the cutter blade and center the cutter properly. As you push down on the case, tighten the set screw. You should be good to go after that. It should take less than a minute."
Chamfering
Case Neck Chamfering Tools
http://www.accurateshooter.com/gear-reviews/case-neck-chamfering-tools/
http://www.21stcenturyshooting.com/Case_Mouth_Debur_Tool.php
http://bulletin.accurateshooter.com/2013/10/case-neck-chamfer-tools-pick-your-angle/
Primer Pocket Uniforming
"But, like most reloaders, I had to tinker with a good thing so I then used a K&M PPC flash-hole deburring tool to uniform the flash holes. That was a mistake I think. The tool reams the .059" diameter flash holes to about .067"-.069". Lapua uses a special precision process to form the flash holes, and the flash hole diameters are very consistent. I think it is very difficult to ream them and achieve a consistency level equal to the factory flash hole. Moreover, increasing the flash hole diameter seems to have increased ES and SD. From now on, I will leave the flash holes just the way they are."
6mmbr
http://www.6mmbr.com/gunweek036.html
http://www.kmshooting.com/catalog/p...arge-rifle-primer-pocket-correction-tool.html
http://forum.accurateshooter.com/index.php?topic=3795888.0
Flash Hole Cleaning & Uniforming
Inspect Your Flash Holes on New Brass
http://bulletin.accurateshooter.com/2007/12/inspect-your-flash-holes-on-new-brass/
Flash-Hole First Aid — Removing Flash Hole Obstructions
http://bulletin.accurateshooter.com/2012/12/flash-hole-first-aid-removing-flash-hole-obstructions/
BR/PPC Flash-Hole Deburring Tips
http://bulletin.accurateshooter.com/2007/03/brppc-flash-hole-deburring-tips/
FLASH HOLE AND DECAPPING PIN SIZES AND TIPS
http://ballistictools.com/articles/flashhole.php
Full Length Sizing and Headspace
"IMO, and based on my experience, the straightest brass comes from a properly dimensioned one piece die."
http://forum.accurateshooter.com/index.php?topic=3832340.msg36327319#msg36327319
Boyd Allen
"The ability (and tools required) to properly determine how far the shoulder is being pushed back when the case is resized is the first thing any handloader should have a handle on."
Al Nyhus
http://benchrest.com/showthread.php?87536-Head-Space
Excerpt from The Rifleman's Journal, "Basics: Headspace -- Setting Proper Headpace on Resized Cases "
by Germán A. Salazar
Headspace is, in purely technical terms, the difference between the chamber's length measured from the bolt face to the middle of its shoulder versus the length of case's base to the middle of its shoulder.
"Headspace" in the context of the rifle chambered for a rimless cartridge is actually the distance from the bolt face to the point in the chamber that is halfway up the shoulder. In the reloading context we often use the term to indicate how much clearance have we built into the brass case as compared to that distance. Simply stated, if the headspace measurement on a resized piece of brass is 0.002" less than the chamber headspace of the rifle in which it was fired, we often say the brass has 0.002" headspace. That's not a technically correct use of the term, but it will do for most reloading purposes.
Resized brass headspace should be between 0.001" to 0.002" less than the headspace of the fired case [in bolt rifles].
Excerpt from Accurate Shooter Article, "How to Load More Concentric Ammo"
When setting up a Type-S sizing die, set the neck bushing into the die with the numbers facing down toward the body of the die. Tighten the de-capping assembly until it contacts the bushing and then back it off ¼ of a turn. This allows the bushing to free float in the die. You should be able to hear the bushing rattle if you shake the die. Having the bushing free floating self centers the neck, and again minimizes any run-out that can occur.
If you prefer other brands of sizing dies there are a few tricks that people use to minimize run-out as well. Many reloaders claim that the use of an O-ring at the base of the de-capping assembly lock nut will float the assembly and help self center during sizing. Another trick that has been used is to remove the retaining pin on the shell holder slot on the press ram, and use an O-ring in its place to hold the shell holder in place. This allows the shell holder to self center during sizing as well.
Full-Length Sizing Die Set-Up — Tip from Sinclair International
How to Set Up Your Full Length Sizing Die
by Ron Dague, Sinclair International Technician
From Sinclair’s Reloading Press Blog
Full-Length Sizing Die Set-Up ? Tip from Sinclair International « Daily Bulletin
Full-Length Sizing Die Set-Up — Tip from Sinclair International
How to Set Up Your Full Length Sizing Die
by Ron Dague, Sinclair International Technician
From Sinclair’s Reloading Press Blog
At Sinclair International, we are often asked for a fool-proof method to set up a full-length sizing die, and begin reloading our fired cases. The method used by many target shooters today is to set up your full length die to closely match your rifle chamber and minimally full-length size your cases –as little as .001″ for bolt-action rifles. I prefer to use this method for all of my bolt-action cartridges.
STEP ONE
I like to de-prime five (5) cases (de-prime only, do not full length resize) and measure from the base of the case to the shoulder with our Sinclair Comparator Body (09-1000) and Bump Gage Insert(09-10200). We refer to this as our headspace measurement. Our Electronic Caliper (#MIC-14) works well and may be pre-set at .000” making this headspace measurement easy to capture. The Sinclair Comparator/Gauge Body and Bump Gage Inserts make this task fairly simple. L.E. Wilson Tools & Gages, Hornady Manufacturing, and RCBS all make similar units to achieve your headspace measurement.
STEP TWO
With your full-length die threaded into your reloading press, loosen the lock ring and run the press ram up toward the full length die with a shell holder in place (with no case). Then, screw the die toward the shell holder until it stops. Back the die out of the press and away from the shell holder one full turn and set the lock ring finger tight.
STEP THREE
Lubricate each of the cases with your favorite sizing lube (my favorite is Imperial Sizing Die Wax) and resize a case. Again, take a headspace measurement from base to shoulder. [When running the case up into the die, be sure the press ram moves the full limit of its upward travel.] If there’s no change in the measurement from the fired dimension, loosen the die lock ring and turn the full length sizing die downward 1/8 of a turn. [Editor's Note: You'll need to use smaller turn amounts as you get close to the desired amount of bump. We suggest moving just a few degrees of die rotation at a time once you've reached the point where the die hits the shoulder without moving it back.] Now repeat the sizing process with a second lubricated case and take the measurement again. Keep rotating the die downward gradually (in small increments) and repeat the case sizing process until you see approx-imately .001”-.002” reduction to your fired headspace measurement. We prefer a headspace reduction of approximately .001″ – .002″ for bolt action rifles and .003″ – .005″ for semi-auto rifles. You can adjust to your rifle as to what works best. Don’t forget to load 10 rounds or so and try them from the rifle’s magazine to make sure they function properly.
Accurate Shooter, "Uniformity of Shoulder Setback"
jelrod1
http://forum.accurateshooter.com/index.php?topic=3826233.0
Dwell time is often used in metal forming machines at the end of stroke to give the metal time to completely conform to shape. How much it helps brass in a reloading die I don't know, but there are situations where it does. Just from my experience if I size 10 cases really fast then size 10 pausing a second or two, the ones that were paused will measure correctly and some of the others will measure like they weren't pushed back enough.
Accurate Shooter, "Uniformity of Shoulder Setback"
22BRGUY
http://forum.accurateshooter.com/index.php?topic=3826233.0
I do not apply any lube to the shoulder area and do agree that the "dwell time" helps consistency. I do not have the body/FL die screwed tight down in the press but have small marks on the die set ring and then on the top of the press that I make with a felt tip marker. I hold onto the die with my fingers during the sizing process so it stays lined up with my marks. That way if a piece of brass comes out a little short of .002, I can adjust a little to add a thou. If it comes out with bump more that .002, I simply mark it and use it as a sighter this cycle. I use a Stony Point Head N Shoulders set to measure set back.
Accurate Shooter, "Adjusting F/L Die for Headspace"
steve4102
http://forum.accurateshooter.com/index.php?topic=3816212.0
I use a Stoney Point gauge, but this is how an old timer I knew did it without a gauge.
1. Put the Shell Holder in the press and raise the ram.
2. Screw the Full Length(FL) Die into the press so it is about a "nickle's thickness" above the Shell Holder.
3. Lube a "Fired" case (walls and inside the neck) and squash it.
4. Remove the Lube and try closing the bolt on it in the chamber.
5. If the bolt closes with no resistance, screw the FL Die into the press about 1/8-1/4 turn and repeat steps 3 & 4.
6. As you feel the resistance begin, slow down how much you screw the FL Die into the press so you are at about 1/16 of a turn, or "Fine Tuning". At some point you will not be able to close the bolt and you are extremely close to having the FL Die in the proper position.
NOTE: The reason for this is because the FL Die has begun Resizing the Case-walls down to the Pressure Ring. As it does so, the Case-body lengthens slightly which in turn moves the Case-shoulder slightly forward. Then as the "Fine Tuning" continues the Case-shoulder makes contact with the FL Die and is moved slightly reward(or slightly shortens the Case-head to Case-shoulder dimension).
7. Stop when there is a slight bit of resistance when closing the bolt on the empty case. You now have a "slight crush fit" for the case in that specific chamber, or Zero Headspace.
8. Once you get it where you want it, take some masking tape or a black marker and put a Witness Mark where the FL Die Lock Ring is positioned to hold the FL Die in this position. Loosen the FL Die and return the Lock Ring to align with the Witness Mark and sung up the Set-Screw.
Screw the FL Die back into the press and try squashing another case. It should have the same resistance as the previous one. If not, you need to re-adjust the Lock Ring so it does. But you are extremely close to where you want it, so make very small changes at this point.
Accurate Shooter, "Bumping Shoulder Back"
ridgeway
http://forum.accurateshooter.com/index.php?topic=3812710.0
One thing I do to ensure I'm bumping consistent is during my sizing process. When I run a case into the sizer die, I let the ram lock(Forster) in for 2-3 seconds. This will ensure the case makes full contact inside the die. [This is known as "Dwell Time"]
Accurate Shooter, "F/L Sizing Die Setup?"
Preacher
http://forum.accurateshooter.com/index.php?topic=3805122.0
If your using a bolt gun, you can remove the firing pin assembly, and then when you chamber a round you'll be able to feel exactly how much pressure it will take to chamber the sized case.
Keep screwing the die into the press, and trying it in the chamber until you can just barely feel the case in the chamber when you close the bolt. If the bolt falls all the way down you have pushed the shoulder in to much, and you'll need to back of the die a little until you can feel the case in the chamber..
I like the bolt to fall part way down, and then use a tiny bit of pressure to finish closing it.
Once the die is set you really don't need to change anything after that...
Accurate Shooter, "Using an O-ring on your resizing die - what is your experience?"
BoydAllen
http://forum.accurateshooter.com/index.php?topic=3797791.0
Given the cost of the O ring, why not just give one a try? I think that you may not understand that just because lock rings can be tightened solidly against the press, that that may not be necessary or even desirable. After all, it is the threads that take the load of sizing, and the adjustment of the die within them that sets the shoulder bump. As long as the die does not rotate, the setting will remain constant. The O ring provides enough friction between the bottom of the lock ring, and the top of the press to keep the die from rotating even when the lock ring is only tightened enough to slightly compress the O ring. Tests have demonstrated that this sort of "float" can improve the straightness of sized cases, although there are larger issues that need to be addressed if this aspect of reloading is to be optimized. I have switched the lock ring that came with the FL die that I use for my 6PPC for one of the Lee units that has a built in O ring, and have seen a slight improvement in the concentricity of my sized cases, although they were pretty good to start with.
Full Length Sizing for Bottle Neck Cartridges
Resizing Bottleneck Rifle Cases - MassReloading
Resizing - Case Dimension Changes
by: Germán A. Salazar
The Rifleman's Journal: Basics: Resizing - Case Dimension Changes
Reloading: Two-Step Sizing and Concentricity
Two-Step Sizing and Case Neck Concentricity
The Rifleman's Journal: Reloading: Two-Step Sizing and Concentricity
O-Rings on Dies May Reduce Run-Out
O-Rings on Dies May Reduce Run-Out within AccurateShooter.com
FL Bushing Dies vs. Honed FL Dies
FL Bushing Dies vs. Honed FL Dies within AccurateShooter.com
Setting Proper Headpace on Resized Cases
by Germán A. Salazar
The Rifleman's Journal: Basics: Headspace
Note the index marks on the die and press used to mark headspace adjustment. A #17 (7/8" x 1/16") O-ring is also in place between the press and die to allow partial "floating" of the die.
Understanding Headspace
Understanding Headspace
Over-All Length (OAL) - explained in detail -
http://www.larrywillis.com/OAL.html
Lapping Reloading Dies
Lapping Reloading Dies | Rick Averill?s Home Page
Excellent post by Kevin Thomas of Lapua USA regarding headspace, case length, neck and full length sizing and reloading safety issues.
http://www.snipershide.com/shooting...inding-f-l-neck-sizing-combo.html#post2676904
Blaser R93 misfire - Why neck sizing is not good for Blaser straight pull rifles by Roe Stalker
Blaser R93 misfire - Why neck sizing is not good for Blaser straight pull rifles - YouTube
"Apparently if one only neck sizes the brass one can face an issue of this “annoying click”. I am saying click as I am not sure it is a “real” misfire when the firing pin is not hitting the primer hard enough it is more to do with the action not fully closing.
I made a few rounds using the brass fired in the Blaser, trimmed and neck sized. I wanted to check whether the issue people talked about was real or not. I quickly found out it was true. Half of the rounds would not fire first time in the rifle. Eventually I managed to get all of them to fire, but had to slam the bolt on the case hard couple of times. Not good if you have a medal buck standing in front of you…"
Roe Stalker
[Always full length resize brass cases to avoid misfires in Blaser rifles secondary to Neck Sizing Only. This tends to occur when neck sizing only, without bumping of the shoulder of the case. Neck sizing only can lead to overly long cartridge headspace which prevents full lock up of the action and results in firing pin malfunction. Correct Full length resizing results in more uniform and consistent brass.]
rxs0
Response to Roe Stalker's Video by Robert Stokes
http://roestalker.co.uk/blaser-r93-and-neck-sized-brass/
"The reason the R93 doesn’t fire with a cartridge that is over maximum headspace is a safety feature of the design. It is interrupting the firing pin because the bolt is not fully in battery. This is a common event in many designs that block or restrict the firing pin if the action is not fully locked. The M16 and equivalent designs also do this. I see it happen every year as we prepare for the national matches and train new shooters. If they are used to reloading for a conventional bolt rifle and fail to move the shoulder back about .003 inches, you hear the dreaded click, a hand goes up, an alibi called and everyone waits while the issue is diagnosed. Happens every year and is an annoyance, but not nearly the annoyance it would be if the round was fired without the bolt fully closed. Same is true for the Blaser design, without this safety feature, there would be a catastrophic failure, if the round could fire without the bolt securely locked."
Robert Stokes
Blaser R8 Missfire
http://www.blaserbuds.com/forum/viewtopic.php?f=42&t=8101&hilit=Headspace+misfire
DEALING WITH HEADSPACE BY TODD SPOTTI
http://www.redding-reloading.com/component/content/article/21-tech-line/62-dealing-with-headspace
Reading Pressure Signs
http://www.massreloading.com/reading_pressure_signs.html
Bushing Selection by Redding
http://www.redding-reloading.com/component/content/article/21-tech-line/57-bushing-selection
Concentricity and Bushing Dies by Redding
http://www.redding-reloading.com/co.../21-tech-line/59-concentricity-a-bushing-dies
"Our tests showed that case neck concentricity is directly proportional to bushing size. In other words, as you size case necks with progressively smaller bushings, the concentricity gets progressively worse."
"Other factors that can improve concentricity:
1. Lube case necks, even with TiN coated bushings.
2. Partial size case necks. Sizing 1/2 or 3/4 of the neck seems to be the most popular.
3. Try flipping the bushing over. We like to install them with the letters down to start with.
4. Trim cases mouths square so they will enter the bushing straight. Don't forget to chamfer the case mouth, inside and out. This is very important as it eases the entry of the case mouth into the bushing, and the bullet into the case mouth.
5. Anneal case necks. Cases that have been fired many times work harden and this causes excessive spring-back of the case necks."
CREATE A “CUSTOM DIE” WITH A SIMPLE SHELLHOLDER CHANGE!
http://www.redding-reloading.com/co...a-custom-die-with-a-simple-shellholder-change
Concentricity Problems by Redding
http://www.redding-reloading.com/component/content/article/21-tech-line/63-concentricity-problems
Cartridge Case Denting by Redding
http://www.redding-reloading.com/component/content/article/21-tech-line/65-cartridge-case-denting
"To check for excessive case sizing, compare the dimensions of a fired case and one that has been resized. The diameter of the fired case at any point should not be reduced more than 0.005". If you find that your cases are being sized more than this, an oversize chamber or undersize die may be the problem."
Measuring Headspace
http://www.rifleshootermag.com/2010/09/23/gunsmithing_headspace_0612/
How Headspace is Measured
http://www.sportingshootermag.com.au/news/measure-headspace-for-accurate-shooting
Excellent Discussion on Blaser Rifle Misfires, Headspace, and Full Length Resizing.
http://www.thestalkingdirectory.co.uk/archive/index.php/t-31197.html
http://www.thestalkingdirectory.co.uk/showthread.php/31197-Reloading-problem?
Headspace Gauges and how to use them, Parts I & II
http://www.brownells.com/.aspx/lid=12555/GunTechdetail/Headspace-Gauges-And-How-To-Use-Them-Part-I
http://www.brownells.com/.aspx/lid=10389/GunTechdetail/Headspace-Gauges-And-How-To-Use-Them-Part-II
"Headspace gauges are used to check one aspect of a firearm’s suitability for use. If the headspace is less than minimum, factory loaded cartridges may not fully chamber in the firearm, the action may not close fully, and it may not fire. If the gun does fire, you could have excess pressure problems, and in the case of semi-automatic arms, possible serious damage to the locking system. It’s possible, with autoloading guns, to have slam fires due to insufficient headspace. If headspace exceeds the maximum limit, excessive case stretching can occur, even to the point of a case rupture or head separation from the case body. Other problems associated with excessive headspace are: failure to fire, misfires, poor accuracy, and very short case life. The sudden “dumping” of powder gases into the action can wreck an action or stock, and in the case of many rifles, send powder gases back along a bolt body to blast the shooter’s face. For this reason, eye protection when shooting is a must!
The most common usage of headspace gauges is with bottleneck cartridges in bolt action rifles. As with any job, check the chamber and magazine to be certain the rifle is not loaded. Remove the bolt from the action, and strip the bolt as far as practical. This means remove the firing pin assembly and, if possible, the extractor. If the bolt has a spring- loaded plunger in the bolt head as an ejector, remove the ejector. Clean the chamber, the bolt locking lug recesses in the action, the bolt face, locking lugs and the gauge. With some types of bolts, the extractor can’t be removed without damage to it or its retainer. For many years, Remington centerfire rifles have used a rivet to retain the extractor. Do not remove the extractor on Remington rifles.
Open and close the stripped bolt on an empty chamber several times to get a feel for the amount of resistance the bolt has to closing. Slip the GO gauge into the chamber and with the pressure of only one finger, attempt to close the bolt. If you are working with a Remington rifle, or any rifle where the extractor cannot be readily removed, slip the rim of the gauge under the extractor on the bolt, and push the bolt and gauge forward to chamber the gauge. Attempt to close the bolt handle. IMPORTANT: If you feel any resistance to closing greater than you had with the chamber empty, stop right there. Don’t force the bolt closed. The bolt handle gives you a tremendous amount of leverage, so to avoid damage to the gauge or rifle, use only minimal pressure to close the bolt. If the bolt closes with no feel to the handle with a GO gauge in the chamber, open the bolt, remove the GO gauge, and replace it with a NO-GO gauge. Again, gently attempt to close the bolt. The bolt handle should stop or show resistance to closing at some point before it fully closes. DO NOT force the bolt handle closed. Even if the bolt handle closes 98% before you feel resistance, the headspace is normally considered to be within specs.
If the bolt handle closes fully on the NO-GO gauge, repeat the test with a FIELD gauge. If the bolt does not close completely with this gauge, the headspace is on the long side, but the rifle can usually still be used with factory ammo, if the cases will not be reloaded and there are no other problems present. Never fire a gun that closes on a FIELD gauge. If it is fired, the chances are extremely high that you will get case ruptures."
Brownells
Measure Headspace for Accurate Shooting
http://www.sportingshootermag.com.au/news/measure-headspace-for-accurate-shooting
gotcha
http://forum.accurateshooter.com/index.php?topic=3827799.0
One way to tell your cartridges are fully fire formed is increased resistance to bolt opening. This won't always be true for ALL the cartridges. Mark the cartridges that show resistance to opening and set your bump accordingly on those cartridges. Lock-in your die setting, the rest of the cartridges will soon catch up. Keep your press handle all the way down for a few extra seconds this will help the shoulder take a more uniform "set" to desired length. For me this works a little better than waiting for ALL the cartridges to exhibit the same amount of resistance to bolt opening.
Full Length Sizing [for belted magnums]
http://benchrest.com/showthread.php?54561-Full-length-sizing
http://benchrest.com/showthread.php?54279-Typical-headspace&p=433540#post433540
"One little point that goes back to the question, I believe that one should not gage bump from a once fired case, but from one that has been fired until a little tight, and that the primer should be removed as well. It takes a few shots for the head to shoulder measurement to reach maximum. I bump .001."
Boyd Allen
http://forum.accurateshooter.com/index.php?topic=3808270.msg36238942#msg36238942
"When we bump shoulders(usually in the range of .0005 to .002), the case body IS supported . The issue with sizing the case far enough down has a lot to do with the "coverage" of the chamber, vs. that of the functional part of the interior of the die. If there is a line at the bottom of the case that is just inside of the chamber that the die cannot reach, and the die is such a close match to the chamber that it barely reduces the diameter of the body of the case, there will be problems if hot loads are used. One of the things that can contribute to this is how dies are commonly chamfered at their bottom opening. Anything that is done here, beyond just breaking the corner, and smoothing it, reduces the die's coverage. The problem is that like all machined parts, there are tolerances for the depth that chambers are reamed to as well as the same thing for dies. For many, the easiest way to resolve these issues, which can work very well, is to simply remove some metal from the top of the shell holder. Just because you find this solution inelegant, is irrelevant, it has worked very well for a lot of benchrest shooters, to solve a problem with the least amount of effort, and no negative consequences. We can measure sized cases, and how they fit in their chambers, by a combination of comparing measurements before and after sizing, and the feel as they are chambered."
Boyd Allen
http://forum.accurateshooter.com/index.php?topic=3797853.msg36131592#msg36131592
"Never neck size only.
The above advise works in his gun with his chamber at his pressure, you might experience totally different results.
After first firing, load a fired piece of brass and see if there is resistance when closing the bolt. You will have to remove firing pin assembly or hold the trigger down while closing bolt slowly. If bolt falls all the way down with no resistance, F/L size but don't push shoulder back. Do this everytime you fire that brass until you get to where you need to bump shoulder back.
When you get to that point, bump shoulder back so that you feel resistance on your bolt about 70% of the way down."
Erik Cortina
300 Win Mag Headspace?
http://forum.accurateshooter.com/index.php?topic=3772282.0
What is this? [Excellent Discussion of Case Separation due to Excessive Headspace]
http://forum.accurateshooter.com/index.php?topic=3830434.0
http://www.snipershide.com/shooting/snipers-hide-reloading/222587-what.html#post2814188
Shoulder Won't Bump
http://www.snipershide.com/shooting...ng/224007-shoulder-wont-bump.html#post2829063
"The Straightest brass that I have used comes from a one piece die that is properly dimensioned for my chamber and which produces correct neck tension without an expander."
BoydAllen on Accurate Shooter
"Shooting a cartridge fireformed to the chamber is essentially the same as shooting your own wildcat."
http://forum.accurateshooter.com/index.php?topic=3817022.0
Donald Newcomb
"I see what you are asking, often times the FB [freebore] is long enough to put the boat tail junction above the neck shoulder junction. I have used bullets with not enough FB to get the boat tail junction above the neck shoulder junction. In that situation I only sized 3/4 of the neck as not to pinch at the bottom and it worked out."
http://forum.accurateshooter.com/index.php?topic=3831003.msg36319056#msg36319056
Drop Port
"First of all did you survey the "headspace of all the fired cases that you sized? Secondly, it has been my observation that cases to not reach their maximum "headspace" with only one firing. I suggest that you do another test with some new brass of the same type, and the same die. Number each case with a permanent marker, and make a chart, showing the unfired, and fired "headspace" of each case. If your cases got tighter after sighting the shoulder probably moved forward during sizing, because it was short of full chamber potential and then got squeezed by the die, but the die was not low enough to locate the shoulder during the process. Personally, I do not like headspace comparitors that have inserts cut to shoulder angles, much preferring something designed to make line contact around the shoulder, such as the Stoney Point, now Hornady design. If your shoulder was telescoped slightly by sizing that did not fully move it back and determine its angle, it may have ended up at a slightly different angle than the insert. What I like to do is to fire a single case, neck sizing only, with relatively hot loads, until its datum to head dimension ("headspace") does not increase. At that point, I record the datum to head dimension for that rifle, and set bump in reference to that dimension. Most of the time, when I have to work with once fired brass, I set the die so that the shoulders are where they came out of the chamber when fired, and since they will vary, I check several, try the longest in the rifle, and if it is not tight, use that dimension."
BoydAllen on Accurate Shooter
http://forum.accurateshooter.com/index.php?topic=3838655.msg36365175#msg36365175
Priming
Primers and Pressure
http://www.jamescalhoon.com/primers_and_pressure.php
Primer Pocket Depth and Diameter
http://ballistictools.com/articles/primer-pocket-depth-and-diameter.php
High-speed measurement of firearm primer blast waves
http://arxiv.org/ftp/arxiv/papers/1203/1203.2701.pdf
Seating
Excerpts from "Reloading Advice from Sinclair International"
"What do you feel is the one-most crucial step in precision reloading?”
Rod Green: “I feel that bullet seating is the most important step. If you had focused on making sure all prior steps (case prep, powder charge, etc.) of the process have been carefully taken to ensure uniformity, bullet seating is the last step, and can mean all the difference in the world in terms of consistency. Making sure that the bullet is seated to the same depth each time, and time is taken to ensure that true aligned seating can make the load.”
Bob Blaine: “I agree with Rod. I strongly feel that consistent bullet seating depth is the most important step in creating the most accurate hand loads. I have seen the results in both my bench and long range rifles. Taking the time to ensure exactness in the seating process is by far, the number one most important step in my book.”
AccurateShooter.com: Agreed. When loading match ammo, after bullet seating, we check every loaded round for base of case to ogive length. If it varies by more than 3 thousandths, that round is segregated or we attempt to re-seat the bullet. We measure base of case to bullet ogive with a comparator mounted on one jaw of our calipers. You may have to pre-sort your bullets to hold the case-base to ogive measurement (of loaded rounds) within .003″.
Excerpts from Accurate Shooter Article, "How to Load More Concentric Ammo"
One problem that the reloader faces with longer bullets is that they are so long that the standard seating stem is not machined deep enough to contact these bullets properly. The point of the bullet “bottoms out” in the stem and the result is off-center seating and/or rings and dents on the bullet nose. If you plan on using such bullets, you should purchase a “VLD” style seating stem, which is cut to accommodate the longer bullets. The use of this stem results in truer seating of the bullet without leaving a ring or marring the tip of the bullet.
Finally another trick used by many in the seating process is to turn the case while the bullet is being seated. Some people claim this will keep things straight. What they do is raise the ram in increments while seating and rotate the case in the shellholder in increments of 90 degrees from the original starting while the bullet is being seated.
Excerpt from Accurate Shooter Article, "Redding Offers Retro-Fit Micrometer Stems for Standard Seaters"
http://bulletin.accurateshooter.com...ro-fit-micrometer-stems-for-standard-seaters/
That’s right, Redding now offers micrometer seater assemblies made specifically for Berger VLD bullets. These Seating Micrometers allow you to convert a standard seater to a Micrometer seater optimized for VLDs. That’s great news for VLD fans. Eric Stecker of Berger Bullets tells us: “We have confirmed with Redding that each of the new micrometer plugs in the VLD group were designed based on Berger VLD bullets. We provided all of our VLD bullets to Redding, from which they took deliberate measurements and made these new plugs.”
New VLD-specific Seater Stems Improve Bullet Seating Depth Consistency
Stecker explains how the new VLD-specific seater assemblies produce better, more accurate ammo: “Many shooters have problems getting the VLD bullets to shoot because of the bullet seater die they are using. VLD bullet noses are so long and sharp that, in many dies, the bullet tip bottoms out in the bullet seater stem instead of touching on the side of the ogive like it should. Seating depth inconsistencies up to .025″ can occur if the seater stem bottoms out on the bullet tip. The worst part is that many shooters have no idea that this is the root cause of their poor performance. This new product can help turn a frustrating shooting experience into an enjoyable one.”
Accurate Shooter, "seating bullet to ogive"
mikecr
http://forum.accurateshooter.com/index.php?topic=3827495.0
The common culprits of depth mis-seating:
-bullet tip bottoming out in stem
-stem datum too high on nose(wedging)
-excess seating forces
-slop in press
Basics: Seating Depth
Checking Seating Depth
by: Germán A. Salazar
The Rifleman's Journal: Basics: Seating Depth
Interesting discussion regarding "cold welding" of bullets in case necks
Have you had any experience with "cold welding" of bullets in case necks?
Reloading: Seating Die Runout
Seating Die Induced Runout - A Comparison
by Germán A. Salazar
The Rifleman's Journal: Reloading: Seating Die Runout
Rifle Cartridge Overall Length
MassReloading - Rifle Cartridge Overall Length
Excerpt from Accurate Shooter Article, "Tech Tip: Try Rotating Cartridge During Bullet Seating Process — This Might Reduce Bullet Run-Out"
http://bulletin.accurateshooter.com/?s=Tech+tip+rotating+cartridge&submit=Search
Next time you’re loading ammo with a threaded (screw-in) seating die, try seating the bullet in two stages. Run the cartridge up in the seating die just enough to seat the bullet half way. Then lower the cartridge and rotate it 180° in the shell-holder. Now raise the cartridge up into the die again and finish seating the bullet.
Seater Die Adjustments from Redding
http://www.redding-reloading.com/component/content/article/21-tech-line/135-com-seat-bullet-depth
Seating Depth Variation by Redding
http://www.redding-reloading.com/component/content/article/21-tech-line/60-seating-depth-variation
"Inadequate or excessive neck tension can also cause bullet seating depth variations. If you're using a bushing style sizing die, make sure you've selected the correct diameter bushing to size the case necks. Our current recommendation, is to select a bushing that is .001" smaller than the neck diameter of your loaded cartridges.*"
Cartridge Overall Length (COAL) and Cartridge Base to Ogive (CTBO)
Effects Of Cartridge Over All Length (COAL) And Cartridge Base To Ogive (CBTO) – Part 1
http://www.bergerbullets.com/effect...coal-and-cartridge-base-to-ogive-cbto-part-1/
The cartridge base to ogive (CTBO) measurement is a key parameter used to precisely seat bullets relative to the lands. Use the dummy round to find the CTBO when the bullet's ogive is touching the lands. You can the make bullet seating adjustments relative to the "touching the lands" CTBO starting measurement to find your optimal seating depth. See the following article by Brian Litz.
rxs0
Effects Of Cartridge Over All Length (COAL) And Cartridge Base To Ogive (CBTO) – Part 2
http://www.bergerbullets.com/effect...coal-and-cartridge-base-to-ogive-cbto-part-2/
"So now you know the dimension from your bolt face to where your bullet touches the rifling using your bullets and gauge. Now all you have to do is adjust your seating die so that it makes ammo that matches this dimension. At this dimension you are “touching the rifling”. It is from this starting point that you can tune your rifle very effectively. Whatever amount you make this dimension longer than this starting measurement is a jam. If the starting dimension was 2.110” and you change it to 2.120” you are using a .010” jam. If you change your dimension to 2.090” you are using a .020” jump (as an example).
The key to this situation is that you find which CBTO shoots best in your rifle using your bullets and your gauge. It will take a bit of effort to get this sorted out especially if you haven’t done it before but I can assure you that once you know and control this dimension accurately you will be able to obtain better performance from your load in your rifle. It is important to remember that you can’t ignore COAL especially if you want to feed through a magazine. However, if you know your CBTO and then find out your COAL is 0.050″ too long to feed through a magazine then you are equipped to decide what to do next. If you must feed through the magazine then you will know for sure that you will have to add 0.050” more jump (make the CBTO 0.050” shorter) to get the cartridge into your magazine. This may or may not affect the rifles performance but at least you will have hard and reliable data from which to make decisions."
Brian Litz
Read the following article for Berger’s recommended process to optimize seating depth for precision.
http://www.bergerbullets.com/getting-the-best-precision-and-accuracy-from-vld-bullets-in-your-rifle/
"Both Redding and RCBS sell replacement seater-stems for VLD type and long bullets.
Also, myself I always polish the seater-stems on all my dies, which I find can greatly improve consistency."
http://forum.accurateshooter.com/index.php?topic=3832059.msg36325511#msg36325511
Donovan Moran
Some folk make a "custom" seat stem by putting hot glue in the stem, then seating a bullet...makes for a nice fit.
http://forum.accurateshooter.com/index.php?topic=3832059.msg36325551#msg36325551
snert
"To hold the bullet concentrically, the Bullet Alignment Bore and the Seating Stem have been honed and ground to virtually the same diameter as a jacketed bullet."
Redding Competition Seating Die. From Redding's website
"Redding came out with a VLD seating stem specifically designed to prevent the Berger VLDs from bottoming out/ hitting the tips of the VLD bullets when being seated. I use the VLD stems exclusively now."
http://forum.accurateshooter.com/index.php?topic=3832059.msg36325872#msg36325872
JEffVN
Best bullet seating method?
http://benchrest.com/showthread.php?67892-Best-bullet-seating-method
If you want the best of both use a Wilson type inline seater and seat the bullets a little long and finish seating the bullet to your desired OAL with a Forster Ultra seater in a 7/8" press. The Wilson type inline die can't be beat as far as concentricy but doesn't seat to the same OAL as well as a Forester Ultra seater (in my experience) but using the Ultra seater as the last step you ensure that you get good concentricy with the Wilson seater by doing most of the job seating the bullet and the Ultra Seater will ensure the same OAL. This goes against my K.I.S.S. method of reloading match ammo but it works.
Rodney
Boyd Allen's Technique for adjusting and measuring seating depth in Wilson Type Seaters
"It is a very simple design, without any sort of micrometer, and that is how I like it. I find that I like the directness of changing the total length of the stem and cap, as measured with my calipers. That is the dimension that I record in my load notes, as well as the approximate relation to the rifling."
http://forum.accurateshooter.com/index.php?topic=3830355.msg36350566#msg36350566
Boyd Allen
"The pro move is to get a 2nd or 3rd cap and stem if you plan on loading for more than one rifle or bullet, set the additional stems up for that and label them."
http://forum.accurateshooter.com/index.php?topic=3845768.msg36408649#msg36408649
mshelton
"To get a good sense of bullet seating pressure, Virgil seated bullets in a Wilson straight-line tool BY HAND — not arbor press. He estimated that the seating pressure on his hand was moderate — perhaps 15 pounds. If seating requires significantly more pressure, the operation damages the bullet’s fragile pressure ring, bulging your groups. If the seating pressure is too light, he said you’re assured a mediocre .250″ rifle."
http://precisionrifleblog.com/2013/...-warehouse-lessons-in-extreme-rifle-accuracy/
Seating depth consistency
http://forum.accurateshooter.com/index.php?topic=3847297.0
Powder Charging
Digital Powder Dispensers Part One
Digital Powder Dispensers Part One within AccurateShooter.com
Digital Powder Dispensers Part Two
Digital Powder Dispensers Part Two within AccurateShooter.com
Measuring Tools, Concentricity Gauges, and Sorting Tools
Excerpt from Accurate Shooter Article, "How to Load More Concentric Ammo"
After the Rounds Are Loaded — Batch Sorting by Concentricity Levels
No matter how meticulous you are, and no matter how good your components and tools are, run-out will still show up. Reloaders can drive themselves crazy trying to make each and every loaded round a true “0” in run-out. You will still see some minimal amount no matter what you do. Set yourself a standard of maximum allowable run-out for your loads. For instance for my Long Range 600- and 1000-yard F-Class loads I like to see .002” or less. I average .0015” and see a few in the range up to .004”. I spin each loaded round on my Sinclair Concentricity Gauge and sort them by run-out. Those that run over .002” I use for sighters or practice. Though achieving zero run-out (on every round) isn’t possible, minimizing run-out can definitely help your performance. Not only will your loads shoot better but you will have one less thing to worry about when you are lining up the sights on the target. — Pete Petros
Measuring the Case
by: Germán A. Salazar
The Rifleman's Journal: Basics: Measuring the Case
Bearing Surface Comparator
Bearing Surface Comparator within AccurateShooter.com
Bullet Tipping - Accuracy One Shooting Supplies
http://home.comcast.net/~jesse99/bsc.html
Go/No-Go Gauge
Go /No-go Gauge
Effects Of Cartridge Over All Length (COAL) And Cartridge Base To Ogive (CBTO) – Part 1
http://www.bergerbullets.com/effect...coal-and-cartridge-base-to-ogive-cbto-part-1/
Effects Of Cartridge Over All Length (COAL) And Cartridge Base To Ogive (CBTO) – Part 2
http://www.bergerbullets.com/effect...coal-and-cartridge-base-to-ogive-cbto-part-2/
Tools for Measuring Case Necks
Tools for Measuring Case Necks within AccurateShooter.com
Reading a Standard Micrometer
http://www.youtube.com/watch?v=i_jygJkJujE
Gauging Success - Minimum Headspace and Maximum COL
Gauging Success - Minimum Headspace and Maximum COL | World's Largest Supplier of Firearm Accessories, Gun Parts and Gunsmithing Tools - BROWNELLS
Sorting 223 Bullets using a Neal Jones 22 Rimfire Head Space Gauge
Sorting 223 caliber bullets by surface bearing length
Sorting Bullets, Brass, and Primers
Base to ogive measurements, anomaly?
http://forum.accurateshooter.com/index.php?topic=3832451.msg36328007#msg36328007
"When bullet makers change tooling, there are often differences in that measurement [base to ogive]. Most competition shooters order several thousands of the same lot number to keep them consistent."
tenring
Annealing
The Art and Science of Annealing
http://www.6mmbr.com/annealing.html
Annealing Instructions
http://www.bench-source.com/sitebuildercontent/sitebuilderfiles/annealerrevb.pdf
http://www.kenlightmfg.com/cartridgecaseannealer.htm
http://www.annealingmachines.com/how-to-anneal.html
The Science of Cartridge Annealing
http://bisonballistics.com/articles/the-science-of-cartridge-brass-annealing
Designing and Forming Custom Cartridges for Rifles and Handguns by Ken Howell
http://www.amazon.com/Designing-For...85846012&sr=8-1&keywords=ken+howell+cartridge
Excellent discussion on annealing
Giraud or Bench Source?
http://forum.accurateshooter.com/index.php?topic=3819532.0
Bullet Tip Trimming and Pointing
Whidden Pointing Die System
http://www.6mmbr.com/bulletpointer.html
Hoover Bullet Tipping Instructions
http://www.bullettipping.com/products_bullettippingdie_instructions.html
Hoover Bullet Trimming
http://www.bullettipping.com/products_hoovermeplattrimmer.html
Bullet Pointing
http://forum.accurateshooter.com/index.php?topic=3801387.0
Meplat Uniforming for Terminal Ballistics
http://forum.accurateshooter.com/index.php?topic=3775909.0
Bullet Coating:
Hexagonal Boron Nitride (hBN) Coating:
Source for 0.5 micron and 70 nm (nanometer) Hexagonal Boron Nitride Powder in 1 pound containers. The 70 nm powder is their smallest particle size:
http://lowerfriction.com/product-page.php?categoryID=2
http://bulletin.accurateshooter.com/2008/08/boron-nitride-source-and-application-procedures/
http://home.comcast.net/~jesse99/hex_boron_nitride_coating.html
https://www.youtube.com/watch?v=5DsYhPLSUD8
Why should you use our Boron Nitride Bullet Coating Kit (David Tubb)?
Boron Nitride coated bullets offer several distinct advantages over bare or moly coated bullets
(from Tubb's site
http://www.davidtubb.com/bn-boron-coating ):
Tubb Precision Blended [Editor:likely a blend of 70 nm and 5 micron particles] Hexagonal Boron Nitride goes on clear and doesn't come off in your hands, and unlike Moly coating, does not need a wax coating to hold it in place;
Unlike Moly, Boron Nitride has no humidity issues;
Moly out-gasses at around 600 degrees, Boron Nitride out-gasses above 2500 degrees;
Boron Nitride has a lower coefficient of friction than Moly, so it is slicker than Moly;
But the biggest reason to use Boron Nitride on your bullets, the most important advantage Boron Nitride coated bullets have over bare and Moly coated bullets, is that the first shot from a cold, "dirty" barrel will go into the group (of all the subsequent shots). You can't say this about Moly coated bullets, and in David's experience, the first shots using Moly coatings usually go low, and bare bullets are unpredictable.
Boron Nitride coating radically reduces the elevation effects of cold (or hot) bore first shot velocity variations that have plagued shooters in the past. This means that the High Power competitor using Boron Nitride coated bullets will not have to worry about elevation changes from the first through successive shots. It means that the hunter taking that all-important first shot of the day can be confident it will go where it is aimed. And the tactical shooter will know that critical first shot will leave the barrel in the same velocity range and go into the same group as his subsequent shots.
As David says: "This is huge".
By Tumbling/Vibratory bowl coating (from
http://www.lowerfriction.com/howto.php )
Take 5-6 small empty plastic bottles (empty aspirin bottles will do). Put few parts in the bottle and fill the bottle (up to 75%) with coating powder. Fill all bottles likewise.
Put the bottles in vibratory bowl/tumbler with vibratory media.
Vibrate/Tumble for 4-5 hours.
Empty the bottles and wipe clean the parts with soft tissue/cloth.
Articles on Bullet Coating
MUST SHARE- Moly coating trick
http://forum.accurateshooter.com/index.php?topic=3798399.0
Efficient Method for Bullet Coating with Moly, WS2, HBN
http://bulletin.accurateshooter.com/2013/04/efficient-method-for-bullet-coating/
Applying Boron Nitride (HBN) to Bullets
http://bulletin.accurateshooter.com/2008/11/applying-boron-nitride-hbn-to-bullets/
Guide to bullet coating
http://www.6mmbr.com/bulletcoating.html
http://www.accurateshooter.com/technical-articles/guide-to-bullet-coating/
Boron Nitride Bullet Lube Sources
http://bulletin.accurateshooter.com/2008/03/boron-nitride-bullet-lube-sources/
Boron Nitride Sources and Application Procedures
http://bulletin.accurateshooter.com/2008/08/boron-nitride-source-and-application-procedures/
Safety Tip for Shooting Coated Bullets
http://bulletin.accurateshooter.com/2013/01/safety-tip-for-shooting-coated-bullets/
Moly-Coating Process - Step by Step
by Germán A. Salazar
http://riflemansjournal.blogspot.com/2009/09/moly-coating-salazar.html
Moly Coating Process from Berger Bullets
http://forum.accurateshooter.com/index.php?action=dlattach;topic=3749594.0;attach=866237
Moly Source
Molybdenum Disulfide Nanopowder, 90 nm
http://lowerfriction.com/product-page.php?categoryID=19#
Norma on Moly Coating
http://riflemansjournal.blogspot.com/2009/09/moly-coating-norma-report.html
David Tubb on Moly Coating
http://riflemansjournal.blogspot.com/2009/09/moly-coating-david-tubb.html
Berger on Moly Coating
http://riflemansjournal.blogspot.com/2009/09/moly-coating-berger-bullets.html
Applying boron nitride on bullets
http://forum.accurateshooter.com/index.php?topic=3741653.msg35831693;topicseen#msg35831693
GUIDE to Bullet Coating
http://www.6mmbr.com/bulletcoating.html
"Clean your barrel after every shooting session before you put it away. I don't care what you've heard, if you value your rifle.. clean it!
Moly can and will trap moisture between itself and the barrel and an immediate slow corrosion will begin if there is moisture present."
http://forum.accurateshooter.com/index.php?topic=3741653.msg35831906#msg35831906
zfk55
By Tumbling/Vibratory bowl coatingThis method is ideal for bullets and other small parts.
Speed and friction determine how effectively the material bonds to the part. The greater the speed and the pressure of application, the greater the bond.
Correct Method is:
Clean and degrease the part. Take 5-6 small empty plastic bottles (empty aspirin bottles will do). Put few parts in the bottle and fill the bottle (up to 75%) with WS2 powder and steel BBs. Fill all bottles likewise. Put the bottles in vibratory bowl/tumbler with sand, vibratory media or with the bottles wedged.. Vibrate/Tumble for 4-5 hours. Empty the bottles (you can reuse WS2) and wipe clean the parts with soft tissue/cloth.
http://forum.accurateshooter.com/index.php?topic=3741653.msg35831693;topicseen#msg35831693
Without medium in the vibrator the maximum impact is achieved.
zfk55
http://forum.accurateshooter.com/index.php?topic=3741653.msg35831693;topicseen#msg35831693
After three hours, the Thumler's Tumbler is very hard on meplats.
Look at the info for using the Frankfort Arsenal vibrator/tumbler with .177 steel BBs and plastic jars just up above this post. Its all there and works perfectly.
zfk55
http://forum.accurateshooter.com/index.php?topic=3741653.msg35831693;topicseen#msg35831693
All of the benefits of moly: Reduced fouling, reduced barrel wear, reduced barrel heating -- in general the ability to shoot longer before accuracy degrades, and spend less time cleaning when you're done.
Little of the drawbacks of moly: Supposedly doesn't really build up in the barrel, so you don't have to condition a barrel to just hBN bullets, and you can interchange shooting with uncoated bullets without thorough cleaning in between. Also since it's not a disulfide there's no risk of it forming acids that might attack the barrel if not thoroughly removed.
dbooksta
http://forum.accurateshooter.com/index.php?topic=3741653.msg35831693;topicseen#msg35831693
Update... Loaded up a batch and went out to shoot.
The accuracy node definitely moved up. I suppose due to the lower friction creating slightly different harmonics. The node velocity may be the same, didn't take the chrono to verify.
Noticed that I did not see the bolt just start to get sticky until 26.5 gr (H4895) and this previously occurred at 26.1 gr.
Barrel ran cooler.
Boresnake with no brushes left the bore spotless.
I like the stuff.
kelbro
http://forum.accurateshooter.com/index.php?topic=3741653.msg35831693;topicseen#msg35831693
This is how I understand the process after a few PM's to zfk55.
1. First start by washing new BB's in Dawn soap and dry over night.
2. Fill jar (I use peanut butter jars also) 1/4 full w/ new BB's and add 1.5 grains hBN and tumble for 3 hours.
3. Wash bullets in Dawn soap (I did this at the same time as the BB's) and dry over night
4. Add 50-100 bullets to the BB's, jar should be about 1/2 full (I'm doing 6mm107SMK) and add .5 grains hBN for 50 and about .75 grains hBN for 100 and tumble for 3 hours
5. Remove bullets from jars, separate from BB's and roll back and forth in a terry cloth towel.
I'm using a Frankford tumbler with the jars tightly packed with foam and the bullet coating results look great. I haven't coated the barrel or loaded any bullets yet, winter doesn't want to leave MN yet and I got 100 rounds to fire from last year. Hope this helps.
Scott
sbrabec
http://forum.accurateshooter.com/index.php?topic=3741653.msg35831693;topicseen#msg35831693
19zip, I do a hBN and alcohol slurry. I mix it to the consistency of whole milk. I keep a small jar completely air tight and it lasts on the shelf without evaporation. I apply it with a slightly undersized mop like a .270 in the 30 caliber bore. I fire one round within an hour or so.
You've about got it right, Scott. The projectile should not appear mottled, but a solid, darker color and they'll feel very slick when handling them. If your coated projectiles are leaving any trace of copper in the bore then there's a part of your process not working.
Latigo
zfk55
http://forum.accurateshooter.com/index.php?topic=3741653.msg35831693;topicseen#msg35831693
Barrel PreTreat For HBN
http://benchrest.com/showthread.php?66216-Barrel-PreTreat-For-HBN&
Quantifying Friction Effects of Molybdenum Disulfide, Tungsten Disulfide, Hexagonal Boron Nitride, and Lubalox as Bullet Coatings
http://www.dtic.mil/dtic/tr/fulltext/u2/a568594.pdf
Trouble with hBN bullet coating
http://forum.accurateshooter.com/index.php?topic=3846489.0
Troubleshooting
Cures for Vertical Stringing
Cures for Vertical Stringing within AccurateShooter.com
Reading Pressure Signs
MassReloading -
Chamber, Cartridge, and Bullet Analysis
Basics: The Leade Angle
by Germán A. Salazar
The Rifleman's Journal: Basics: The Leade Angle
An Introduction to Rifle Chambers
http://bisonballistics.com/articles/an-introduction-to-rifle-chambers
An Introduction to Rifle Cases
http://bisonballistics.com/articles/an-introduction-to-rifle-cases
Custom Resizing and Seating Dies
Inline Seating Dies for Custom Chambers
http://www.accurateshooter.com/technical-articles/reloading/inline-seating-dies-for-custom-chambers/
Software
Quickload Reloading Software
Quickload Reloading Software within AccurateShooter.com
General Reloading Videos on YouTube
Reloading Virgin Lapua Brass (.308) - YouTube
James Warnock posted this excellent video on reloading 308 rounds.
"Reloading Virgin Lapua Brass (.308)"
Longrange blog 66: Reloading 7x57r - YouTube
Thomas Haugland sierra645
RELOADING .308 MATCH GRADE 208GR AMAX - YouTube
joediesel187
Excellent Tutorial on Reloading and Rifle Tuning by Jack Neary
http://m.youtube.com/watch?v=7SZWvn68bRU
Part 1
http://m.youtube.com/watch?v=ZOPf5Iva-Oo
Part 2
http://m.youtube.com/watch?v=5DAIBx9uWmQ
Part 3
http://m.youtube.com/watch?v=9CtzuS_0wkc
Part 4
http://m.youtube.com/watch?v=zGEhjBs66rk
Part 5
http://m.youtube.com/watch?v=ILvH6TYNcx8
Part 6


