The idea of raised beds arrises from a need to avoid bending over, to work the plants, nothing more. in-ground emplacements can be amended (soil enriched) just as well, and weed abatement/avoidance can also be enhanced on the ground, vs a raised bed. Drainage issues and limited or controlled watering, can also be addresses adequately on the ground.
weeds, especially grass can enter at the bottom along the edge (where side joins bottom) and eventually sprout inside your box or other container, so unless you have it on legs, or the ground is covered with an impermeable liner wide enough to prevent crawling-type grass, your bed is going to bet invaded. The image earlier posted with large tarps under the beds with a wide apron for walking is a good example of what would work. Still, raised beds represented a cost I wasn't willing to expend for our large garden.
Starting in Autumn:
1. I tilled the garden area, and brought in 5 or 6 pickup loads of horse manure (i know, seeds. Shut up a minute and listen), cow manure and (seriously) Elephant manure!
2. retilled, and left it for the winter
3. Come spring, another 5-6 loads of horse manure. Tilled it in.
Raked it all into wide beds, about 3 ft wide, slightly higher than grade (about 4" total height).
4. Built 3 manifolds of PVC 1/2" pipe, with a hose connection, facing out, and three outlets facing opposite way on pipe. T's and Elbows. sufficiently wide enough to span across one end of the rows/beds.
5. Attached straight runs of 1/2" pvc pipe full length of rows. (hint: 1/2" 30 ft, adequate pressure for three runs, 40ft, use only two runs).
overhead water with sprinklers to get a good soak started, but not too muddy, so you can walk in the rows between beds.
6 drill either pre-planned 1/16 holes or wait until you begin planting.
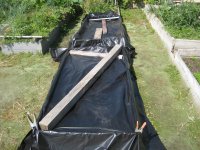
7 cover with black plastic. Any other color will allow sunlight through. Black plastic will prevent germination, and any weeds that DO happen to try sprouting, hits the black plastic and burns. Black plastic must be of a heavy enough gauge to allow walking, and REUSE year to year. (Hint: If it comes on a roll, it is probably not thick enough. We used salvaged black plastic from a heap-leach mine, that had not been used for processing. The mine closed, and precut sheets were just lying there. Never got used. They went like hotcakes to spread under homes (crawlspace) and gardens. The black plastic is the absolute key to all of this.
8. use a drawing of your garden plan: allow for mature spread of plants and for crawling of vines, as well as shading from taller plants, and of course orientation of your plot and/or plantings.
9. Walk each row of the sun heated plastic sheeting, so it droops into each walking lane. Secure the edges and some rows, so that wind doesn't lift your garden cover.
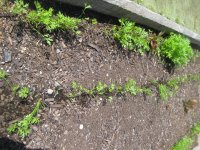
10: Cut an x shaped hole, and dig out enough space to set your plant, drill a small (1/16 or smaller) hole in the exposed pipe, and push it to one side away from the hole. Set the plant appropriately (deep for tomatoes) and far enough apart for mature growth, space ina diamond repeating patern from both sides of the bed. Surround the hole with either newspaper or mulch, to prevent burning of young leaves.
11. Turn on each manifold and check adequate pressure at distant end.
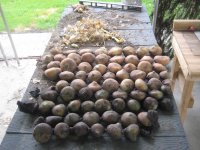
Result: Far less watering, almost no weeds or weeding, no compression of the growing area soil, and by using scavenged materials, almost no cost. Scads of produce, and very little tending work. The install only took one good weekend with three teens and the wife assisting.
We didn't open a fruit stand, but we did have all we needed for our annual food storage, supplied all of our corn plus corn for a neighbor who's cattle had eaten all of theirs, and sold produce in the local mom and pop store.
If I can dig out the photos, I'll edit this post.


