Join the Hide community
Get access to live stream, lessons, the post exchange, and chat with other snipers.
Register
Download Gravity Ballistics
Get help to accurately calculate and scope your sniper rifle using real shooting data.

Install the app
How to install the app on iOS
Follow along with the video below to see how to install our site as a web app on your home screen.
Note: This feature may not be available in some browsers.
You are using an out of date browser. It may not display this or other websites correctly.
You should upgrade or use an alternative browser.
You should upgrade or use an alternative browser.
Just Finished the Reloading Bench Build
- Thread starter IndianaRem5r
- Start date
I built one very similar. The only thing I did extra was mounting corner wood around the outside to stop cases and things from rolling off the edge. But I wish I did an overhang like yours.
I also bought 2 boxes of cheap laminate flooring from home Depot for the top and sides. It's aesthetically pleasing and provides Alot of protection.
I also bought 2 boxes of cheap laminate flooring from home Depot for the top and sides. It's aesthetically pleasing and provides Alot of protection.
Looks really good and heavy. Nice job. Only thing I'd do, is an an edge, to stop " rollers", and a couple coats of eurethane on the top.
Looks like it is a solid build, and the overhang is a really nice feature for anyone mounting a press.
If there is some slack/movement in it still consider bolting it to the wall and floor, if it's parked permanently.
Also laminate flooring, countertop etc, will make a bench top that is much easier to keep clean
I am about to do the same myself in a newly finished room, 4x4 for frame,4x6 legs, woodscrews, expansion bolts and a 3,5 meters counter top, ontop.
Looks pretty flimsy. Are you sure you don't need some I-beam and reinforcing rod in there? 
Good job! I like the overhang.
Good job! I like the overhang.
G
Guest
Guest
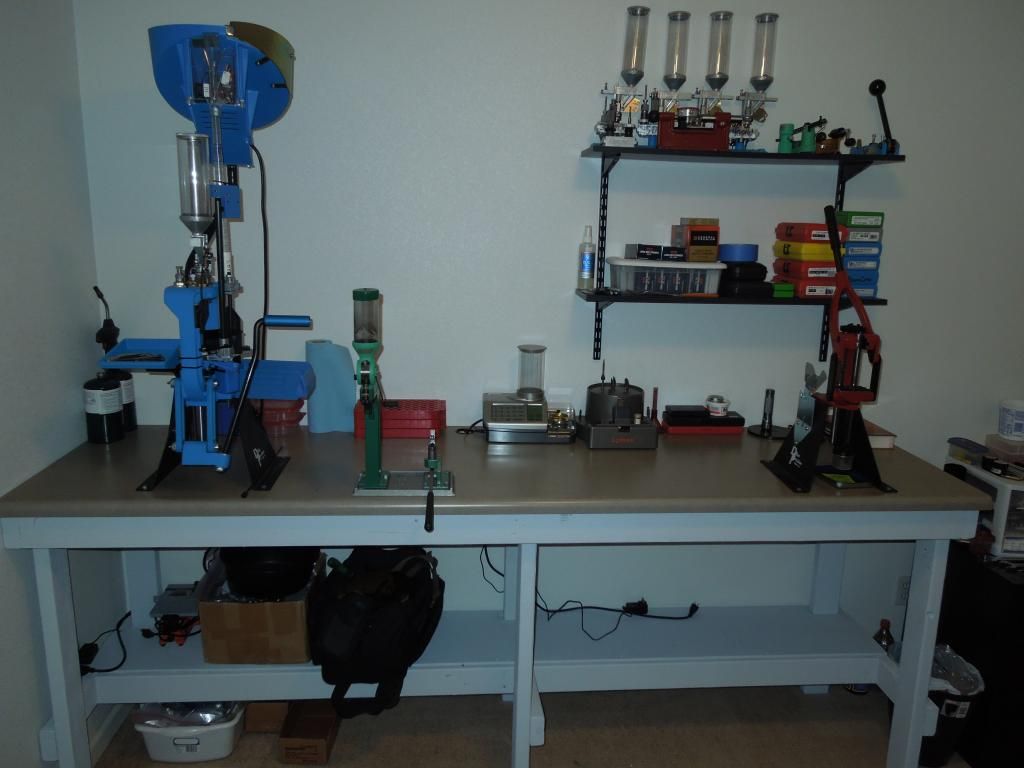
Here's my reloading bench I built all last week that measures 6'Wide x 36"Heigh x 26" Deep. I am brand new to reloading and wanted a solid bench that would last. I wanted something solid, heavy and a furniture quality smooth top. Took me 5 days to build. I used Premium 2"x4" and 2"x6" and Cedar 4"x4" posts for the frame. Bolted the frame together with 3/8" carriage bolts. I bought a 4'x8' sheet of 3/4" Oak for the top and the shelf underneath. The top is constructed of the 3/4" Oak glued and screwed from the bottom to 3/4" MDF so there is no screws in the top surface. I then screwed 2x6" pieces across the bottom side of the top so the top could be screwed to the frame with a 4" front overhang. I used a nail gun to secure 1"x3" Select Pine trim across the front and both sides with 1"x6" Select Pine across the back to create a lip to prevent things from rolling off the back.
I then sanded the entire bench with 300 Grit sandpaper and the top with 300 then 400 grit sandpaper. I used Minwax Golden Maple stain on the entire bench letting it soak in for 15 minutes to get a deep golden red color before wiping off the excess then let dry for 24 hours. The next day I applied a coat of Minwax Polyurethane in Satin finish to the entire bench and let dry for 6 hours. I then sanded the counter top, bottom shelf and side trim with 300 grit sandpaper and applied a second coat of Polyurethane and let dry for another 6 hours. I sanded the counter top and side trim again and applied a 3rd and final coat of Polyurethane to the top, bottom shelf and side trim.
While the bench was a lot of work, I couldn't have bought something like this at the store for what it cost me. Entire bench cost me just under $200 in materials and turned out awesome. The picture doesn't do it justice, it is a deeper red in person and the top is butter smooth with a heavy protective coating of Polyurethane.
I now have to sand, stain and Polyurethane the 3/4" Oak shelves I made and mount both of them, one above the other on the wall in front of my bench.

I'm pleased with it. I'm convinced you have to build what you want. This isn't something you can buy or I probably would have. What do you guys and gals think?
Indiana
Looks good and sturdy, also looks like you still have some room on the left and right, so the possibility of expanding is good. I am lucky enough to have a large garage and once done building 1st bench, got the bug of "expanding" so that's just what I did and for sure do not regret it. Shelves would be a good add-on, can't get too many of them. Eventually, you will get more and more "stuff" and that's a fact
Good shooting and reloading.
good job nice and heavy great lighting too.
Very good point there; strong lighting 100% recommended and necessary. For reloading, darkness is not your friend.
Great job ! I need to modify my setup as well. I need to get my press and powder thrower higher. I am mulling over a "floor stand" type setup with the press arm mounted approx at head height. My back starts to ache from slightly bending over for hours while sizing or seating bullets.
Nice setup flashhole. I can appreciate neat & organized benches.
Hats off to you guys that build your own. Admittedly I'm not very handy that sort of way, so I went & bought a Kobalt from Lowe's. It got sturdy after I used some T brackets reinforcing the work top & back wall in addition to weighing it down with all the gear.
I'm also really tight on space, so had to make best use of what I had. I'm pretty happy with the way it sits now...

Ok I'll play. Here's my work in progress: got the cherry desks/hutches for free on craigslist and the other bench materials was from a grocery store that went out of business.
Metallic loading, case prep on left with ammo storage above.

Shotshell reloading and gun cleaning with bullets in cabinet above

Powder, primer and ammo box storage

A safe and brass storage

Metallic loading, case prep on left with ammo storage above.

Shotshell reloading and gun cleaning with bullets in cabinet above

Powder, primer and ammo box storage

A safe and brass storage

Last edited:
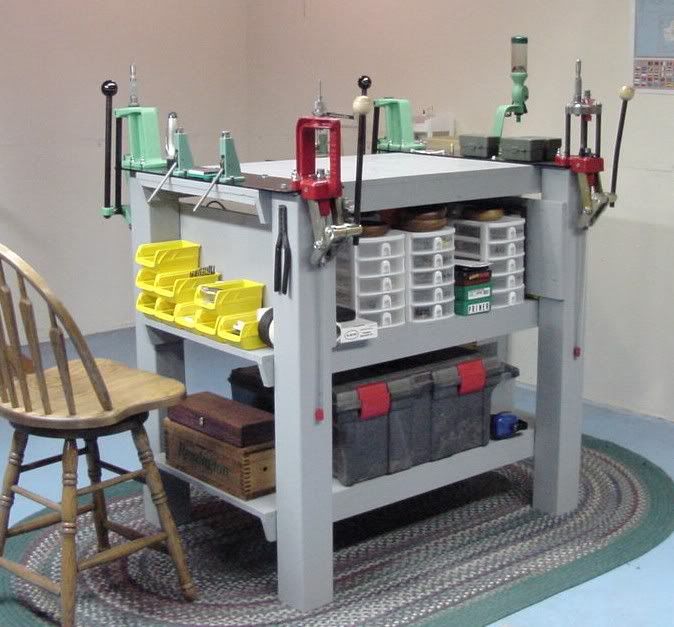
Mike 402 - Those elevated press mounts do a lot to distribute force and stabilize the press. Good job. When I built my bench I straddled the 5-1/2" fake wood uprights with 5/16" steel plate and mounted the presses directly over the 42" uprights to minimize flex (I like to stand when I reload). It's rock solid. You will take that stability for granted until you use a press mounted in a different fashion.
View attachment 48657View attachment 48658
Get the presses closer to the target or closer to the computer/TV
Man my wife already says I spend all day on the range.... She might never see me again.
Similar threads
- Replies
- 12
- Views
- 299


