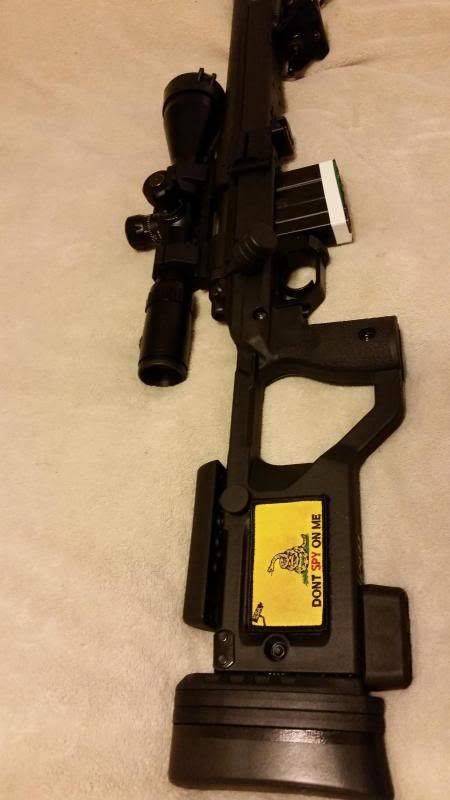
New X-Ray Chassis from KRG-now shipping!

I picked up my X-Ray after work this afternoon. Right now, I am too lazy to take photos and get the hosted up somewhere. However, here are my (photoless) initial impressions...

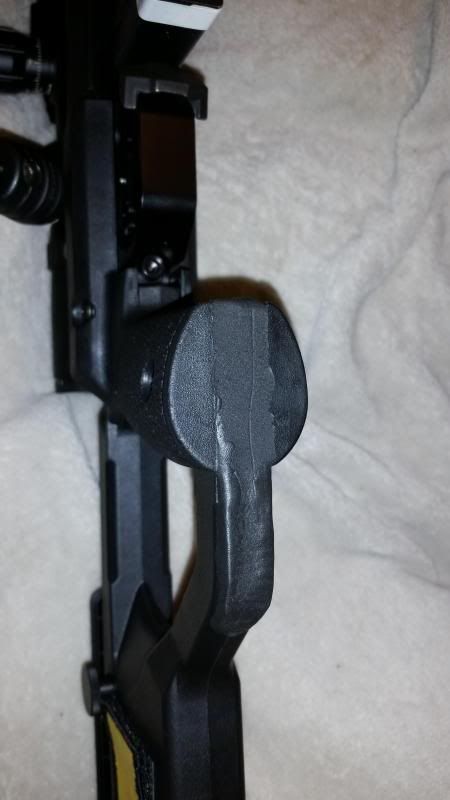
Bad - Some relatively minor fitment issues with the grip panels. They both protrude below the grip section by enough to be noticeable. It took a little tweaking and tightening before I got the grip panels lined up everywhere else. The remaining slight misalignments are nothing that some sugru and/or my dremel tool can't fix. That's if they eventually annoy me enough to fix.

No instructions for the proper backer plate to use for the bipod mount. It took a little trial and error to figure out that the small stainless backer plate is the one to use if you put the bipod stud all the way forward.

Same lack of documentation for the barricade stop. That one was easier to figure out, at least.

Default cheek piece is pretty hard, and not the most comfortable. I see either a Wiebad cheek pad or the KRG overmold cheek piece in my near future.

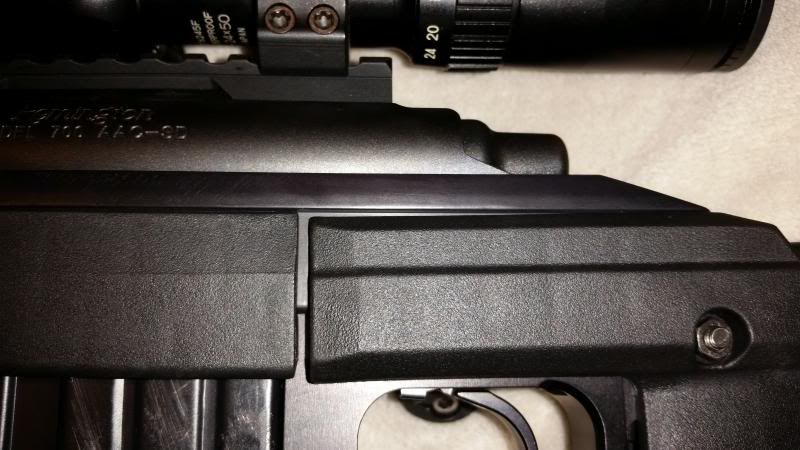
The bolt and nut that hold the top of the grip panels in place sticks out a bit too much on the nut end. Again, nothing a little dremel work or a dab of Sugru to cover it won't fix.

As other users had stated before, I had issues with the safety pin on my Timney trigger not clearing the inside of the chassis. That's not the chassis' fault, and it was nothing a little hand file work on the offending pin didn't fix.

Using a Harris bipod all the way forward, and the barricade stop all the way to the rear doesn't leave enough room on the fore-end for a skid pad to be installed. Since I plan on picking up a spigot for the bipod some time soon, that problem should be solved once I get the spigot installed.

Spacers were a pain to deal with, mostly because the rubber recoil pad doesn't always want to let the screws back out.

The small grip panels are a bit too small for me. I see a set of the large panels in my future.

I wish the phillips screws that hold the stock together were a little more recessed.

Now, on to the good stuff:

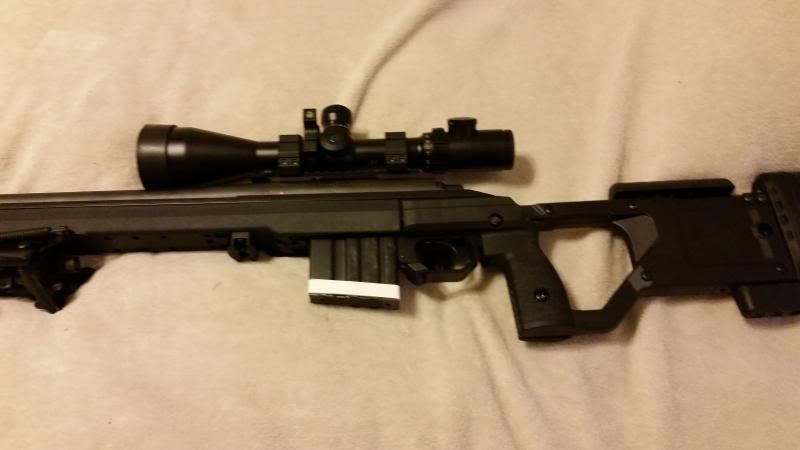
Holy crap, this thing is light. Light in a good way. The balance is fantastic with my AAC edition, Bushnell ERS 6-24x, Vortex anti-cant, Harris BRM-S and AAC Brakeout.

The barricade stop I ordered looks to be just the ticket for working off barricades and out of the window frames at K&M.

The adjustable cheek riser is very easy to work with, and the o-rings function beautifully as a simple reset method. With the straight spine of the stock, I barely had to pull the riser up to get perfect cheek weld.

Once dialed in, the spacers are solid, and integrate well with the rear bag. I am running the butt height all the way up, so the bag rider blends in beautifully with the rear of the stock.

The entire stock just feels solid once everything is dialed in. I was also surprised that while the distance from the trigger to the end of the stock (with 2 spacers installed) is shorter than my old B&C stock, it's more comfortable by far. I was expecting the LOP to come out LONGER on the X-Ray, not shorter. I get the feeling the vertical grip (and the fact that it's much closer to the trigger than the grip area on the B&C) has a lot to do with this.

The stock itself is quite slender - barely wider than the receiver. I don't like bulky stocks, and this one really fits the bill for me.

The molded in mating surface for Harris bipods on the front of the foreend is a very nice touch.

The action seems to run even smoother with the X-Ray than it did with the B&C, which was a massive improvement over the crappy Hogue stock that came on the AAC edition.

Alpha magazines do work just fine in my X-Ray with my rifle. I have noticed that inserting them can be a big janky, but that seems to be due to the gap between the aluminum spine and polymer handguard in the front area of the mag well. A slight adjustment to my mag insertion method has helped that issue already.

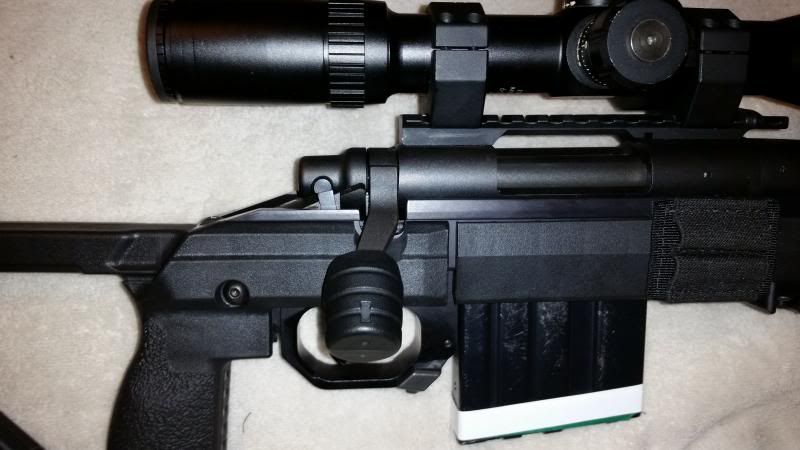
The wrap-around magazine release rocks, as does the oversized trigger guard.

The KRG Bolt Lift I have been running on my 700 looks great with the X-Ray.

Overall, I think my complaints are VERY minor, especially compared to the benefits I am already seeing to the stock. I will have the rifle back out on the range this weekend, and the X-Ray will be getting some live-fire workout. I will try to remember to take photos this weekend and post them some time next week, along with a more detailed review.

I do see another order with KRG in my near future, though - Spigot mount, flush sling mount, sling cup, large grip panels, and possibly the overmold cheek piece.
 
Can you post a picture of you cheek mount ? Thanks.

Adjustable cheek mount with victor grippy cheek piece, the long screws and brass nuts I did not use with the victor grippy. I did have to use washers with the screws provided because the screws were bottoming out before they where tight.

IMG_0175.JPG
 
Right now there is no long action planned but if the demand is there we will make it. It would be a bit extra but not too much probably.

Gt1 thanks for the update on the mount plate/Victor Co combo, glad to hear it worked out for you.

WoodenPlank, that's a good write-up. We'll use your feedback along with that of others and try to make it better and better.

Justin
 
Adjustable cheek mount with victor grippy cheek piece, the long screws and brass nuts I did not use with the victor grippy. I did have to use washers with the screws provided because the screws were bottoming out before they where tight.

View attachment 38073


Just got mine in the mail today, will install when I get off work.

Did you have to go elsewhere to find those washers, and if yes, what size did you get? Will the washers that came with the stock work? There were no instructions given but I thought it would be simple enough to install, however, what are the long screws and brass nuts for?
 
Stock remington sps tactical mounted to x-ray chassis with the adjustable cheek piece mount with victor grippy cheek piece.
View attachment 37965

GT, how do you like the monopod with the KRG? Have been considering one for a bit to replace my old GI sock and after seeing Loan Wolfs video is seems to have a tactical application. How fast is it to dial into a shot? Does it tend to sink into soft ground and need frequent readjustment?

Sully
 
pklin1297 I had some washer around the house that fit and dont know the size of the washers. I didnt try the washers that came with the stock. I think the long screws and brass nuts are to be used with the stock cheek piece.
Just got mine in the mail today, will install when I get off work.

Did you have to go elsewhere to find those washers, and if yes, what size did you get? Will the washers that came with the stock work? There were no instructions given but I thought it would be simple enough to install, however, what are the long screws and brass nuts for?
 
sulcop96 I like the atlas monopod, the atlas mono pod has a quick adjustment, and a fine adjustment just by turning the body. To me it adjust fast, I have never used a rear bag yet but getting one now to see how fast it compares to the monopod. I have never shot it on soft ground yet, if you do get the monopod upgrade the cap with the steel cap atlas will install the steel cap if you order that option. Found a youtube review by 8451 Tactical on using the monopod on soft ground.
https://www.youtube.com/watch?v=1iSKTcDEDQE&noredirect=1

GT, how do you like the monopod with the KRG? Have been considering one for a bit to replace my old GI sock and after seeing Loan Wolfs video is seems to have a tactical application. How fast is it to dial into a shot? Does it tend to sink into soft ground and need frequent readjustment?

Sully
 
Last edited:
Right now there is no long action planned but if the demand is there we will make it. It would be a bit extra but not too much probably.

Gt1 thanks for the update on the mount plate/Victor Co combo, glad to hear it worked out for you.

WoodenPlank, that's a good write-up. We'll use your feedback along with that of others and try to make it better and better.

Justin

Justin,

So far, I am quite happy with the stock. Knowing you guys are listening makes me appreciate it even more.

Here are some photos of my setup, along with the areas I had minor complaints about - as well as my fix for one of them.

20140515_192408.jpg


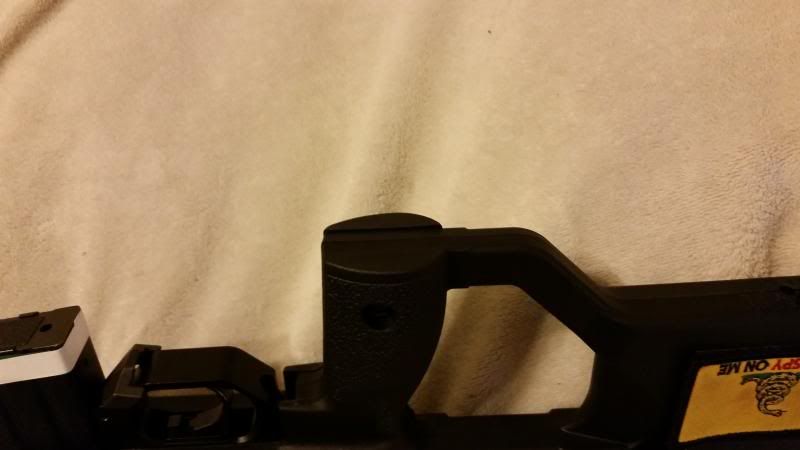
Here's the over-hanging bottom edges of the grip panels on my stock frame:

20140515_192420.jpg


It's not much overhang, but it is noticeable.

Here's the misalignment issues with the left side grip panel:

20140515_192514.jpg


If I reposition the grip panel so it's flush against the lip of the aluminum frame, the front edge of the grip panel protrudes in front of the grip frame. I forgot to get a photo of that, though.

Here's the opposite side. The right grip panel lines up perfectly.

20140515_192635.jpg


Here's an overall photo, showing the barricade stop I ordered with my stock. It's much smaller than I expected (then again, so is the stock width) but after playing with it on some surfaces in the house, I have to say I really like it. When I get out to the range this weekend, I will be doing some dry fire runs with the stop to see how it does.

20140515_192644.jpg


Finally, here's my fix for the grip panel overlap issue:

20140515_194811.jpg


I used some black Sugru rubber putty to fill in the gap. I extended the Sugru farther back onto the stock body, too, in order to leave a rubberized surface where the stock meets the ground after setting it down on the bipod. I mostly did that just to use the Sugru from the packet I cut open, and to get rid of the *thunk* noise the stock made when I put it down. What can I say - I'm picky. I used the rest to make some rubber bumps on the bag rider to give it a little more grip on a rear bag.

Overall, I am still quite pleased with the X-Ray.

Justin, thanks for putting out a product that's this good, and doing it for a reasonable price. I definitely see big things in the future for your design.
 
Last edited:
Justin,

So far, I am quite happy with the stock. Knowing you guys are listening makes me appreciate it even more.

Here are some photos of my setup, along with the areas I had minor complaints about - as well as my fix for one of them.

20140515_192408.jpg


Here's the over-hanging bottom edges of the grip panels on my stock frame:

20140515_192420.jpg


It's not much overhang, but it is noticeable.

Here's the misalignment issues with the left side grip panel:

20140515_192514.jpg


If I reposition the grip panel so it's flush against the lip of the aluminum frame, the front edge of the grip panel protrudes in front of the grip frame. I forgot to get a photo of that, though.

Here's the opposite side. The right grip panel lines up perfectly.

20140515_192635.jpg


Here's an overall photo, showing the barricade stop I ordered with my stock. It's much smaller than I expected (then again, so is the stock width) but after playing with it on some surfaces in the house, I have to say I really like it. When I get out to the range this weekend, I will be doing some dry fire runs with the stop to see how it does.

20140515_192644.jpg


Finally, here's my fix for the grip panel overlap issue:

20140515_194811.jpg


I used some black Sugru rubber putty to fill in the gap. I extended the Sugru farther back onto the stock body, too, in order to leave a rubberized surface where the stock meets the ground after setting it down on the bipod. I mostly did that just to use the Sugru from the packet I cut open, and to get rid of the *thunk* noise the stock made when I put it down. What can I say - I'm picky. I used the rest to make some rubber bumps on the bag rider to give it a little more grip on a rear bag.

Overall, I am still quite pleased with the X-Ray.

Justin, thanks for putting out a product that's this good, and doing it for a reasonable price. I definitely see big things in the future for your design.

Received my chassis today, and this post pretty much sums it up. With the exception of the upper grip panel screw, it is actually sticking out the side just a hair. I have a screw cutting/threading tool that will fix it up nicely so it should be no big deal. The grip panel hanging off the bottom does not really bother me as much as the crookedness of the left one. Overall it is a great chassis. I will have to order a few more items from you guys to get it setup just right.

Thanks for offering us such an awesome chassis at a great price!

I'm wondering if the mold for the small left panel was off just a touch.

Has anyone gotten the large grip panels yet? Do they have the same issue?
 
pklin1297 I had some washer around the house that fit and dont know the size of the washers. I didnt try the washers that came with the stock. I think the long screws and brass nuts are to be used with the stock cheek piece.

Thanks much for the info. I was actually able to screw the included screws all the way down with room to spare after tightening, so no washers needed. At one point it did get harder to screw but I never hit any semblance of a stop so I kept going. I had thought maybe I was hitting rubber already but I wasn't... anyway, will see how the cheek likes it later.
 
sulcop96 I like the atlas monopod, the atlas mono pod has a quick adjustment, and a fine adjustment just by turning the body. To me it adjust fast, I have never used a rear bag yet but getting one now to see how fast it compares to the monopod. I have never shot it on soft ground yet, if you do get the monopod upgrade the cap with the steel cap atlas will install the steel cap if you order that option. Found a youtube review by 8451 Tactical on using the monopod on soft ground.
https://www.youtube.com/watch?v=1iSKTcDEDQE&noredirect=1

Yep, that is Lonewolf, Lonewolf and 8541 are the same person. Thanks though and that is the same video I watched and makes me want to try the monopod. I normally use a golved hand technique or a bag but I have been in a few situations where a monopod may have worked better. If I try one I'll post up the results but I am not a bench shooter and most of the time I am not prone so I am looking at it for other applications outside the norm.

Sully
 
Just got my Tikka X-Ray yesterday and so far I really like it.

14114635326_3bdde225fe_z.jpg


Initial thoughts:
Everything feels nice and solid and install was quick and easy.
I'm glad that I ordered the additional large grips. I have large hands and the included small grips were just too small for me.
The grippy overmolded cheek piece upgrade is awesome and the recoil pad is also nice and soft.
The length of pull was really short so I think most will need the spacers.
All of the adjustments were great and it was pretty easy to get the fitment to my liking.
The included Magpul polymer front rail is ok for now but I will definitely be ordering one of the aluminum ones from KRG when they are back in stock.

I was surprised to see that you can't adjust the Tikka trigger once it's installed in the action. Possibly on future versions you could include a small 3mm hole in the mag well area that allows access to the adjustment screw? I decided not to drill any holes in my brand new chassis but probably will do it sometime.

I was able to put some rounds through mine this weekend and it shoots great. Big ergonomic improvement over the original stock. No problems with the bipod on the polymer rail, but if you are using a QD bipod that is on/off frequently you will probably want the aluminum rail. I will reiterate my earlier comment that having to take the Tikka action out of the chassis to adjust the trigger is a bit of a drawback. Looks like some drilling is in order.

14222988974_da88e8d076.jpg

What cal is your Tikka and did you have to modify your AICS Mags? I have a Tikka T3 308 I just dropped into an XRAY and the AICS Mags leaves gash marks when cycling a round out of the mag into the chamber.

Thanks for your input on your other findings, I may follow your lead on drilling a hole to be able to adjust the trigger.

Sent from my XT1060 using Tapatalk

Mine is a .308. I did not have to modify my AICS mags. The 5-round mags fit pretty much perfectly. The 10-round mags fit a little tighter in the stock, seems like they are a little bit wider than the 5-rounders as they have some rub marks on the sides. But all of them fed the rounds reliably. Where are you getting gash marks? I have read that sometimes the AICS feed lips can be sharp and some people use Flitz polish to smooth them out a bit.
 
I just purchased two 5-round AICS mags from midwayusa when I ordered my XRAY, Once I had the chassis swapped out I loaded 3 rounds into each mag and cycled the action to check out how it feeds and the feed lips left nasty gashes on the topside of the brass... I compared the feed lips on the stock Tikka Mag to these AICS mags and there is a big difference in length.
I ended up grinding the AICS feed lips down to match the Tikka Mag feed lips length and tried rounding out the edges on the lips. I was wondering if I am the only with the issue witch I doubt but this being my first chassis swap out I did not want to rule out any error on my part either so I thought I would ask and if I was not the only one what where other people doing to correct this.


Thanks for your help.
 
The AICS mags can be a bit stiff and sharp when new. We work ours over a bit with a cratex bit on a dremel. Shortening the feedlips does also help. They are unnecessarily long.

eravelo the mount comes with instructions. If yours are missing we can email them over if you send me your email.

Thank you fellas,
Justin
 
I just purchased two 5-round AICS mags from midwayusa when I ordered my XRAY, Once I had the chassis swapped out I loaded 3 rounds into each mag and cycled the action to check out how it feeds and the feed lips left nasty gashes on the topside of the brass.

Haven't had any issues with the Remington 700 and the AICS 5 round mag, fwiw. However for people looking to buy an AICS magazine, I recommend checking out Southwest Precision. I bought mine for $68.05, shipped in 2 days. Great people to work with and it was about $30 cheaper than Midway and other companies. Also fwiw.
 
Justin, got the instructions within minutes, thanks.
Another question, I purchased the larger grip panels for the X ray, but there is a tab on the forward portion of the moulding that interferes with the X-ray fore end. Are these large grips correct for the X-ray? In hindsight their description on the web site doesn't say so, but the detailed description of the stock says they fit. Should I just whack the tabs off with an X-acto knife?

One last question, is thread locker needed when mounting the spigot to the chassis?
 

Attachments

  • image.jpg
    image.jpg
    506.6 KB · Views: 36
Last edited:
The AICS mags can be a bit stiff and sharp when new. We work ours over a bit with a cratex bit on a dremel. Shortening the feedlips does also help. They are unnecessarily long.
Justin- I'm not familiar with Cratex, but I have lots of shop tools from building race cars. I assume you're just polishing and de-burring that inside bottom edge while removing as little actual material as possible?

Scott Whitehead
 
Justin, got the instructions within minutes, thanks.
Another question, I purchased the larger grip panels for the X ray, but there is a tab on the forward portion of the moulding that interferes with the X-ray fore end. Are these large grips correct for the X-ray? In hindsight their description on the web site doesn't say so, but the detailed description of the stock says they fit. Should I just whack the tabs off with an X-acto knife?

One last question, is thread locker needed when mounting the spigot to the chassis?

That doesn't look like leftover flashing from the mold to me. I'd assume an X-acto knife is the ideal cure, but Justin will probably have some input.

Justin- I'm not familiar with Cratex, but I have lots of shop tools from building race cars. I assume you're just polishing and de-burring that inside bottom edge while removing as little actual material as possible?

Scott Whitehead

Yep. A piece of very fine grit sandpaper can help, too.
 
Justin, got the instructions within minutes, thanks.
Another question, I purchased the larger grip panels for the X ray, but there is a tab on the forward portion of the moulding that interferes with the X-ray fore end. Are these large grips correct for the X-ray? In hindsight their description on the web site doesn't say so, but the detailed description of the stock says they fit. Should I just whack the tabs off with an X-acto knife?

One last question, is thread locker needed when mounting the spigot to the chassis?

My large grips had those tabs as well. I just trimmed them off and now they fit just like the small grips.
 
Hey Fellas, here's some more info:
-FDE is coming but still a few weeks out. Sako Green is almost here.
-The tabs on the large grips do need to be broken/trimmed off as noted. They fit into the W3 but not the X-ray.
-Scott you are correct, just polish up the edges of the feedlips where it touches the rounds. Cratex is an abrasive/polishing compound trapped in rubber that is used on a dremel tool. It's a handy bit for polishing with the dremel.
-We use loctite on most of the screws on our chassis and we think it's a good idea to use it (blue kind, not the red permanent) when mounting the spigot but if you don't have it chances are that everything will work out fine.

Keep the pics and questions coming guys, there's a lot of good looking rigs I'm seeing.
Justin
 
Jbm... The stock is fully adjustable. You don't need a stock pad. If you are looking for a soft cheek piece... KRG offers an option... If you want storage... That is another issue.


Sent from my iPhone using Tapatalk
 
Jbm... The stock is fully adjustable. You don't need a stock pad. If you are looking for a soft cheek piece... KRG offers an option... If you want storage... That is another issue.


Sent from my iPhone using Tapatalk

I currently run the KRG Xray, and understand it is adjustable. I am not sure if you know what the Wiebad Mini Stock pad is or not, but it offers no storage. I also shoot with a beard and will not shoot with a rubber cheek rest of which KRG offers.
 
Having shot with a beard on many occasions, I can appropriate the desire for a stock pad and not wanting a rubber mat... My apologies.

I currently run the KRG Xray, and understand it is adjustable. I am not sure if you know what the Wiebad Mini Stock pad is or not, but it offers no storage. I also shoot with a beard and will not shoot with a rubber cheek rest of which KRG offers.
 
Hello Gents,
We don't know for sure if the Wiebad stock pad will fit but I really can't see why it wouldn't. That one in the pic on their website looks like about the size of the cheekpiece on the X-ray/W3C.

For now the stocks do not come with spacers. We can ship them to AUS but shipping may be costly. If you talk to Cleaver or Delta Tac they can probably get you some cheaper/easier. Delta Tac has some coming soon I think.

Thanks guys,
Justin
Thanks for that Justin I emailed delta tac (where I have ordered my chassis) and he is going to let me know when they arrive , need to get the chassis first tho ,:D
 
For someone who already has the stock: how does the LOP feel without spacers? I'm 6' and wondering if I should order spacers with the stock.

I am 5'9 and I got both the 3 spacer kit and the 4 spacer kit and ended up using the 4. It gave me the best positional feel and lock in both bench and prone positions. In short, you will need spacers. For you I would get at least 4 spacers and if you don't need the fourth, cut the screw shorter with dremel.

Edited to add: Do you already have a stock with LOP to your liking? If so, measure the distance from trigger pad to end of butt stock, shoot an email to KRG with that measurement and ask them how many spacers you'll need. KRG website listed the LOP of the bare stock and the thickness of each spacer so you can figure it out yourself also... Oh and best to get the metric measurements...
 
Last edited:
Get the stock but no spacer kit. Shave some normal roofing shingles down so they fit behind the butt pad and get behind the stock and check your LOP. Add as many shingles as you need to get your correct LOP and then measure. You now know the exact LOP measurement and order accordingly. Only takes two days to get them shipped out and you end up ordering only what you need.

Sully

For someone who already has the stock: how does the LOP feel without spacers? I'm 6' and wondering if I should order spacers with the stock.
 
Get the stock but no spacer kit. Shave some normal roofing shingles down so they fit behind the butt pad and get behind the stock and check your LOP. Add as many shingles as you need to get your correct LOP and then measure. You now know the exact LOP measurement and order accordingly. Only takes two days to get them shipped out and you end up ordering only what you need.

Sully

You'll end up paying 2 shipping charges, though.
 
You'll end up paying 2 shipping charges, though.

Sure but then you know your LOP is correct without guesswork or using someone else as a test bed. I know of two people in this thread who thought they needed "X" number but needed "Y" then they get to ship back set "X" and order set "Y" adding wait time to field the rifle and the additional shipping for that too. Fitting a rifle is a fairly important step in marksmanship so why half ass it for a shipping charge?

Sully