Sidearms & Scatterguns Slide Milling, The Good, the Bad and the Ugly

derek1ee

dotechne.com
Full Member
Minuteman
Feb 23, 2017
392
400
I will start by saying that I am not a "real" machinist by trade.

My full time job is a product manager in a software company, but I've always enjoyed making physical stuff when I'm done creating digital things at work. Got a Tormach CNC mill a few years back, made things like Picatinny rail for LMSS scope, Ckye bipod adapter, and such some here may have bought. Early this year upgraded to a proper industry-grade VMC and have been looking at other things to do to pay for my ammo. :)

One service I am looking at providing is slide milling for red dot, and just surprised at what some places are doing. Won't name names but just want to share what I found.

Exhibit A - notice the "wavey" pattern? It is the result of "adaptive" tool path generated from CAM software, which is designed for roughing (bulk material removal) and not finishing. Because it is not designed for finishing the floor of a flat surface, and that end mills are not perfectly flat at the bottom, when used with a large step overs (distance between the waves) it leaves marks high enough that won't even go away after sand blasting, as seen from the photo after Cerakote.
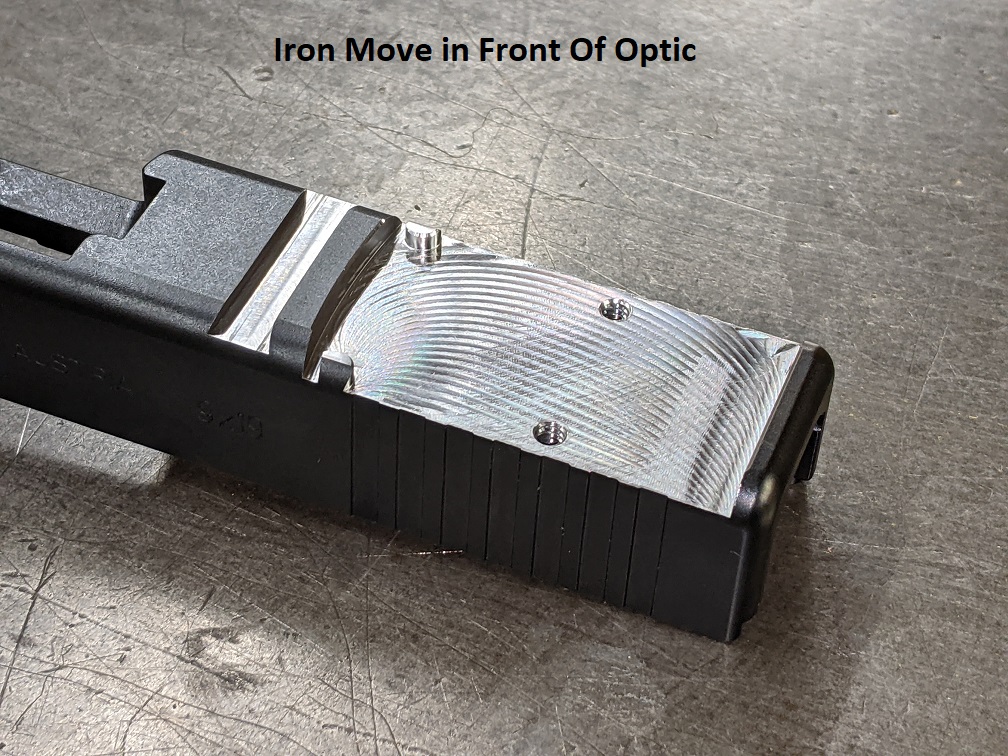
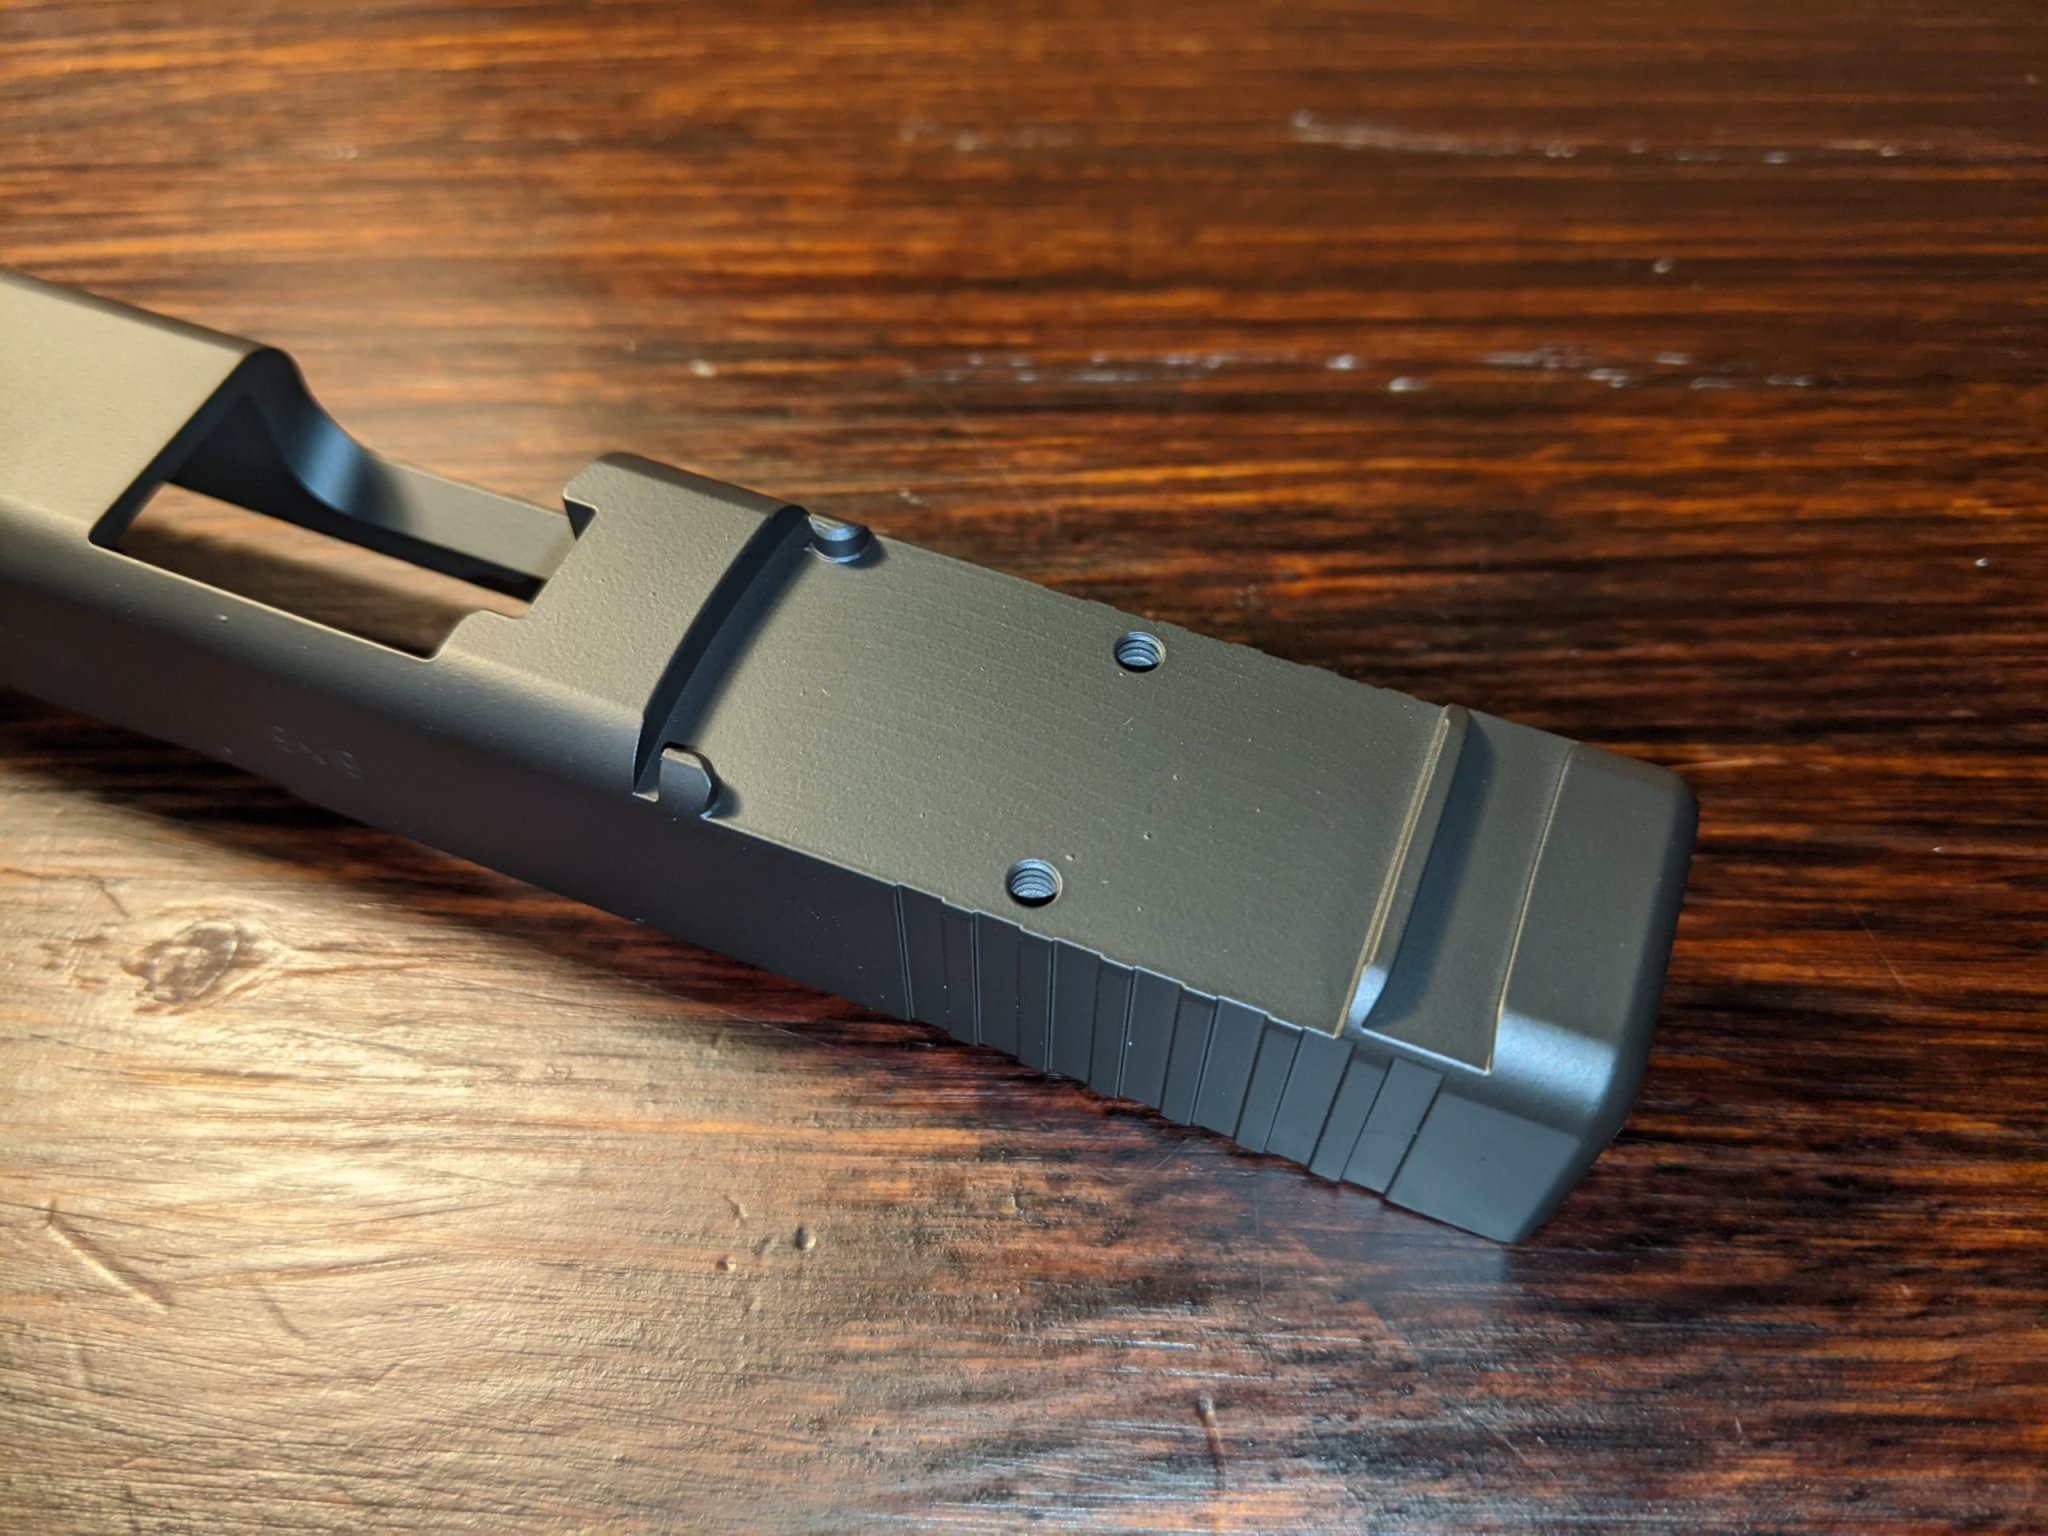
Iron-Move.jpg


PXL_20210822_133252498-scaled.jpg


2D adaptive clearing toolpath from Fusion 360 - "Creates a roughing operation...".
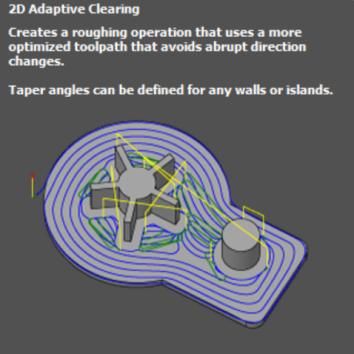
image 5.jpg
 
Last edited:
Exhibit B - Another one that I see quite common is the absent of locating post. Most of the material removal when milling the slide is done with 3/8" or 1/4" end mill, but the distance between the post and the front wall is about 1/16", which means another smaller end mill must be used to machine the posts - that's more tooling, programming, tool change, cycle time, etc..

But the problem is, and especially since almost all the services that do not leave locating posts machine the pocket to be a "universal/oversized" fit, the 2 screws are doing all the work restricting the multiple degrees of freedom of the red dot on the slide: not only is it keeping the red dot down, but it also must keep the red dot along the bore during recoil, side-to-side perpendicular to the bore, and any rotational movement.
nopost.JPG
 
Exhibit C - Another approach you often see is to actually have posts for the screws. At a glance it has some benefits, such as providing additional locating of the red dot, longer screw engagement length, etc..

However, the two round posts have some issues in my opinion. They cannot be perfectly sized since the clearance holes on the red dot is 0.156 nominal +/- 0.005". And would over constrain (bind) the red dot, which is why fixture design uses a round pin (to constrain the part along X/Y but not for rotation) and a diamond pin (to constrain the rotation along X/Y plane). In the photo below, the quarter-posts up front would further constrain the red dot, which is why RMRcc doesn't have a locating hole to accept the post.

And while the posts around the screw would increase the thread engagement length, it comes at the cost of down sizing the screw. In the case of RMR, that means going from a #6 to #8. when #6 screws can already provide 1x thread engagement even on the ejection side, I don't think the tradeoff is worth it.


screwpost.JPG


Here you can see one without the screw post, and the locating post is about 1/4 round. I think this is fine for a universal fit, where the front wall doesn't make contact with the red dot, but rather rely on the back of the post and back wall to constrain the red dot on the Y axis. Another detail you may notice is that the front wall area and the rest of the floor are machined with two different tools, when their height isn't perfectly measured/stored in the machine controller, they don't blend well leaving a small ledge that you can see & feel (right of the red dotted line).

blend.JPG
 
Last edited:
Here is how I plan to do it, and some of the design considerations.

1. I do not leave screw posts, this allow me to keep the screw size #6-32. The left side is drilled & tapped deeper, while the right is shallower to not interfere with the extractor plunger. I do drill thru into the plunger channel, as it is required to tap the thread deep enough. Drilling thru doesn't cause any issue in my opinion, the plunger channel is exposed to the environment both front/back anyway, and any foreign matter ingress into the red dot is stopped by the screw.

2. I do have the front locating pin, but they are diamond shaped, and only contact the red dot towards the center line. I also machine the pocket to the low end of the tolerance band, and walk it out both front/back by 0.001" at a time, until I have about 0.0005"-0.001" clearance which is needed for Cerakoting. This way, the locating pin constrain the red dot perpendicular to the bore, the front/back wall constrain the red dot along the bore, and the screw is only constraining it up/down so the stress is reduced. In fact the fit is so tight, care must be taken care to drop the red dot straight down onto the slide or it won't fit, and I can cycle the slide with out the screw and the red dot will also stay in place.

xyz.JPG


3. Since I need to use the 1/16" end mill to machine the front locating pin and the front wall, I also used it to finish the floor with "flat" tool path, which is a tool path designed for finishing operation on, you guessed it, flat surface. This is the longest operation because I have to take very small step overs, but the benefits are: 1) I don't have to worry about blending the floor created by two different tools and make sure the height measure is spot on, or else you will see/feel a ledge when the larger tool transitions to the 1/16" tool up front. 2) It also creates a nice visual effect - not that it matters, because it's flat enough that you won't see anything after it's sand blasted/coated.


After roughing:
roughing.JPG


After finishing:
cut.JPG


After sand blasting - all tool marks gone.
sandblast.JPG


After Cerakote & RMR mounted - this is a different slide than the previous images, a Gen 4 19 with a particular rough surface.
after.JPG


No light front/back after Cerakoting took up the tolerance reserved for coating.
nolight.JPG


4. Another small detail, is that the work coordinate system is set at the back (X) / top (Z) / middle (Y) of the slide. The important bit is the Y-axis (bore line) being set at the middle, because the width of the slide can vary by a bit, probe both side of the slide to find the center ensures the red dot is perfectly centered.
 
Last edited:
That's a well-thought approach to the task and it appears to have yielded nice results. I'd probably adapt a slightly different coordinate system (barrel centerline along X and the width of the slide along Y) according to what I'm accustomed to in automotive, but that's inconsequential to the outcome.

Instead of two holes at one end (or worse, four holes in the corners), I really wish RDS manufacturers would put a single "net locator" hole on the barrel centerline at one end and a slotted feature at the other, with adequate clearance offered to the sight surfaces front and rear to ensure that interference doesn't exist with reasonable tolerances applied to the pocket dimensions. Too late for that now with all the various systems in use.
 
Last edited:
Old thread revive! Lol. But just a thought here.
Have you considered milling the thread instead of tapping?
Then you wouldn’t have to drill into the plunger channel (although it may be fine).
Then you could comp the thread for a slightly tighter fit than a tap provides.

That would be a tiny thread mill for a #6 screw, and prone to breakage. Drilling into the plunger channel is a non-issue, and a tighter thread fit provides no advantage in this case. I see no advantages and only downsides.
 
Kind of glad this got revived, you did a better job thinking this through than many actual qualified Production Engineers do. Having done QA for machine shops for a while now, your exhibits are only the tip of the iceberg for the kinds of things we have to look out for with lazy programming and poor fixturing.

So I'd give it an A++ if it were something coming across my desk for first article (y)
 
One thing the OP missed though, is considering what optic the slide is being milled for.

For many, like a Leupold Deltapoint Pro for example, the studs or bosses in the slide are needed to locate the optic repeatably, and the front and rear walls of the milling need to have additional clearance (IIRC Leupold specifies +.015") due to variation in dimensions between different optics.

But with the Trijicon RMR, the bosses are not needed; dimensional variations between different samples of that optic* are so small that the slide pocket can be milled tight enough to fully constrain the optic. I've done a number of them that way over the years, and those I've done don't even need to be re-zeroed when the optic is removed to replace the batteries.
*It's worth pointing out that the Type 2 RMR is ~.003" longer front to back than older versions, so a correctly milled pocket for an older RMR will need to be opened up slightly to accommodate a Type 2.

In the case of an RMR at least, you can certainly have the optic constrained by the slide pocket, or by the bosses, but not both, due to tolerance stacking. If the pocket is tight enough to fully constrain the RMR, those bosses do nothing.
 
  • Like
Reactions: E. Bryant