PERFORMANCE REPORT ON THE SAVAGE 110 BA/S
(With a Nightforce 12-42 X 56 NXS scope)
IN THE .300 WIN MAG CALIBER
By: Dennis Boring December 2010
LOCATION: Oroville, Ca.
(0-600 yard capable Clay Pit Range)
PRELIMINARY SUMMARY:
OK, I’m not a long range target shooter (yet), and I’m no competition shooter (probably never will be…) but I’ve been around guns, both pistols and rifles since I was about 8-10 years old. In my 50 years of exposure I’ve seen a lot of guns. I’ve seen and done a lot of hunting, both big game, squirrels, and ground dwellers and I’ve seen a lot of reloading... in fact I reload no less than 7 different calibers of both handguns and rifles currently. As of yet, I don’t shoot a bird-gun nor do I reload for one either. In fact I’ve seen and done a fair bit of most everything including some amateur gunsmithing. This report is MY opinions and observations concerning the rifle, the initial shooting, sighting in and resulting performance of the rifle. Take it for what it’s worth, the price is right. Enjoy the read.
SET-UP:
The rifle came from Savage in its factory cardboard box, stuffed in a nice plastic bag and somewhat supported by a few small pieces of Styrofoam. No damage at all considering it came halfway across the US to me. It came with a 20 MOA ramp built-in so attachment of the scope was fairly easy for long range intended shooting setup. I unwrapped it and examined every inch of it… from it’s’ thumb knob adjustable AR style stock to the fluted, muzzle brake equipped barrel. I ran a ‘dry patch’ down the bore and cleaned out any residue left from the factory, the dealer, the shipping across the country, the storage, etc. and only got a tiny bit of ‘crap’ out. Any is too much so it’s ready to fire No# 1 thru it and get started.
ANALYSIS:
The bolt is pretty loose when you pull it back but considering this is a ‘working’ field gun and not built to be a clean benchrest firearm I guess the bolt clearance is a little more than the customary .004”-.006” and probably closer to .010”-.020” to prevent seizing up in the dirty conditions of the back country no doubt. The bolt handle was perfect in size and shape for me, but I have a smaller hand and even with a glove on, it was quite easy to operate and I could even work the bolt without leaving the stock with my cheek. It was coated with a nice dull black finish and had the “SAVAGE” name and logo printed on the bolt. The lug(s) are pretty substantial and the workmanship is top notch.
To remove the bolt was a piece of cake as well, just pull it back like you’d think, squeeze the trigger and push down on the indicator tab on the right side where my finger is and slide it out. The cheek piece is almost in the way, but if you tilt the bolt up slightly it comes right out without any trouble.


The rails, yes, 4 rails… 3 extra plus the 1 for scope mounting, were awesome works of machining art ALL cut from the same chunk of aluminum, although I don’t expect to use the side rails they do add a spacey, predator, alien kinda look to the whole “machine” (and a little bit more needless weight) but who cares… I’m not packing this thing elk hunting [yet]. I would’ve really liked it if the 20 MOA scope rail was machined at the same time as the action, and the side and front rails were attached separately but what the hell… if I really don’t like them, I have a milling machine and can make quick work of them as I see fit.

The finishing was perfect, and the fit and form followed function and they measured within mere thousands of each other obviously CNC produced. The flutes on the barrel were flawlessly done as well and the only weird or unusual thing I noted was the bottom of the “pistol grip” area. It looked like it was an afterthought and not molded in one piece like you would expect. It was attached with a 3-1/2” long machine like screw with a clip at the end. The whole rifle at 15# plus scope and a full mag was not light either but I didn’t buy it for the light weight features.

I decided to change the recoil pad to the thicker one right from the git-go. It was easy and the screws were Torx type and they had blue lock-tight on them already. Swapping out the recoil pad was easy and done in about 5 minutes. You just removed the screws and their hard washers and peeled the small one off and replaced it with the thick one. Assembly was the reverse of dis-assembly.
 <<a href="http://s174.photobucket.com/albums/w104/cdennyb/?action=view¤t=image013.jpg" target="_blank">
 /a>
/a> 
Then I acquired two pair of nice 6-screw aluminum tactical mounts in the HIGH version and using my 30mm tool steel TG&P solid round to maintain the alignment I installed and tightened the rings to the 20 MOA rail making sure the nuts were on the opposite side from the ejector port. The opposite end was recessed and had flush flanged heads. The square body of the cross bolt fit very well in the rail slot(s).


I machined a small billet aluminum level to attach to the 20 MOA Picatinney rail since my other one was only good for the Ruger Varmint rifle I shoot and wouldn’t attach to the rail. This will show level at the action (rail), thus allowing me to square & plumb the scope before tightening the cap attachment screws down for good with lock-tight.


Why 3 sets of rings?
Well, I went with aluminum Weaver HIGH rings and after having a second thought decided I should’ve put on steel ones, even at $150 a pair. Since I decided on aluminum rings at $40 a set… and thinking and over thinking the matter I figured since it was a magnum, a .300 Winchester magnum and would no doubt have more than a little ‘kick’ which might by chance affect the scope attachment I decided to double up on the rings and insure a positive hold on the tube regardless of the ‘kick’. Although 4 would’ve been perfect, there was only enough room for 3 with the spacing of the rail. I now have a spare ring.
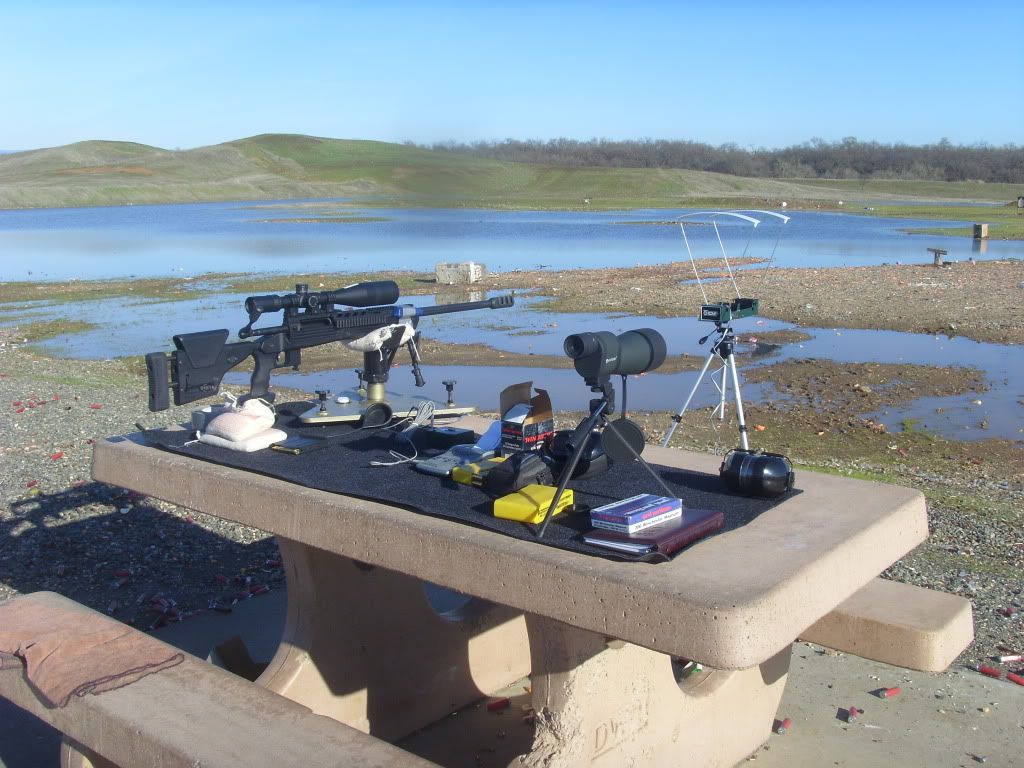
Attaching the scope was fairly easy since the 30 mm tool steel alignment rod provided a starting point for the tube to nest in perfectly. I ran a small dab of grinding compound on each ring base and confirmed the alignment was adequate showing at least 75% of the surface both top and bottom were making contact with the rod. I checked the torque on each rail bolt and then after cleaning with alcohol and lightly wiping down with light machine oil I attached the scope and top caps then I loosely tightened the cap screws since I needed to level the action and then plumb the scopes vertical reticule line at the range. Using a criss-cross pattern, I drew them down equally. Although I initially had the scope set back quite far, I ended up moving it slightly more forward and this whole process was done again! This is what I ended up with.

I was going to be shooting this rifle in the prone position on occasion (in the future) so I acquired a Harris 6-9” bi-pod to fit the forearm and attached it securely per the instructions. All ready to go… and also decided to use some ‘reduced recoil’ Winchester loads in the 180 grain variety (to save my shoulder.) for the customary sighting-in procedure.
BALLASTIC CHART FOR 200 GR SPBT AND 4130 POWDER MAKING 2800 FPS AND ZEROED AT 200 YARDS including slope data for 15, 30, & 45 degrees

BALLASTIC CHART FOR 200 GR SPBT AND 4130 POWDER MAKING 2900 FPS AND ZEROED AT 200 YARDS including slope data for 15, 30, & 45 degrees

More to come when the weather breaks… next report: Shooting and sighting in to 400 yards. Scope adjustment report, recoil, video links, and more pics.


