Maggie’s The Welding and Metalworking Thread

In all honesty, three ideas with the I beams-
2nd floor for one of the silos. Weld the 12x30s together to clear span 26’ and the others to do the sides, I joists etc over that.

Save for the house/church/something something
Or just re sell.
That would look really cool if you could make some loft or full second floor in that silo.
Even cantilever it out or something for cool effect.
IMO
 
That would look really cool if you could make some loft or full second floor in that silo.
Even cantilever it out or something for cool effect.
IMO
The showroom side, I always wanted a cantilevered patio out the south side, looking across the valley, great views at that height. Almost can’t believe the change in view with even a 12’ rise in elevation. From the top of the silos, it’s really nice. Customers kinda talked us out of improving it. “But then it won’t be a silo…” I was easy to convince. The one on the north side is storage right now and would be a great candidate as well
 
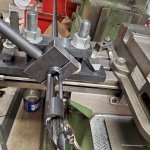
Metal working? I prefer machine tools, only welding if I have to.
Lathes and Bridgeport milling machine fits my gun hobby perfectly...
 

Attachments

  • 20240526_192538.jpg
    20240526_192538.jpg
    614 KB · Views: 70
  • 20240524_233212.jpg
    20240524_233212.jpg
    650.5 KB · Views: 73
It probably comes in around 20 lbs.

This one is patterned after our og driver which was built by my grandfather. Pretty much the same size just built out of carbon steel. And it has 7/8 rebar for the handles.

I had to use one of the light duty tractor supply drivers the other day and after a couple post I was looking for the heavy duty one. Apparently my dad had come and got it at some point. It's always going back and forth so I just built me another one. A rather unique one at that.
 
Sorry to hear about your friend.

That's a handy sized lathe -what diameter through the spindle? Did it come with much tooling? - there is a way to spend a heap of money without much effort.
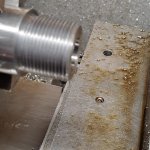
1½" through the spindle. It came with all the tooling that he had with it. And yeah, the machine is the cheapest part. I wanted to learn how to build my own rifles so I started down this path. I've spent whole rifles in tooling lol.

I sold my other lathe and tooling to fund this one. This one came with what I had and more. My last one was an 80's vintage jet, 1336PBD. I had gone completely through that machine. All new bearings, seals, and belts. Complete teardown and cleaned everything. When I loaded it up for the guy that bought it I kind of hated to see it go. It was more than capable of doing what I need but this one is a little nicer. All gear drive, and it will cut metric threads. Should the need arise.

Now I'm tearing into this one. Been giving it a rub down with kerosene to clean off all the gunk and grime. A couple gallons in and I'm about through with that. I think I'm going to pull the cross slide and the apron and go through it this weekend just to slick everything up. Then I've got to get it set up. I've got an old arisaka I'm going to rebarrel to a
22-250 for another friend of mine.

It's only my second build so y'all stay tuned, I may need some input along the way.
 
Is the lathe 1ph or 3ph? I know what you mean about tooling. Between getting Bison chucks and Aloris tooling I probably spent more than three times what I paid for my SBL 10L.
Probably should clarify. A lathe that size would have 3ph motor and wondering if you have 3ph at your shop? The SBL has a 3ph motor but only have 1ph in my shop so installed a VFD. Have 3ph behind the shop for our irrigation well but was easier just to install a VFD.
 
Sort of a restoration of a really cool Trio of old butcher knives. Two are Russell-Dexter. One is unknown, looks sort of home-made. All were really rusty and dull, but cleaned up great!

The long one needed a complete new handle. So I used a piece of desert Ironwood with very cool Burl. Only thing left is to pit a bit of wax on the scales and vegetable oil on the blades.

IMG_2365.jpeg


Love these old kitchen/bbq/hog breaking blades! Cheap at flea markets and really nice to have in the kitchen and use!!!!

Sirhr
 
For the punch ? Yeah ill dig one up....
From spain. I provided the artwork. Want me to link the .dxf ?
 
1719176385823.png

Rainy weekend, so got a bit more done on the Mary Rose Cannon. Carriage is coming into shape. Barrel is done. Wheels were really fun with hole saws and individually-fitted spokes.

It's going to be a stunning (firing) model. .45 cal rifled barrel with bronze rings shrunk on.

Starting to take shape.

Cheers,

Sirhr
 
I was in the steel erection industry for 45yrs before I retired , started many fires accidentally in that time , fire watches are a damn good thing ,and we didn't always have the personal to to have one ,luckily never killed anyone or burned down anything big but had some close calls , working by yourself is the worse gotta constantly stop and look around and keep water or fire extinguisher close .
Not steel industry, but I've had to weld on/in a few combines over the years and it's the same way. Soak everything you can ahead of time and keep more water/extinguisher close by.
 
  • Like
Reactions: SWgeezer
Picked up an Ellis Dividing head off Ebay. When I received it it was filthy and froze up so at first I thought a bought an expensive paperweight. as I tore it apart I noticed that it was in excellent shape and appeared to be very little used or not at all. Cleaned, painted and polished it and after reassembly works like a charm. Plan on mounting it on a ENCO XY table on a Clausing 20" drill press. Just need to get a 4" chuck for it.
IMG_3052.JPG
IMG_3054.JPG
IMG_3053.JPG
 
Picked up an Ellis Dividing head off Ebay. When I received it it was filthy and froze up so at first I thought a bought an expensive paperweight. as I tore it apart I noticed that it was in excellent shape and appeared to be very little used or not at all. Cleaned, painted and polished it and after reassembly works like a charm. Plan on mounting it on a ENCO XY table on a Clausing 20" drill press. Just need to get a 4" chuck for it.View attachment 8456379View attachment 8456380View attachment 8456383
Is this still available?
 
Yes, and I agree. I just had to give you a hard time, as I too have been wanting to get either a dividing head, or a rotary table and put dividing plates on it.

You got some good stuff. I respect that.
I know used is usually much cheaper. But we have bought a bit of stuff from these guys over the years. Ajax Tool Supply

Pretty much wore out a couple bison rotary heads, but they were solid and good quality.


Last edited:
  • Like
Reactions: Sean the Nailer
So, I’m not sure if I just scored big or dumped a little money at an online auction-
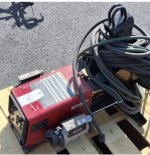
Lincoln 84 dual flex… something something. I literally know nothing about it and here’s the only pic I’ve seen. Any info or feedback from what you guys can tell?
 

Attachments

  • IMG_7528.jpeg
    IMG_7528.jpeg
    499.7 KB · Views: 43
The wiff asked me if it was possible to make a sharks tooth she found into a gold pendant. I said quite possibly, and the rabbit hole magically appeared.

I told her to pick her favorite toof, not including the meg tooth she has cause I ain’t making a gold copy of that 5 inch bastard.

Today was a practice run with a small banged up toof and some cerosafe. Turned out ok, but some refining is needed before I go 14k and the toof she chose

IMG_6550.jpeg
IMG_6551.jpeg
IMG_6556.jpeg
 
Pretty good for a first try.

Just keep in mind you can melt gold over again a bunch of times.

Not the same as messing up with that farmer's rod.
Just playing around today.

Debby does Norf Kakalacki is playing all weekend, so gonna smoke a pork loin and put some real effort into the gold version.
 
  • Like
Reactions: doubloon
It is a reverse image, just how the toof laid out in the sand.
The reverse side. It is undoubtedly worse as I didn’t do very good prep work in packing the sand into the mold. It was very loose and probably had some grains fall into the cavity when I put the two halve back together. I’m sure it would polish out fairly well like the front did though
IMG_6562.jpeg
 
  • Like
Reactions: timesublime
It has been a LOT of years since I've created sand casts, for the aluminum foundry. I get what you're saying, regarding the initial sand prep.

That effort extended there, leads to fantastic outcomes on the back-end of the job. How 'fine' do you sieve your initial layer, and how many layers do you 'pound in there' before filling the back with bulk?
 
  • Like
Reactions: roostercogburn98
Just playing around today.

Debby does Norf Kakalacki is playing all weekend, so gonna smoke a pork loin and put some real effort into the gold version.


mmmmmmmmmm pork


Wife tinkers with the finer arts, carving, jewelry, etc.

She cast a couple pieces in gold, carved the wax in the shape she wanted so a one shot deal but the detail was good when it came out the mould.

Since you have the toof already if you don't get what you want packing sand you could always make a positive of it in something like silicone for easier repetition.
 
  • Like
Reactions: roostercogburn98
It has been a LOT of years since I've created sand casts, for the aluminum foundry. I get what you're saying, regarding the initial sand prep.

That effort extended there, leads to fantastic outcomes on the back-end of the job. How 'fine' do you sieve your initial layer, and how many layers do you 'pound in there' before filling the back with bulk?
That was the other “F” in prep work. I only broke it apart with my hands and sprinkled it over the object. I will dig out a screen and get it spread better. The mold is kinda small so I did two very inconsistent layers and tamped it half assed. I did tamp the last layer of bulk fill fairly solid before I raked off the excess.

I believe I probably had some space in the bottom half as well from not packing in tight tight. The mold could have possibly moved a tiny bit