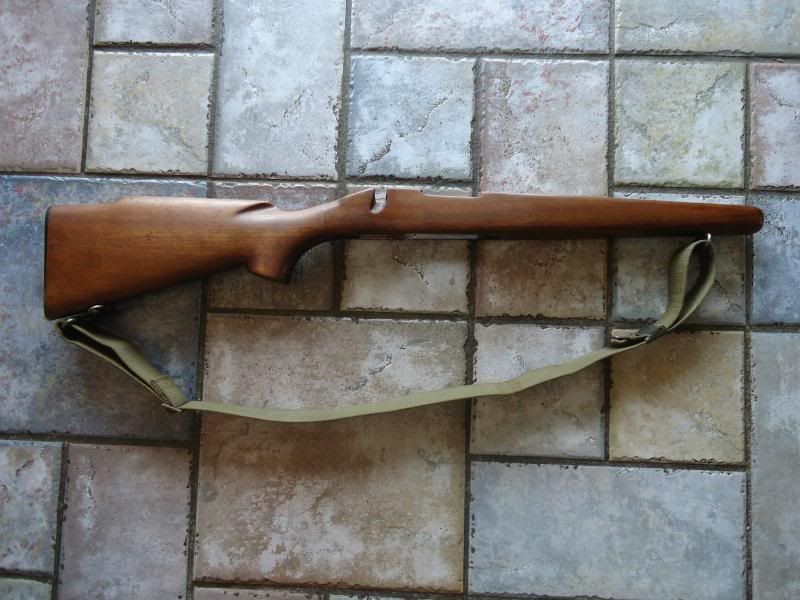
M40 Build Guide

I think I have some original USMC gun books for the M40 rifles. I only have a few though. I have many of the other ones I think I only have a few that were during the M40 time frame.

Here is a picture. Not sure of all the differences in the books from one revision to the other, but this is the most noticable one I found. The DATE. This book predates the M40A1 and would be during the Vietnam Conflict.
303hb9i.jpg
 
??? The 513T swivels are easy to find. I ordered 2 from Numrich should be here soon.


No debate there Jake; the 513T's are available and easy to find and yes, the Rem.725 swivels are narrower. We also know that the correct/PC swivels for an M40 are 1-1/2 inches, which the 513T's are not (@1-1/4") and that the front post has a machine thread, which again, the 513T's are not.

What I'm presenting are the possibilities of locating parts for your M40 build, by identifying the original sources, in the Remington manufacturing stream that these parts either originated on, or were carried over into, i.e. Rem,725/740/760/742, as well as the 513T. While the Rem.513T used a swivel body, similar to the M40's, in the buttstock (wood thread,) the Rem.725 needed a machine threaded post for the forearm (an actual pairing of swivel posts.)

Like any surviving major firearms manufacturer around, after WWII, that had participated in the war effort, I'm pretty sure that Remington was uniquely equipped to take a swivel body and pin either a wood or machine threaed post to it and then cut, form and press any size swivel loop, into it, that's called for. At some point, consumer trends or inventory carrying costs dictated that any residual parts be disposed of, in bulk. The next step, over time, is usually a "Sold Out" notice at a wholesaler and/or distributor, just when we're neck deep, into a project/build.

Most of what we're looking for is in inventories, like Numrich (love those people and thankful for what they do,) or is found in someone elses unsorted 'clutter.'

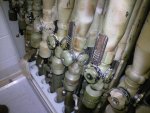
Here's a photo of someone's 'clutter.' Q. Is there anything of interest in it?

pix508253262_zpsadb5018b.jpg


There just might be, but only if you're open to looking for something (you want for your project) where you'd least expect to find it.

Just a thought...
 
Last edited:
Swivel Locaction - Precise Layout: Positions and Drilling Angles...

I understand. What is the correct location for these swivels? Like 3" from the front and 3" from the back?

Great question and one that I'd like the 'exact' answer to, myself.

Q. Would a Sniper's Hide forum member, with access to an original M40 (or a SSA model, as substitute. [Though having measurements, from both, as a cross reference, would be great.]) be willing to take two (2) steel 'Carpenters Squares' and do a couple of accurate take-offs?

1.) Lay one square (long side) along the top edge of the forearm and the inside of the short side touching the tip of the forearm.
1a.) The second square, layed parrallel to the first and slid back until the outside edge is lined-up with the centerline/axis of the front swivel.
1b.) Note measurement to closest 1/16 inch.

2.) Lay one square (long side) along the bottom edge of the buttstock, from the toe of the wood stock (not butt plate.)
2a.) The second square, layed parrallel to the first and slid back until the outside edge is lined-up with the centerline/axis of the rear swivel.
2b.) Note measurement to closest 1/16 inch.

It may appear anal, but having the correct information eliminates all of the quess work... for everybody. There will always be questions, but in the instant case, a researched, factually established answer could be found. In addition, it makes doing the placement layout and drilling angles simple, precise and easily duplicated, with a pencil and common/available tools .

I'm looking forward to some member responses and maybe a couple of documentation photos.
 
Last edited:
The front swivel is set at 2" and the rear swivel is set at 2.25" (with butt plate installed) on the SSA. Also, I suspect Remington used something they have on hand for the swivels on these SSA models. The swivels themselves measure 1.475" inside width at the widest part. The outside width of the swivel is 1.79"
 
Last edited by a moderator:
One more measurement- the forearm.... while we're at it...

Some reproduction/substitute stocks, for the M40 clones, have longer forearms that must be shortened. So the question(s) are, what is the correct length and how do we determine that length?

I use a steel ruler (not a tape,) for work like this.

With the rifle, upsidedown:

1.) Place a steel edge at the tip of the forearm, perpendicular to the long axis of the stock.
2.) Measure, from the center of the front action bolt (on bottom metal,) along the bottom of the stock itself, to the tip of the forestock (inside of steel edge.)
2a.) Note measurement to nearest 1/16 inch.

Again, measurements from an original M40 and an SSA model, would be great, for future reference purposes.

Thanks!!
 
SSA = 11 15/16" or 11.9375"

Thanks Culpeper!! Now, Slowly - Step - Away - From - The - Calculator. :)

Now, we're really getting into those small details and little nuances that go into building an accurate M40 clone. This rifle, as a project, is very deceptive in it's appearance and gathering-up and establishing these details, is a great tool for both current and future reference.

A lot of new and detailed information has been added to the forum, lately, that really expands those basics identified on Page -1-.
 
20140111_235039_zpswiuap3gx.jpg


Basically done, it still needs linseed oil for a while. This is after only 6 coats.

Looks pretty much done, to me and it looks good! You might try adding some fine pumice, to your BLO, to help you fill the pores in the walnut.

Q. Did you stain your stock? If so, with what (mfg. - type/color)?

Q. Did you put in pillar posts and/or do any bedding of the action yet?

Q. Did you go with the 3 inch measurements, you posted earlier, for both your buttstock and forearm sling swivel positions?
 
Looks pretty much done, to me and it looks good! You might try adding some fine pumice, to your BLO, to help you fill the pores in the walnut.

Q. Did you stain your stock? If so, with what (mfg. - type/color)? No stain just straight BLO

Q. Did you put in pillar posts and/or do any bedding of the action yet? No I'm going to shoot it first to see how it performs, if bad then glass bed it

Q. Did you go with the 3 inch measurements, you posted earlier, for both your buttstock and forearm sling swivel positions? I went with 2.85" on the back and as far forward as I could go with the factory 513T front swivel and have a 1/16" buffer in the barrel channel, it ended up being around 4-1/4"

My comments are in red.
 
20140111_235039_zpswiuap3gx.jpg


Basically done, it still needs linseed oil for a while. This is after only 6 coats.

That looks reeeeeeeaaaaallllly nice. Swap ya my varmint rifle for it. ;)

After discovering pure tung oil, I gave up on linseed as a gunstock finish. Much easier to work with, better waterproofing and does not darken the wood over time. Also does not mold, which modern BLO can do if not allowed proper (half past forever) drying time. Toki uses a tung oil that has added resins that darken the wood a little and looks amazing, at least his pictures do.
 
Strelok Tomstone Reticle

Jake, you have a nice little custom rifle now. :)

Strelok has added the reticle to his list of reticles in Strelok+. See attached image.

Tombstone Accu-Range, Redfield reticle holdovers
Reticle is in the Second Focal Plane (SFP)
Min. magnification: 3.0
Ranging magnification: 9.0
Max. magnification: 9.0
Current magnification: 9.0
Strelok+ 2.3.2
 

Attachments

  • Tombstone Accu-Range, Redfield.jpg
    Tombstone Accu-Range, Redfield.jpg
    135.3 KB · Views: 52
A different approach...

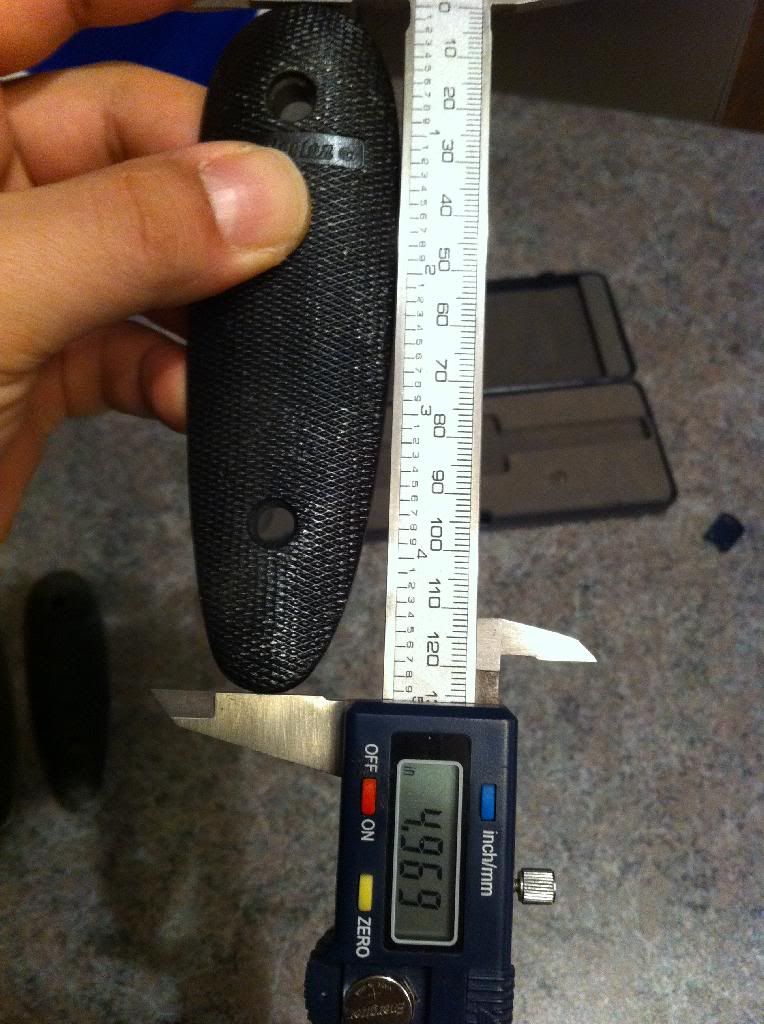
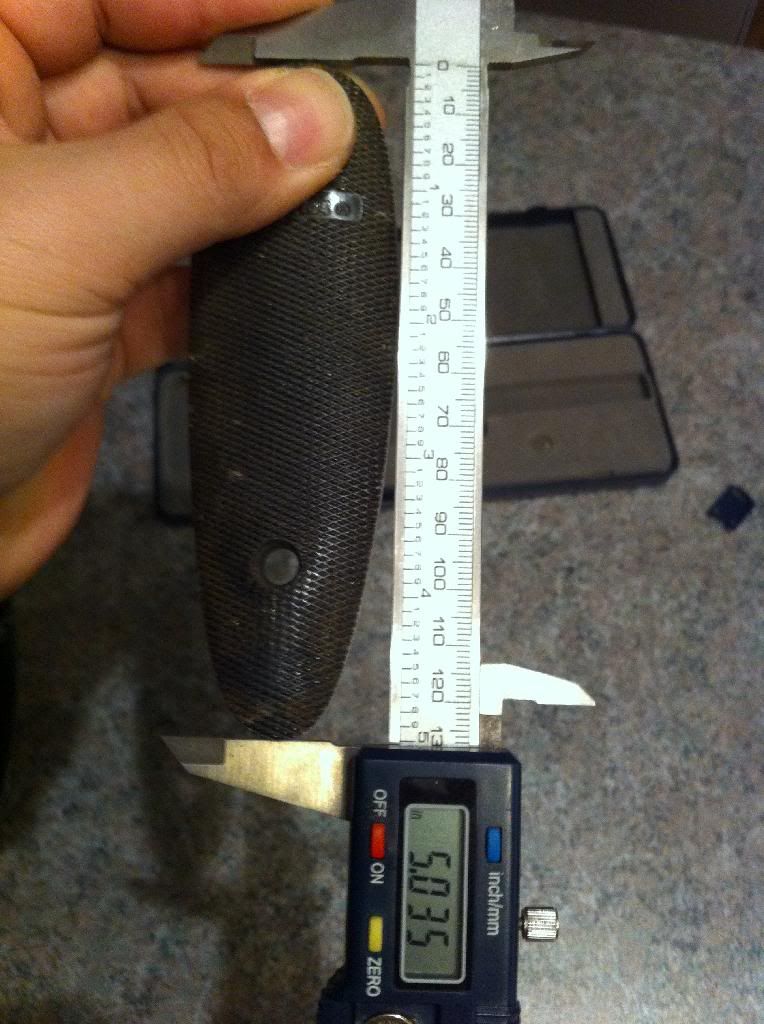
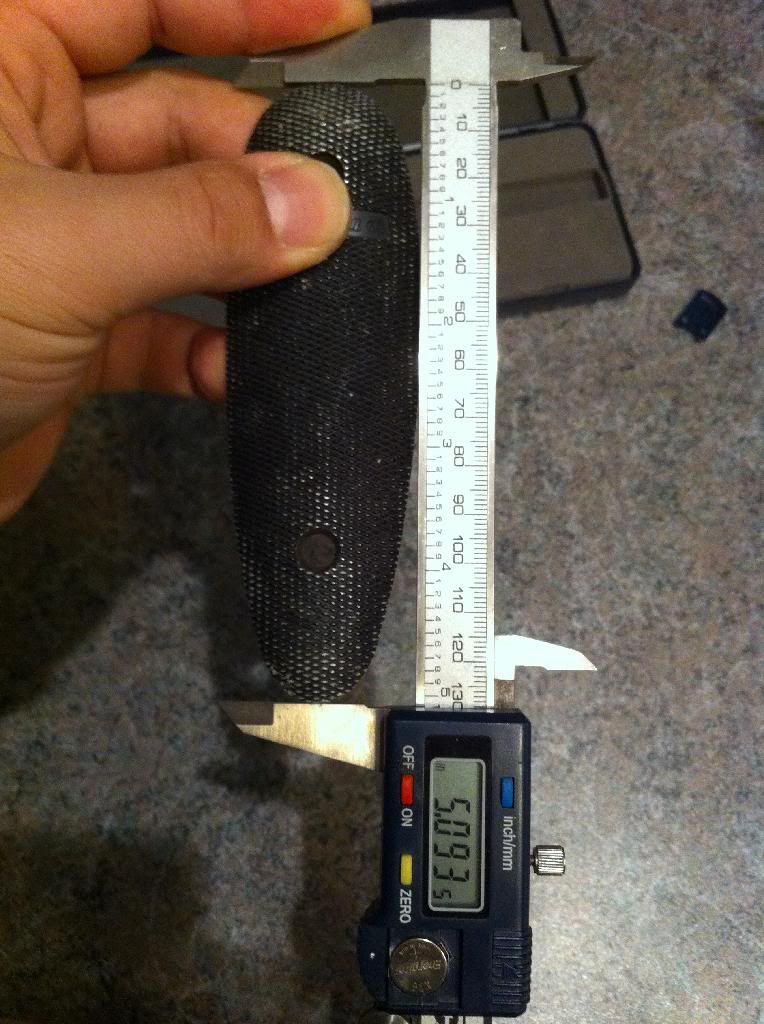
I need for some member to measure (as exactly as possible) the length of the 16601 butt plate and post it.

[I'd do it myself, except for the fact that I put mine back in storage. :p]

Thanks!
 
I need for some member to measure (as exactly as possible) the length of the 16601 butt plate and post it.

[I'd do it myself, except for the fact that I put mine back in storage. :p]

Thanks!

I'll do this when I get home tonight.

Edit:

It seems to be just at about 5.040" long. But, that's probably shorter than the factory ones. It's obvious mines has been ground around the toe and on the sides a bit.
 
Last edited:
I'll do this when I get home tonight.

Edit:

It seems to be just at about 5.040" long. But, that's probably shorter than the factory ones. It's obvious mines has been ground around the toe and on the sides a bit.


Thanks aur0ra145, for taking the time to get that information and posting it here, in response to my request. Your butt plate's length appears to be well within the norm.

Another SH forum member, SDWhirlwind, who has 14 individual butt plates, contacted me, by PM. 12 of the 14, measure between 5-1/8 inches and 5-1/16 inches, respectively. The remaining 2 are under 5 inches. The greatest variation appeared to be in the widths; understandable given our 'supply' is from butt plates previously on Rem. 725, 740 and 760 models.

I'll post all of the measurements, if somebody wants to really drive themselves nuts.

Personally, I wanted this measurement, so that I could determine various length and width measurements, in photographs (i.e., side profiles containing a full buttplate,) using the butt plate as a 'scale constant.'

Thanks, to all.
 
Last edited:
I need for some member to measure (as exactly as possible) the length of the 16601 butt plate and post it.

[I'd do it myself, except for the fact that I put mine back in storage. :p]

Thanks!
I have had several of these butt plates,think I still have 3 or 4. They are all sightly different is size. These are all take offs,so I guess the bottom line is that when the plates were installed,who ever the assembler was sanded the plates to match the wood???
 
I have had several of these butt plates,think I still have 3 or 4. They are all sightly different is size. These are all take offs,so I guess the bottom line is that when the plates were installed,who ever the assembler was sanded the plates to match the wood???

That was my understanding as well. I have 3 of those, and they're all slightly different in length.


The 16601 butt plate mysteries... unveiled!

To follow, please find a copy of the substantial content and body of SDWhirlwind's message. The italic font and underlines, are mine.

"...there is no 'proprietary' measurements for the Remington aluminum butt plates. They are installed on the stock blanks and then stock and butt plate are rough and more than likely finish sanded as one unit. Which is the reason the outer edges are not anodized and have the yellowish tinge from the Dupont stock finish used. Top radius/contours are not identical nor height from screw center to top dead center and same with radius at the toe along with width variations top to bottom and some with differences from vertical screw center line right and left. The stock blanks were not contoured to the buttplates but final shape at butt heel and toe done I assume by hand in the '60's to each workers taste/satisfaction!
To verify this as proof for you I dug out the dozen 16601 butt plates I have loose. Of the 12 4 have a #1 under the 16601, 2 a #2, 4 a #3 and 2 a #4. So don't know if that number is related to date/period or model or what. The 700's used the same butt plates as some of the 742/760 guns of that time period. There was no correlation between that bottom number and length nor width. I measure length of the 12 with a ruler to nearest 16th =/- as my caliper only goes to 5". Width measured with a caliper to nearest .005". Measurments in order are the ones with #1 marked, #2, etc

#1 5 1/8+" x 1.60"
#2 5 1/8" x 1.585"
#3 5 1/8-" x 1.530"
#4 5 1/16" x 1.50"

#5 5 1/8" x 1.580"
#6 5 1/16" x 1.595"

#7 5 1/16" x 1.580"
#8 5 1/16" x 1.575"
#9 5 1/16" x 1.630"
#10 5 1/8" x 1.605"

#11 5 1/16" x 1.545"
#12 5 1/8" x 1.610

Length was fairly consistent although I have a stock/gun or 2 with plates under 5". Width was the bigger issue and as I stated not consistent at all top to bottom with toe sometimes wider than tapering more abrupt or even more pointed and top contour/radius wider or narrower with no set pattern as to right or left side
curvature which as stated I am guessing is because they were hand done. ..."


There you have it and it also appears, that no correlation can be established, that any variations found, have anything to do with a stock being finished on a Friday! :p

Commence!!
 
Last edited:
aurOra145....I cant agree with you more. If you are talking about a SH stock...I had my 2112 do my build and he said it would have been easier to have completely redone a standard barrel ADL stock than the amount of work he had to do on the inletting as well as just finishing the exterior as well.
 
1966 Redfield 1" Tube Tokiwartooth anodized job

Sorry, the video is not that good but it does show the quality of the work done by Tokiwartooth. The weapon is a M40 SSA.

February 9, 2014 12:49 PM - YouTube

I've also attached an image. I don't take good pictures.
 

Attachments

  • tokiredfield1.jpg
    tokiredfield1.jpg
    243.9 KB · Views: 50
Parkerizing_'THE GREEN' Color

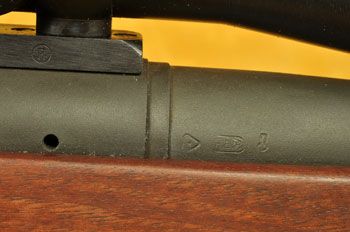
I thought that these two (2) photos correctly captured that 'elusive' shade of 'green' parkerizing that the original M40's had. We NEED to make every reasonable attempt to (re)establish that formula and process. I don't think it's lost, rather, just misplaced and buried in the either our military's specification archives or those of the major arms manufacturers, of the day.

From a Korean War issued M1D:

THEGREEN_Parkerizing_zps42aa1076.jpg


THEGREEN_Parkerizing_B_zps3fdf5328.jpg


Wherever is that forum member that knew a guy, who knew a guy that knew how it was done? This is a serious topic!
 
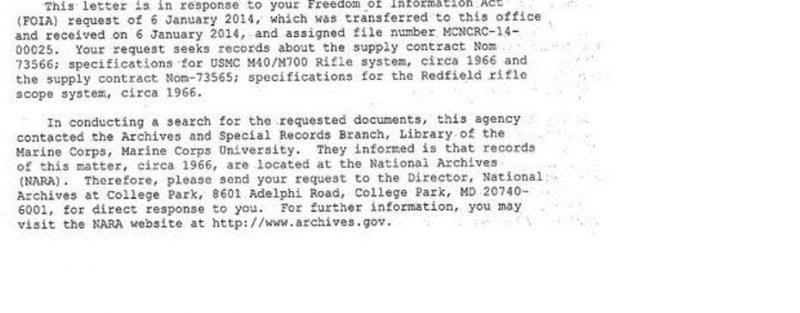
I just received this today. This is where the original procurement records are archived. See attachment. I'm not going to pursue it any further. Army olive green is not the same as the Dept. of the Navy's idea of drab green. It is more Black/Gray to the Corps back then. See Ford Gray #7c7f6c

7C7F6C.jpg

EDIT: WTF, I forward the whole attachment to NARA since the chain of command in the original correspondence is a little impressive. I'll post something when I hear something back. Sending a request FOIA always gets a response and saves time in the long run even if it is now public information. I would have never been able to trace it to the Archives in Maryland. If you're near there just go and look at the whole box(s). Probably has lots of interesting things in there.
 

Attachments

  • m40data1.jpg
    m40data1.jpg
    28.4 KB · Views: 43
Last edited by a moderator:
Green Parkerizing... my head hurts

Soak the rifle in motor oil for a few year should achieve the green park. I forget which brand of oil it was.

Lurking and surfing through 96 consecutive pages of the CMP Forum turns up this:

"The dark gray/green parkerization coloring that is more often encountered on post war M1 rifles does occur on WWII period M1 receivers, bolts, op rods, and barrels. I would imagine the cromic acid rinse used after phosphating is the principle (agent) causing this for both periods."

Requires further investigation and definitely experimentation.

There's further discussion on the M14 Forum pages, from which it may be extrapolated that the 'nickel' content of the steel was (may have been) a factor in chemical reaction with oil (cosmoline, or maybe Valvoline) over a ten to 25 (10-25) year process and the fact that the M1 receivers were dipped in lead, to make them less brittle was (may have been) another factor.

Link: WW II "Green" Parkerizing - M14 Forum (2 Pages)

They have twelve (12) related 'Search' topic, on the same subject.

One of which leads to here and the (possible) addition of copper (green) to the formula:

Arizona Response Systems, LLC. Notes. Introduction to Metal Finishing

And, Parkerizing, in general: How To Parkerize Steel

There's this Link which may offer an answer, but begs skepticism (must read to page bottom): Green for Parkerizing Conversion

So, Ad infinitum and ditto to all that investigation and experimentation stuff...

Summary: Experimentation on small parts MAY yield an answer.

My head hurts...:p
 
Culpeperdoes it again...

I just received this today. This is where the original procurement records are archived. See attachment. I'm not going to pursue it any further. Army olive green is not the same as the Dept. of the Navy's idea of drab green. It is more Black/Gray to the Corps back then. See Ford Gray #7c7f6c

View attachment 29850

EDIT: WTF, I forward the whole attachment to NARA since the chain of command in the original correspondence is a little impressive. I'll post something when I hear something back. Sending a request FOIA always gets a response and saves time in the long run even if it is now public information. I would have never been able to trace it to the Archives in Maryland. If you're near there just go and look at the whole box(s). Probably has lots of interesting things in there.

Enlarged, for anyone wanting to save a (Very Kool Document :cool:) copy for their build records:

m40data1_zps6ea3ea5f.jpg
 
Last edited:
Enlarged, for anyone wanting to save a (Very Kool Document :cool:) copy for their build records:

m40data1_zps6ea3ea5f.jpg

Is that an example of the parkerizing color or the anodizing dye used by CAI Technologies? I have been trying to find if anyone or any remnants of CAI exists to get info on the anodizing dye, but no luck.

With regards to the green park, I'm pretty sure there was a guy/firm who said he was achieving this, and actually posted how to do it, on the CMP forum.
 
Last edited:
29850d1392170987-m40-build-guide-7c7f6c.jpg


That is a close example of taking a original M40 that was used in-country and matching to a hex color. Has nothing to do with the scope. The records at the archives are just the original procurement and supply documents ca. 1966 for the entire weapon system. I have heard of the same person who will tell you over the phone how to achieve the color. I think he is referenced in this thread. I don't quite remember. But I think people are confusing Army and Marine colors. They aren't the same. And since the M40 was such a small production run the best place would be the Remington custom shop for information. They made the rifles. They should have the documents. They chose not to achieve this color on the M40 SSA for some reason or another. Personally, I think the color is a non-issue for clones, including the M40 SSA. There is just a lot of speculation and little actual research going on.
 
Last edited by a moderator:
29850d1392170987-m40-build-guide-7c7f6c.jpg


That is a close example of taking a original M40 that was used in-country and matching to a hex color.

For those of us unfamiliar with this 'hex color' system, are there any reference number(s) and/or name(s,) associated with same, that we can look-up, for ourselves?

I have heard of the same person who will tell you over the phone how to achieve the color. I think he is referenced in this thread.
Please see LINK where I note my 'skepticism.'

Personally, I think the color is a non-issue for clones, including the M40 SSA.
It definitely is a matter of personal preference and an incurable disease, all neatly wrapped-up in one obsession. Absolute perfection costs in the area of what, $40K? Everything else, between acquiring parts and final assembly is just 'elapsed time' and the more detailed information that can be found, the more accurate the clone can (potentially) be.

There is just a lot of speculation and little actual research going on.
I think that what you've contributed, can be construed as 'research.' As long as there is an 'open' question about this firearm; somebody looking for and someone willing to dig for answers, this process will continue. Ultimately, the more specifications and specifics that are pursued, the less speculation and conjecture will exist. None of this information goes to waste.

Commence!

Just can't get multiple "quotes" function to work for some reason- my apologies.
 
Last edited:
Yes, hex colors can be traced to paint manufacturer schemes. The sample and hex color I posted above is Ford Gray. See post #832 and #740. On #740, using the link, scroll down the bottom of the page to see paint manufactuers. At the top of the page it will give the closest match. At the top of the page is where you enter the hex color as well. You can get the hex color of any part of image with image software.
 
Last edited by a moderator:
Parkerizing- The Color Contenders...

a.) #7c7f6c:

The hexadecimal color code #7c7f6c is a shade of yellow-green.
In the RGB color model #7c7f6c is comprised of 48.63% red, 49.8% green and 42.35% blue.
In the HSL color space #7c7f6c has a hue of 69.47 degrees, 8.09% saturation and 46.08% lightness.
This color has an approximate wavelength of 576 nm.
Ford Gray is a matching paint color.

b.) #78766a

The hexadecimal color code #78766a is a shade of yellow.
In the RGB color model #78766a is comprised of 47.06% red, 46.27% green and 41.57% blue.
In the HSL color space #78766a has a hue of 51.43 degrees, 6.19% saturation and 44.31% lightness.
This color has an approximate wavelength of 588 nm.

Note: #78766a is one (1) step off of "Camouflage Green" #78766b:

The color Camouflage green with hexadecimal color code #78866b is a shade of green.
In the RGB color model #78866b is comprised of 47.06% red, 52.55% green and 41.96% blue.
In the HSL color space #78866b has a hue of 91.11 degrees, 11.2% saturation and 47.25% lightness.
This color has an approximate wavelength of 563 nm.

c.) #78775a

The hexadecimal color code #78775a is a shade of yellow.
In the RGB color model #78775a is comprised of 47.06% red, 46.67% green and 35.29% blue.
In the HSL color space #78775a has a hue of 58 degrees, 14.29% saturation and 41.18% lightness. This color has an approximate wavelength of 583 nm.

d.) #807a67

The hexadecimal color code #807a67 is a shade of yellow.
In the RGB color model #807a67 is comprised of 50.2% red, 47.84% green and 40.39% blue.
In the HSL color space #807a67 has a hue of 45.6 degrees, 10.82% saturation and 45.29% lightness. This color has an approximate wavelength of 591 nm.

Entering a generalized description of 'Gray Green,' instead of a number (for giggles,) yielded the following:

e.) #75816b

The hexadecimal color code #75816b is a shade of green.
In the RGB color model #75816b is comprised of 45.88% red, 50.59% green and 41.96% blue.
In the HSL color space #75816b has a hue of 92.73 degrees, 9.32% saturation and 46.27% lightness.
This color has an approximate wavelength of 562 nm.
BS381 283 - Aircraft grey green is a matching paint color.

Is it possible that we can see color 'blocks,' of the above colors, next to each other, for comparitive purposes?
 
Last edited:
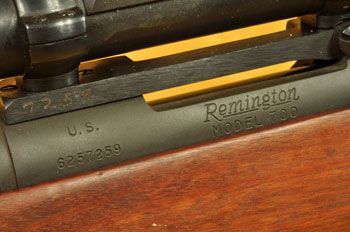
The best example of the 'green' parkerized tint is rifle #6257259. Against the black hardware, we can see that the tint is quite strong. And it is a close match to the swatch 'culpeper' posted and the M1D finish posted by 'bolt_trash'.


29850d1392170987-m40-build-guide-7c7f6c.jpg

THEGREEN_Parkerizing_zps42aa1076.jpg

I look at that color swatch and I see... a gray... when compared to barrel color on M40 # 6257259. It's just not carrying enough 'green,' in the content.

NOTE:
I amended my previous post #839, to include the new color #807a67, to keep everything in one (1) place and to compare color content and percentage ratios. [/B][/U]

I will note that #807a67 and #78766a both share a close relationship, on the color scale, with 78766b "Camouflage Green."

As a matter of debate, #75816b visually 'appears' very close/even closer to the color of the M1D.

IMO, the 'green' component is going to be around 50 percent of the ratios, just to overcome a dominate 'gray' appearance.

Is there any chance that we can see side-by-side large color swatches?

On their individual pages, there is only a small/thin isolated color 'bar' in the upper right-hand corner and subsequent views are 'blended' and in immediate proximity to their color variants.
 
Last edited:
On a comical note this is what Marine armorers think about the original state of a sniper rifle. See attached image.
 

Attachments

  • 2zygyg4.jpg
    2zygyg4.jpg
    274.9 KB · Views: 52
This is another shot at that M40 rifle. It has the obvious green your looking for.

#78775a Hex Color Code Schemes, Charts, Palettes, Paints & RGB / CMYK / HSL Conversion

How do those color mix percentages work? They don't add up to 100%. If they actually provide mix ratios, and can duplicate the color I want.
ETA: Forget it, I see its a typo in the description, but the ratios are too the left in the pane lower on the screen. Cool.

ETA again: Still confused. I expect ratios to add up to 100%, but I'm obviously missing something. With RYB, do I rework the percentages based on 100%? It easier to work with these base colors than to work with RGB, since green is a compound color itself.

RYB red: 35.6998%, yellow: 47.0588%, blue: 35.2941%
 
Last edited:
Guys,

Even if a good gunsmith find the right coloration mix for a parkerizing job, dont forget that no one will be able to match a 40 years old patina. Overtime (storage, grease) can turn parkerizing to a greenish hue.

Its a long time chemical process. Some Garand experts have been able to add a chemical to the mix to accelerate that process. Apparently, it is also possible to approximate that hue by soaking a freshly black parkerized part in a high-sulfur oil, cutting oils and/or Penzoil.
 
This is another shot at that M40 rifle. It has the obvious green your looking for.

#78775a Hex Color Code Schemes, Charts, Palettes, Paints & RGB / CMYK / HSL Conversion

NOTE: I amended my previous post #839, to include the new color #78775a, to keep everything in one (1) place and to compare color content and percentage ratios.

Just might be...

Interesting that the red and green ratios are closer to 'balanced,' (as they are in 78766a) but the blue is substantially lower; making blue a more crucial component. Who'da thunk...:p

And, once again, this color, shows a close relationship with #78766b, "Camouflage Green."

This is a quest and establishing (finding-?) the optimum (not saying 'perfect') chemical formula and process is the goal. You do realize, that this is the first time that this topic has been pursued and researched, at any length.
 
Last edited:
Guys,

Even if a good gunsmith find the right coloration mix for a parkerizing job, dont forget that no one will be able to match a 40 years old patina. Overtime (storage, grease) can turn parkerizing to a greenish hue.

Its a long time chemical process. Some Garand experts have been able to add a chemical to the mix to accelerate that process. Apparently, it is also possible to approximate that hue by soaking a freshly black parkerized part in a high-sulfur oil, cutting oils and/or Penzoil.

Yep, couldn't agree more on patina, scratches, dings, etc. Its what makes the rifle unique.